


When underwater visibility falls to only a few meters, divers may lose visual contact with their buddies, miss the planned exit route, disturb sediment, misjudge depth changes or become disoriented.
Low visibility is not defined by one universal distance. The practical question is whether the team can still maintain navigation, buoyancy, communication, gas awareness and a controlled route to the surface.
Divers Alert Network recommends ending the dive whenever conditions cannot be controlled or exceed the diver's preparation, experience or comfort level[1].
Equipment can support a trained diver, but it cannot compensate for inadequate preparation. A compact breathing cylinder, compass, reel or powerful light does not make an unsuitable dive safe.

| Safety Area | Practical Focus |
|---|---|
| Navigation | Outbound and return headings, natural references, depth contours and a clearly planned exit |
| Buoyancy and trim | Stable depth control, efficient propulsion and prevention of sediment disturbance |
| Gas management | Measured consumption, depth-adjusted calculations, sufficient reserve and regular gauge checks |
| Team control | Close positioning, agreed signals and a rehearsed lost-buddy procedure |
| Lighting | Reliable primary and backup lights, suitable beam control and surface signaling equipment |
| Line procedures | Correct reel use, tie-offs, slack control and entanglement prevention |
| Surface support | Known entry and exit points, current assessment and a recovery or recall plan |
A low-visibility dive should remain within the limits of every team member's training, recent experience, equipment and breathing-gas plan.
Navigation Techniques
Using an Underwater Compass
An underwater compass provides a magnetic reference when natural landmarks cannot be seen clearly.
Before entering the water, identify the intended route, the direction of the exit and any useful natural references. When an outbound compass heading will be used, calculate or record the reciprocal heading for the return.
A reciprocal heading differs from the outbound heading by 180°. For example, an outbound heading of 270° has a reciprocal heading of 090°.
- Check that the compass card or needle moves freely and that the housing is not damaged.
- Hold the compass level so the card can rotate without sticking.
- Align the lubber line with the direction of travel.
- Turn the entire body onto the heading rather than rotating only the wrist.
- Keep the compass away from magnets, powered equipment and metal objects that may affect the reading.
- Maintain stable depth and trim while swimming the heading.
- Recheck the heading after avoiding an obstacle or changing depth.
- Use terrain, current direction, light and depth contours as additional references whenever possible.
A compass shows direction, but it does not correct for current. A diver can maintain the selected heading while still being pushed sideways from the intended route.
For this reason, navigation should combine compass information with distance estimates, elapsed time, depth, current and natural references.
There is no universal rule requiring a heading check every 30 seconds. The appropriate interval depends on visibility, current, route complexity, swimming speed and task loading.
DAN has documented an incident in which inexperienced divers became disoriented while trying to manage a new compass, a new dive computer, depth control and navigation at the same time. The incident illustrates why compass skills should be practised in controlled conditions before they are relied on in poor visibility[2].
A wrist mount, console or short retractor can all be workable mounting methods. The compass should be easy to read without forcing the diver out of trim, and its attachment should not create a loose loop or snag point.
Search patterns should be described by their headings and leg lengths. For example, a square search may use four equal legs with 90° turns. Calling this a pattern with an “8-meter radius” would be inaccurate because a square is not defined by a radius.
Advanced Orientation in Poor Visibility
Low visibility can remove the visual cues normally used to judge movement, depth and body position. A diver may unintentionally swim in a curve, change depth or feel level while ascending or descending.
DAN notes that severe disorientation may make it difficult to identify the direction of the surface even when a diver is near a line. Exhaust bubbles rise, but a strong current can carry them sideways and make them difficult to use as an orientation reference[3].
Depth information should therefore come from a readable depth gauge or dive computer. Direction should be established from the compass, planned route, terrain or a properly installed line rather than from a pressure gauge or the apparent direction of bubbles.
A pressure gauge reports cylinder pressure only. It does not show which direction is up and does not confirm that enough gas remains for the complete exit and ascent.
Breathing-Gas Management
How Depth Changes Gas Consumption
Ambient pressure increases with depth. In seawater, a useful approximation is one additional atmosphere of pressure for every 10 meters of depth.
| Approximate Seawater Depth | Ambient Pressure | Gas Required per Minute Compared with the Surface |
|---|---|---|
| Surface | 1 ATA | 1 times the surface rate |
| 10 meters | 2 ATA | 2 times the surface rate |
| 20 meters | 3 ATA | 3 times the surface rate |
| 30 meters | 4 ATA | 4 times the surface rate |
| 40 meters | 5 ATA | 5 times the surface rate |
This table is an approximation for seawater. It does not account for increased breathing caused by stress, cold, current, poor trim, heavy work or an emergency.
DAN describes the following relationship for estimating consumption at depth:
Gas consumption at depth = surface consumption rate × ambient pressure in ATA
For example, a diver with a surface respiratory minute volume of 20 liters per minute would require approximately 40 liters per minute at 10 meters and approximately 60 liters per minute at 20 meters.
The calculation must then include gas required for the return route, ascent, delays and a possible gas-sharing emergency. DAN recommends deducting the planned reserve before estimating usable time[4].
Advertised breathing time is not a safe substitute for a calculation based on actual cylinder pressure, cylinder volume, depth, personal consumption and reserve requirements.
Why a Fixed Reserve Is Not Universal
A single value such as 50 bar should not be treated as the correct turn pressure for every dive.
The required reserve depends on:
- Cylinder volume and starting pressure
- Maximum and average depth
- The diver's measured breathing rate
- Current, temperature and workload
- Distance from the exit or ascent point
- The planned ascent profile
- Decompression obligations, if any
- The amount of gas required to assist another diver
A larger pressure reading does not necessarily mean that more usable gas is available. For example, 100 bar in a 0.5-liter cylinder contains far less gas than 100 bar in a standard 12-liter cylinder.
The approximate free-gas content of a cylinder can be estimated as follows:
Free-gas volume ≈ cylinder internal volume × cylinder pressure
This simplified relationship does not account for the gas that must remain as reserve, pressure at which the regulator can no longer deliver normally, temperature effects or non-ideal gas behaviour at very high pressure.
Compact Cylinders and Published Runtime
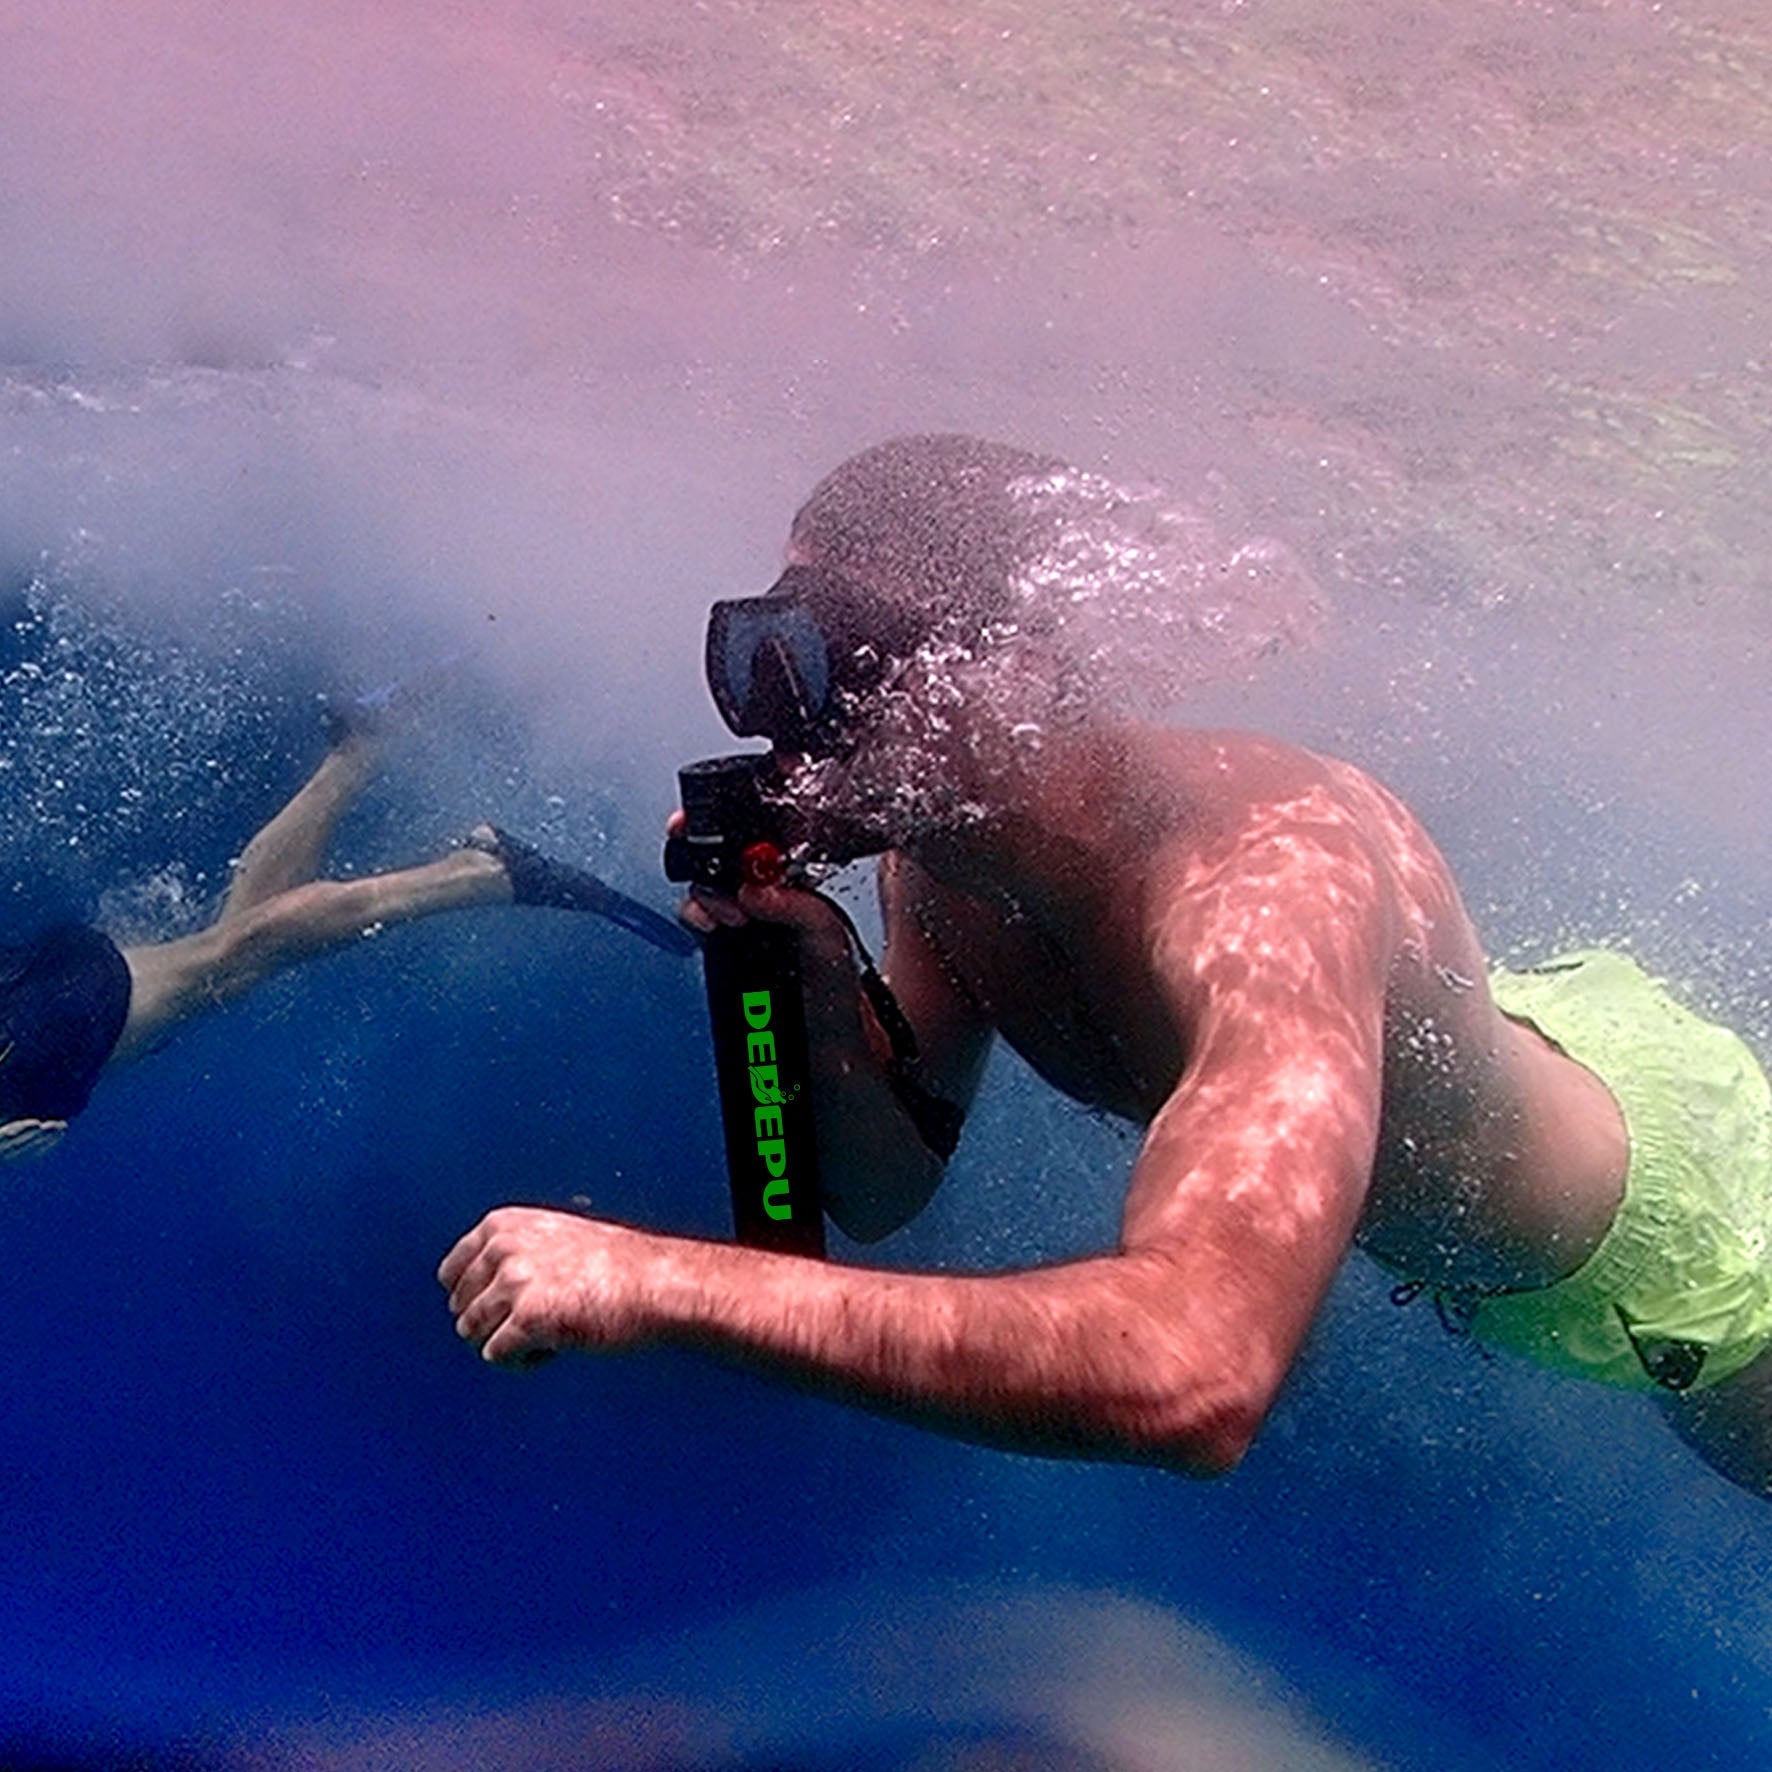
The DEDEPU mini scuba tank series includes cylinders with different internal capacities.
The S3000 is sold as a 0.5-liter model, the S5000 as a 1-liter model and the D600 as a 2.3-liter model.
Internal capacity alone does not determine safe underwater time. The actual duration depends on verified fill pressure, depth, breathing rate, workload, regulator performance and the reserve that must remain unused.
The longest duration shown on a product page must not be combined with the deepest figure shown on the same page. At greater depth, gas is consumed more quickly.
Specifications displayed online may also be revised. The permanent markings on the actual cylinder, its current manual and applicable inspection documentation must take priority over marketing text.
Do not fill a cylinder above the pressure marked on the cylinder or approved in its current documentation.
Guideline Procedures
Continuous Guidelines in Overhead Environments
In a cave or wreck penetration, direct access to the surface is blocked. A continuous guideline to open water can provide a tactile exit reference if visibility is lost or the lights fail.
Installing and following that line requires specific overhead-environment training. Carrying a reel does not qualify an open-water diver to enter a cave or penetrate a wreck.
A guideline is a component of trained cave or wreck procedures. It is not a substitute for the training, gas supply, redundant equipment and team skills required for an overhead environment.
- Begin with a secure primary tie-off in an appropriate location.
- Maintain a continuous route to open water.
- Use secondary tie-offs and line markers according to the procedure taught during training.
- Keep the line away from sharp edges, unstable objects and moving hazards.
- Maintain buoyancy and use propulsion techniques that minimize sediment disturbance.
- Do not wrap the line around the body, valves, hoses or other equipment.
- Do not use the line as a hauling rope during normal progress.
- Remain aware of the direction of the exit and the position of every team member.
Reel capacity depends on the activity and training system. It is inaccurate to describe every 30- or 50-meter reel as a universal cave-diving primary reel.
For example, the current GUE training standards specify at least 45 meters of line for a primary cave reel and at least 45 meters for each diver's safety spool. These are GUE requirements and should not be presented as universal requirements for every training organization[5].
Divers should follow the configuration and procedures of the recognized training program under which they were certified rather than mixing selected rules from different systems.
Redundant Gas for Wreck Penetration
A compact cylinder should not be considered an adequate wreck-penetration gas supply simply because it can provide several additional breaths.
DAN advises wreck divers to calculate gas consumption at depth and notes that wreck penetration requires an alternate supply and training for an out-of-gas exit[6].
The redundant supply must contain enough usable gas for the complete emergency route, including problem recognition, team response, exit from the overhead environment and a controlled ascent.
The DEDEPU D600 holds more gas than the brand's 0.5-liter and 1-liter models, but the larger capacity does not automatically make it suitable as a cave, wreck or decompression bailout cylinder.
Suitability must be determined from the actual gas requirement, regulator performance, mounting method, cylinder rating and the diver's training.
Responding to Disorientation
Open-Water Response
If orientation is lost during an open-water dive, continuing to swim without a reliable reference may increase separation from the exit and consume additional gas.
- Stop unnecessary forward movement.
- Control breathing and establish stable buoyancy.
- Check depth, cylinder pressure, compass and dive-computer information.
- Locate the planned terrain, descent line, anchor line or other ascent reference if one is available.
- Communicate with the buddy using the agreed light, hand or touch signal.
- Follow the planned lost-navigation or abort procedure.
- Make a controlled ascent without violating required ascent-rate or decompression limits.
- Deploy an SMB only if trained to do so and if deployment is appropriate for the site.
DAN recommends including separation, signaling and recovery procedures in the safety briefing. A diver making an unplanned ascent should have a suitable means of signaling the surface team[1].
Exhaust bubbles may indicate the general direction of the surface in calm open water, but they should not be the primary orientation method. Current may move them sideways, and in a cave or wreck they do not identify the direction of the exit.
Deliberately releasing repeated bursts of gas from the BCD is not a reliable direction-finding technique and wastes breathing gas.
Lost-Buddy Procedures
Visual contact can be lost quickly in suspended sediment or darkness. The team should agree on a lost-buddy procedure before entering the water and follow the procedure taught by its training organization.
The briefing should cover:
- Maximum normal spacing between divers
- Which diver leads and which diver maintains position
- Light, hand and touch signals
- How long and where the team will search
- When divers will ascend
- Where the team will reunite at the surface
- How the boat or shore team will be alerted
Searching should account for the three-dimensional environment. The missing diver may be above, below, behind or beside the searcher rather than only farther along the planned route.
A diver should not extend the underwater search until the planned reserve is consumed. Reuniting at the surface may be safer than creating a second missing diver.
Tethering
Buddy Lines
A buddy line is a physical connection between divers. It may help a trained team maintain contact in specific low-visibility environments, but it is not automatically safer than close formation or direct tactile contact.
A buddy line is also different from a guideline. A buddy line connects people; a guideline marks a route.
Lines can catch on nets, branches, wreckage, rocks, valves, hoses and other equipment. DAN notes that tethered divers can use line-pull communication in low visibility, while also warning that the line may increase entanglement risk around underwater obstructions[7].
No universal buddy-line diameter or length is appropriate for every dive. A fixed recommendation such as 5–6 millimeters in diameter and 3–5 meters in length should not be presented as an industry standard.
The suitable configuration depends on:
- Current strength and direction
- Expected visibility
- Bottom topography and overhead hazards
- Fishing line, nets, vegetation or wreckage
- Exposure protection and glove thickness
- The team's training and communication procedure
- Whether direct touch contact would create less risk
When a buddy line is included in a trained procedure:
- Agree on line-pull signals before the dive.
- Test the complete system on the surface.
- Use only the length needed for the planned procedure.
- Avoid loose loops around the body or equipment.
- Ensure attachment points can be reached while wearing the planned exposure protection.
- Carry an accessible cutting device suitable for the expected line hazard.
- Ensure the system can be released according to the trained procedure.
- Do not improvise the arrangement after visibility has already deteriorated.
A line that prevents separation can still create a new emergency if it is poorly routed, too long or difficult to release.
Statements such as “the line should always face outward” or “the line can always be secured in less than 30 seconds” should be avoided. The safest orientation and attachment method depend on the equipment, current, body position and entanglement hazards.
Cylinder Attachment and Trim
Adding a compact cylinder changes the diver's buoyancy, balance and equipment profile.
Extra weight does not automatically improve stability. A poorly positioned cylinder may roll the diver, interfere with breathing hoses, restrict access to valves or create a snag point.
Before using an additional cylinder in low visibility:
- Confirm that the mounting method is compatible with the cylinder and harness.
- Verify that the cylinder cannot swing or detach during entry, swimming or ascent.
- Check access to the valve, mouthpiece and pressure gauge.
- Confirm that hoses and straps do not cross a cutting device or quick-release point.
- Test buoyancy and trim in controlled water.
- Practise deploying and breathing from the cylinder without looking at it.
The extended gauge supplied with some configurations of the DEDEPU S5000 and D600 may make pressure easier to read when correctly routed.
The hose must still be protected from abrasion, kinking and entanglement. A visible gauge does not calculate the reserve or replace frequent, deliberate pressure checks.
Reel Control
Selecting the Correct Reel or Spool
Reels and spools are used for different purposes, including route marking, search patterns and SMB deployment.
DAN notes that a reel can help a diver return to the starting point in poor visibility, provided the diver knows how to deploy and recover the line without creating a tangle[8].
Selection should consider:
- The intended procedure
- Required line length
- Line strength and visibility
- Handle operation with the planned gloves
- Controlled payout
- Resistance to jamming and accidental free-spooling
- Ease of securing the line
- Attachment to the diver without creating a snag point
A transparent housing or a high retrieval ratio is not automatically safer. The reel must remain controllable when the diver is stressed, wearing gloves or unable to see the mechanism clearly.
A ratchet or locking device may assist line control, but excessive drag can pull the diver out of trim or place unnecessary force on the line and tie-off.
Deploying the Line
- Confirm that the starting tie-off is suitable for the procedure.
- Release line gradually while maintaining buoyancy and team position.
- Keep the line clear of valves, hoses, lights and fins.
- Avoid running the line across sharp edges or unstable objects.
- Use additional tie-offs where required by the environment and training procedure.
- Maintain enough tension to avoid loops without pulling the team or damaging the line.
- Stop immediately if the reel jams or uncontrolled line begins to leave the spool.
The reel operator should not focus so narrowly on the spool that depth, gas, buddy position or the environment is ignored.
Rapid payout and rapid retrieval are not primary safety goals. A claim that a diver can retrieve 20 meters of line in less than 30 seconds does not demonstrate safe reel control.
Recovering the Line
Recovery should be slow enough to maintain orderly winding, stable buoyancy and continuous awareness of the exit route.
- Recover slack before it forms large loops.
- Do not pull the team toward the reel.
- Do not wind the line around a hand or finger.
- Pause if the line catches or changes direction unexpectedly.
- Maintain the correct side of the line according to the trained procedure.
- Keep the team together while tie-offs are removed.
If the mechanism jams, do not force it while swimming blindly forward. Stop, establish control and resolve the problem without abandoning buoyancy, gas monitoring or team communication.
Slack Management
Why Slack Is Dangerous
Excess line can form loops around a diver, valve, fin, light or part of the environment. Slack also reduces the useful tactile information provided by a guideline and may allow the team to drift away from the intended route.
Release only the line required for controlled progress, and recover excess line before it develops into an entanglement.
- Maintain controlled tension without using the line as a tow rope.
- Keep the line out of the diver's propulsion area.
- Avoid routing it under unstable structures or through moving equipment.
- Correct a small loop before it grows into a larger one.
- Ensure that every diver can identify the line and direction of travel.
- Remain able to release or cut free if the line becomes hazardous.
Assigning one diver to operate the reel can reduce confusion, but every team member must still monitor the line and surrounding hazards.
Bright line may be easier to see in some conditions, but no single color remains equally visible in clear water, green water, darkness and dense suspended sediment.
Inspection and Maintenance
The line should be inspected according to condition rather than replaced after an arbitrary number of dives.
- Check the working length for cuts, flattening, abrasion, knots and chemical contamination.
- Inspect the attachment to the reel or spool.
- Confirm that the spool rotates smoothly.
- Rinse equipment with fresh water after use in saltwater or contaminated water.
- Allow the equipment to dry fully before storage.
- Rewind the line evenly and without hidden loops.
- Store it away from heat, crushing loads, sharp objects and damaging chemicals.
New line should be prepared according to the line and reel manufacturer's instructions. An unverified pre-stretching percentage should not be presented as a universal requirement.
Entanglement Preparedness
Low visibility makes it harder to see fishing line, netting, wire and loose rope before contact occurs.
A cutting device should be:
- Suitable for the likely material
- Reachable with either hand where practical
- Mounted securely
- Usable while wearing gloves
- Positioned so it does not create an additional snag point
Some environments may justify carrying more than one type of cutting tool. The decision should reflect the actual hazards and the diver's training.
If entangled, the diver should avoid uncontrolled spinning or pulling, signal the buddy, stabilize buoyancy and identify where the line contacts the equipment before cutting.
Cutting a guideline or buddy line without understanding its route may create another hazard. The response must follow the procedure appropriate to the line involved.
Essential Safety Lights
Primary Light
A primary light is essential for night diving and can also improve communication and navigation during planned low-visibility dives.
The most suitable light depends on the environment rather than on lumen output alone.
| Feature | Why It Matters |
|---|---|
| Beam shape | A narrow beam can support signaling and penetration through suspended particles, while a wider beam can illuminate a larger nearby area |
| Burn time | The light must remain usable for the planned dive, exit and a reasonable delay |
| Controls | The switch must be easy to operate with gloves and in darkness |
| Depth rating | The housing and seals must be rated for the planned depth |
| Attachment | The light must remain secure without creating a long loose loop |
| Battery status | The diver must know the charge state and expected runtime at the selected output |
More output does not always produce better visibility. DAN explains that light reflected from suspended sediment can make it harder to see. Reducing intensity or aiming the beam slightly downward may reduce this backscatter in some conditions[1].
There is no universal minimum lumen value or beam angle for every site. A 1,200-lumen light cannot be guaranteed to illuminate a specific distance because beam optics, water clarity, particles and viewing direction all affect usable range.
Before the dive:
- Confirm the battery or charge level.
- Check the manufacturer's runtime at the output that will be used.
- Inspect the lens, housing, switch, cable and attachment.
- Inspect accessible seals for dirt, hair, damage or incorrect seating.
- Lubricate O-rings only with the product and method specified by the manufacturer.
- Close the housing correctly.
- Test the light before entering the water.
A short freshwater test may reveal an obvious leak, but it does not prove that a light will remain watertight at depth.
A primary light should not be aimed directly into another diver's eyes. The beam can temporarily reduce night vision and interfere with communication.
Backup Light
DAN advises carrying at least one independent backup light on every night dive[9].
For planned limited-visibility dives, DAN also identifies a backup light and emergency surface lighting as important safety equipment[10].
The backup light should:
- Operate independently of the primary light
- Have enough runtime for a controlled exit
- Be accessible without removing essential equipment
- Use controls that can be operated with gloves
- Be attached in a secure, low-profile position
- Remain protected from accidental activation
Similar controls on the primary and backup lights may reduce confusion, but the two lights do not have to use the same battery type when the chosen configuration and charging plan are reliable.
Loose spare batteries should not be attached to the outside of the BCD where they can become wet, short-circuit or be lost. A backup system should be a complete waterproof light ready for immediate use.
After diving, rinse and dry the exterior before opening the battery compartment. Follow the manufacturer's maintenance instructions rather than opening sealed sections unnecessarily.
Corrosion, moisture, swollen batteries, damaged insulation or green deposits around contacts require attention before the light is used again.
Signal Lights and Light Communication
A signal light is used for communication, marking or location. It does not replace the primary light used for navigation and instrument reading.
Light signals can vary between training systems and dive teams. Their meaning should be agreed during the pre-dive briefing.
DAN describes a large circular movement as a common “OK” signal and a repeated back-and-forth movement as a problem signal. It also recommends directing signals near the buddy's beam rather than shining the light into the buddy's eyes[11].
Possible uses of a signal light include:
- Marking a known entry or exit
- Marking an ascent or descent line
- Helping buddies identify one another at short range
- Providing an agreed emergency signal
- Improving surface visibility to a boat or shore team
No underwater signal light has a guaranteed visibility range.
Range depends on output, beam shape, water clarity, particles, depth, viewing direction and the observer's attention.
NOAA explains that red and orange wavelengths are absorbed relatively near the surface, while blue light penetrates farther in clear ocean water[12].
This physical property does not mean that a blue marker is guaranteed to be visible over a particular distance. Turbidity and suspended particles may dominate visibility in the conditions where a signal is needed.
- Use a secure attachment with minimal loose line.
- Avoid large loops around the cylinder neck or valve.
- Confirm the manufacturer's rated runtime.
- Choose a flash pattern that does not confuse or disorient the team.
- Prevent accidental activation during storage.
- Practise the agreed signals before relying on them in poor visibility.
Using a Compact Cylinder Responsibly
Alternate Gas Is Not Additional Bottom Time
An alternate breathing-gas source is intended to provide a planned emergency capability. It should not be used to extend a dive after the primary supply has reached its turn or ascent pressure.
DAN recommends calculating air consumption and regularly practising emergency procedures with the actual alternate-air configuration[13].
Before selecting a compact cylinder, evaluate:
- Verified internal capacity
- Working pressure marked on the cylinder
- Current inspection and service status
- Regulator suitability for the planned conditions
- Gas required at the maximum planned depth
- Gas required for the complete ascent or exit
- Access to the valve, mouthpiece and pressure gauge
- Mounting security and entanglement risk
- Effect on buoyancy and trim
- Compatibility with the diver's training
A cylinder should not be described as suitable for “40-meter backup,” cave penetration or wreck penetration solely because a regulator or product page mentions that depth.
The gas supply must be adequate for the specific emergency procedure, and every component must be suitable for the planned pressure, depth, temperature and breathing demand.
Do Not Combine Maximum Claims
A product page may display cylinder capacity, estimated duration, maximum pressure and a depth figure. These values do not necessarily describe one simultaneous operating condition.
In particular:
- The longest estimated duration generally occurs near the surface and with low breathing demand.
- Gas duration decreases as depth and workload increase.
- The maximum pressure is not the same as the recommended operating or fill pressure unless the current cylinder documentation states that it is.
- A regulator depth claim does not prove that the attached cylinder contains enough gas for an emergency at that depth.
The markings and approved documentation supplied with the actual cylinder should be checked before filling or use.
When online descriptions conflict with the cylinder marking or manual, stop and obtain clarification from the manufacturer or a qualified cylinder service facility.

Pressure Warning Lights
The DEDEPU L3000 is described by the manufacturer as having a pressure-warning light that turns off when pressure becomes low[14].
The product page does not provide a precise trigger pressure. The feature should therefore be treated as a secondary alert rather than as the primary means of gas management.
The diver should:
- Check the pressure gauge before entering the water.
- Monitor pressure at planned intervals.
- Begin the exit or ascent according to the gas plan.
- Never wait for the warning light to change before taking action.
A pressure-warning light is not a backup dive light and does not replace a depth gauge, compass, dive computer or pressure gauge.
Filling and Inspection
Use only a filling method approved for the cylinder and capable of supplying suitable breathing-quality air.
Before filling:
- Read the permanent pressure and identification markings on the cylinder.
- Check whether the required inspection remains valid under applicable local rules.
- Inspect the valve, threads, seals and exterior for damage or corrosion.
- Confirm that the filling connector is compatible and correctly secured.
- Keep water, oil and contamination out of the cylinder and breathing system.
- Do not exceed the approved filling pressure.
A high-pressure hand pump or electric compressor should not be assumed to provide suitable breathing air merely because it can reach the required pressure. Filtration, cleanliness, maintenance and operating procedure are essential.
Filling requirements and inspection intervals vary by jurisdiction and cylinder approval. Follow the actual cylinder documentation and the rules of the qualified fill provider.
Pre-Dive Checklist
- Confirm that the dive is within every team member's certification and recent experience.
- Review expected visibility, current, tide, temperature and surface conditions.
- Identify the entry, exit and alternative recovery points.
- Agree on maximum depth, maximum time and abort conditions.
- Calculate the required gas and reserve using measured consumption.
- Confirm outbound and reciprocal compass headings.
- Review natural navigation references and depth contours.
- Review hand, light, touch and line signals.
- Agree on the lost-buddy and lost-navigation procedures.
- Inspect cylinders, regulators, gauges, valves and hoses.
- Confirm that any alternate gas source can be reached and deployed.
- Test the primary and backup lights.
- Check the SMB, reel, spool and line where they are part of the plan.
- Confirm that cutting devices are accessible.
- Check that no straps, hoses or lines create unnecessary loops.
- Perform a complete buddy check before entering the water.
When to End the Dive
The dive should be ended when:
- Visibility becomes worse than the team planned for
- The exit reference is lost
- A primary light fails and the team cannot continue within the trained procedure
- A reel, guideline or buddy line cannot be controlled
- A diver becomes anxious, disoriented, cold or overloaded
- Gas consumption is higher than planned
- Current or surface conditions worsen
- Any team member signals that the dive should end
Any diver may end the dive at any time, for any reason, without needing to justify the decision underwater.
Low-visibility diving is safest when navigation, buoyancy, gas planning, communication, lighting and line control work as one system.
A compass does not replace an exit plan. A buddy line does not replace a guideline. A pressure-warning light does not replace a gauge. A compact cylinder does not replace an adequate primary supply or a properly calculated redundant-gas system.
Divers should remain within their training and call the dive whenever the conditions exceed their equipment, gas plan, experience or comfort level.

Leave a comment
All comments are moderated before being published.
This site is protected by hCaptcha and the hCaptcha Privacy Policy and Terms of Service apply.