

A small diving cylinder is a practical aid for quick boat cleaning, hull checks, and propeller inspections in shallow water. Choose a certified, properly maintained cylinder, check pressure before use, and follow the manufacturer’s limits. For safety, dive with a buddy, use basic scuba training, monitor breathing time, and avoid currents, fouled props, or confined spaces.
Hull Inspection
Crack Inspection
Cracks are the most common underwater hull safety hazard, typically appearing at hull plate seams, around chain lockers, and at hull-to-deck transitions. Metal hulls in seawater suffer electrochemical corrosion causing pitting or weld-aligned cracks; fiberglass hulls develop micro-cracks from impact, internal delamination, or prolonged stress, which can progress to visible surface-opening fractures.
Cracks wider than 2mm or deeper than 1/3 of the hull plate thickness require immediate halt and towing for professional repair — continuing with active cracks is unacceptable.
I once encountered an 8-meter fiberglass yacht during an open-water clean: a 15cm transverse crack, 1.5mm wide, less than 1/4 plate thickness deep, located about 30cm below the waterline with minor seepage. We applied underwater sealant as a temporary fix and returned safely; the next day the yacht went to the shipyard for professional repair — grinding 5cm on each side of the crack, removing degraded resin, filling with epoxy clay, and reinforcing with glass fiber cloth.
Metal hull crack inspection focuses on weld seams and areas of high curvature. Coarse grains in weld heat-affected zones reduce local corrosion resistance, making weld seams the most common crack origin. Brown rust water seeping from weld seams indicates severe internal corrosion — photograph and record and report to a licensed surveyor immediately.
Algae Removal
Algae buildup degrades the antifouling coating's performance, and biological fouling layers increase surface roughness, significantly raising hydrodynamic drag. Test data shows a 5mm fouling layer reduces speed by 10%~15% while increasing fuel consumption by 8%~12%. Before removal, rinse the hull with fresh water to clear loose mud and algae fragments, then proceed with physical scraping.
- Rinse hull surface with fresh water to remove loose mud and initial algae layer
- Scrub sections top-to-bottom along the hull curve with a soft nylon brush at 30° angle
- Use a plastic scraper along the growth direction for stubborn algae, assisted by brushing
- Pay special attention to hull seams and recesses with an old toothbrush or small brush
- After rinsing, inspect the entire hull for exposed or flaking antifouling paint and mark any areas
- Touch-up antifouling paint must be applied onshore — underwater touch-ups cannot achieve proper film thickness
While cleaning a 12-meter sailboat, I found the worst algae accumulation above the propeller and behind the rudder — areas where relatively stagnant water allows marine growth to establish easily. After removal, the hull-attached wet algae weighed approximately 3.2 kg, equivalent to about 2% of the vessel's deadweight payload — an impact too significant to ignore.
Paint Coating Inspection
Antifouling paint is the hull's primary underwater protection, and its integrity directly determines resistance to marine fouling. Once antifouling fails, barnacles, oysters, and other hard-shelled organisms begin attaching within 72 hours and form established communities within two weeks, dramatically increasing removal difficulty. Inspection should focus on the hull bottom, waterline area, and both sides of the keel, feeling the coating surface for rough particles, peeling, or soft spots.
- Is the hull bottom color uniform, or are there areas of obvious fading, whitening, or discoloration?
- Does the coating surface show blistering, cracking, peeling, or soft spots — all signs of coating failure?
- Are there stepped ridges or etched grooves at the waterline from coating buildup or dissolution?
- Is the coating intact around the propeller and rudder areas, where water flow is most intense?
- Are there any localized coating losses from mechanical damage (collision, chafing, anchor chain friction)?
- Are there any dark discoloration areas suggesting localized sulfate-reducing bacterial activity?
| Coating Condition | Thickness Range | Fouling Resistance | Recommended Action |
|---|---|---|---|
| New coating | 80~100 μm | Fully effective | No action needed |
| After one season | 50~60 μm | Generally effective | Monitor but usable |
| Below threshold | <30 μm | Significantly reduced | Recoat at next haul-out |
| Large-area blistering | Uneven | Largely failed | Full sandblast and recoat |
Coating thickness: newly applied antifouling paint is typically 80~100 μm; after one season 50~60 μm remains adequate. Below 30 μm, antifouling capability drops significantly and full repainting is required at the next maintenance period. During one inspection I found a hull with coating only about 25 μm remaining and widespread blistering — the surveyor classified it as requiring immediate dry-docking for full sandblast and recoating, or facing serious corrosion perforation risk.

Propeller
Dent Inspection
Propeller blade dents typically result from underwater obstacle collision, floating debris impact, or improper handling. Minor dents cause only slight propulsion efficiency loss (within 5%), but dents deeper than 20% of blade thickness significantly alter the blade section aerodynamics, creating unbalanced thrust that causes hull vibration and directional instability. Severe dents also concentrate stress, creating blade fracture risk at high RPM.
Rule of thumb: dents deeper than 3mm or wider than 10mm — replace the blade rather than repair, to avoid stress concentration and fracture risk.
I once handled a fishing vessel propeller damage case — the vessel struck a submerged reef during operations. One blade tip developed an approximately 8mm-deep V-shaped penetration, about 40% of the blade thickness. With only two of three blades functional, the vessel developed significant port-side drift upon arrival at port, with maximum yaw angle reaching 15 degrees. After replacing the damaged blade, speed recovered by approximately 12% and the drift problem disappeared entirely.
Propeller blade inspection should fully raise the propeller above water in adequate lighting and examine each blade individually. Where possible, use a dial indicator to measure blade planeness — high-grade aluminum propellers should not exceed 0.5mm error, cast iron not exceeding 1mm. Record any out-of-specification deformation and address before the next voyage.
Fishing Line Removal
Abandoned fishing gear and rope wrapped around the propeller is a common underwater cleaning issue — it reduces propulsion efficiency, and severe cases can cause complete propeller seizure or damage the shafting. Fishing line wrapped around the blade root forms circular stress concentration marks that accumulate over time and weaken root strength, a leading cause of propeller fatigue fracture. Before every cleaning operation, perform a visual perimeter inspection of the hull — surface debris is an especially important warning of possible underwater entanglement.
- Shut off the air source and confirm the propeller is stationary before approaching
- Cut along the entanglement direction with a dive knife, blade back toward the blade surface to avoid scratches
- Extract the cut fishing line section by section; remove residual line at the blade root with needle-nose pliers
- Inspect the blade root for stress marks — record any deeper than 1mm and monitor for changes
- After clearing, manually rotate the propeller 2~3 turns to confirm no jamming or abnormal sounds
- Record the type of fishing line (gillnet, trawl, abandoned rope, etc.) to help identify the source and prevent recurrence
Notably, some fishing line entanglement occurs behind the rudder or inside outboard motor cowlings — these locations also affect water flow stability and directional control. During one cleaning I removed approximately 1.5 meters of abandoned gillnet from behind a yacht's rudder. The vessel had experienced an 8% speed loss before clearing, which fully recovered afterward. Fishing nets are often more harmful than single ropes because the mesh catches additional debris, creating a rapidly growing biological fouling substrate.
Propeller Free Rotation Test
Free propeller rotation is the fundamental prerequisite for propulsion system operation. Any jamming or uneven rotation indicates a fault requiring resolution. Jamming has three typical causes: foreign object entanglement (fishing line, rope, plastic bags), bearing wear or seal aging, or propeller deformation. Testing should be conducted with the air supply closed and the engine in neutral, manually rotating the propeller to feel the damping.
Normal static friction torque for a 400~500mm diameter marine propeller in fresh water is approximately 3~5 N·m. If rotation requires noticeably more effort or shows catching, an abnormality is indicated.
Test procedure: first confirm the vessel is securely moored, the engine is off, and the gear shift lever is in neutral. Then descend underwater, grasp one propeller blade and push slowly in the rotation direction. Normal resistance should feel even throughout; if resistance suddenly increases at a certain angle, mechanical interference is indicated and further investigation of the bearing or seal assembly is needed.
I once encountered a bearing seal aging case — the propeller's resistance suddenly increased sharply at a specific angle. Underwater disassembly revealed the bearing oil seal had completely hardened and cracked, seawater had entered the bearing chamber forming a rust layer, and the bearing race surface showed pitting spalling. The entire propeller assembly required replacement, costing over $1,100 for bearing repair alone. If just one more minute had been spent on manual rotation inspection during each cleaning, this loss could have been entirely avoided.
Safety
Air Source Inspection
The air source is the lifeline of diving operations, and pre-dive air source inspection is the most critical barrier against hypoxia incidents. Inspection must cover three aspects: tank pressure, regulator function, and air source cleanliness. Before use, measure tank pressure with a pressure gauge and observe the regulator first and second stage connections for seawater corrosion or seal aging. Any non-conformance requires immediate replacement or repair — never dive with defective equipment.
- Tank pressure: measure with gauge, full cylinder should be no less than 90% of rated charging pressure (e.g., 2.3L tank rated 200 bar — 180 bar or above before diving is safe)
- First stage seal ring: inspect O-ring for completeness, aging cracks, deformation, or notches
- Second stage breathing resistance: press the purge button, feel for smooth airflow and any intermittent blockage or odor
- Backup air source (if available): confirm backup tank pressure is adequate and supply path is independent
- Air source connection: confirm high-pressure hose is tightly connected to tank valve, perform bubble test with soapy water before diving
- Tank exterior: check for obvious dents, scratches deeper than 1mm, or valve corrosion — any abnormality requires immediate cessation of use
During one cleaning operation I discovered a second-stage O-ring on the regulator had developed fine cracks during pre-dive inspection. Fortunately this was caught before diving — if the O-ring had failed underwater, water pressure would have entered the breathing circuit, causing respiratory difficulty or even drowning. The diving community has a saying: "No check, no dive." Air source inspection is the first mandatory item before every operation, and no step may be skipped due to time pressure or familiarity.
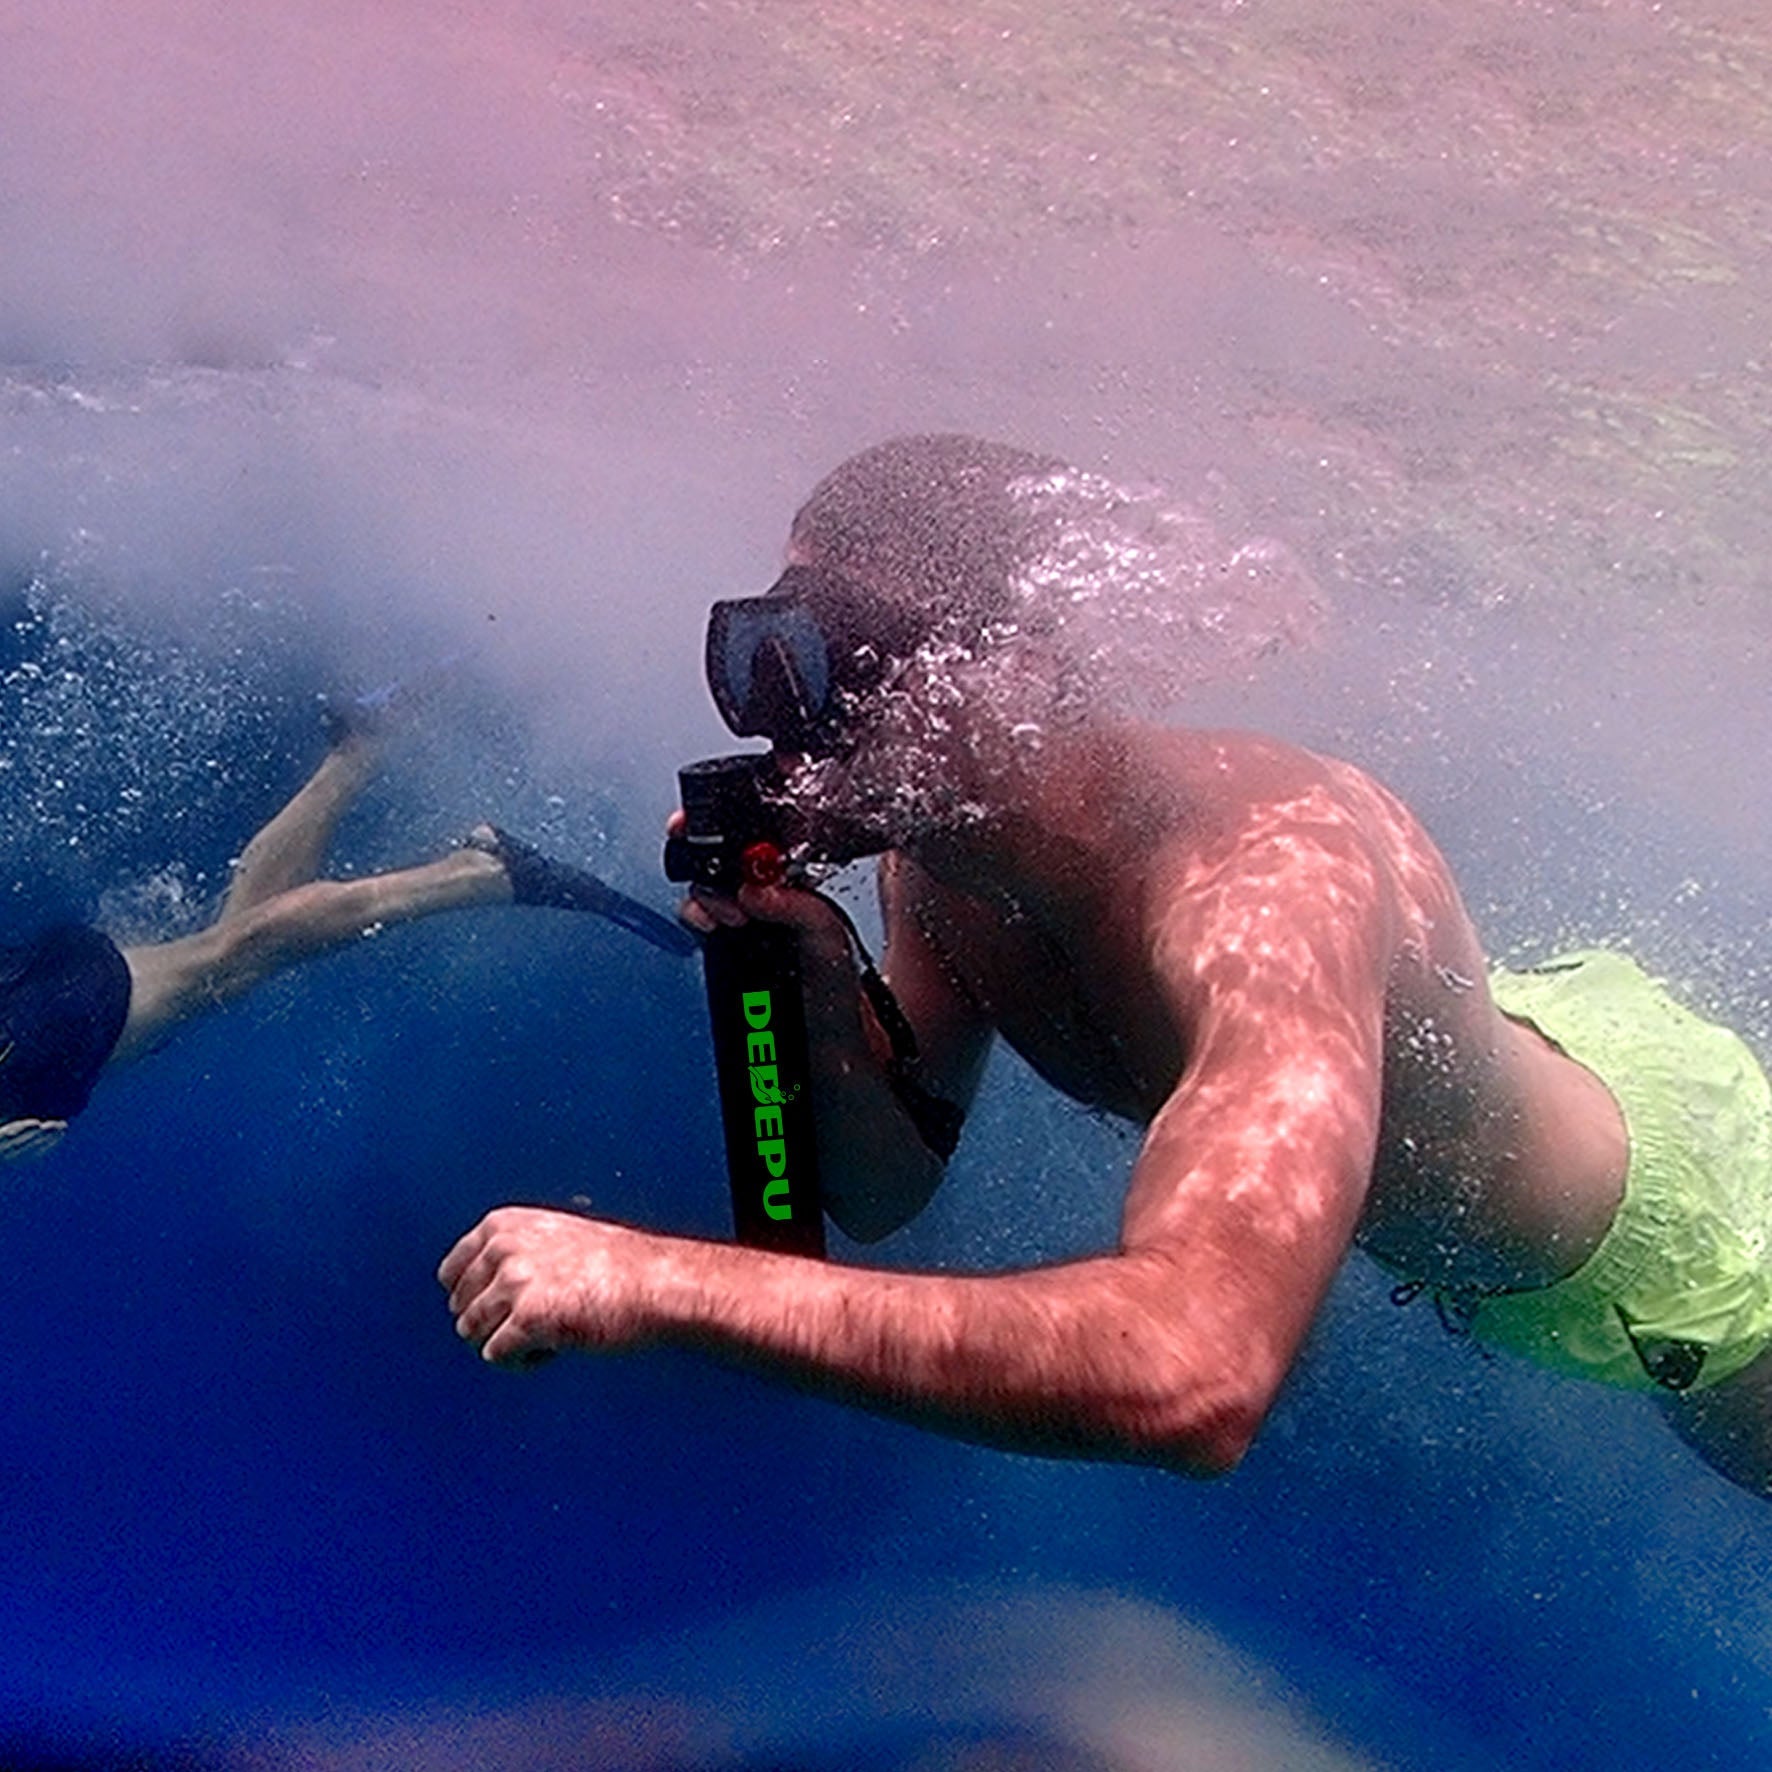
Proper Equipment
Diving cleaning operations require equipment that balances underwater breathing safety with surface operational convenience. Wetsuits are the most common choice — wear a 3mm full wetsuit in water above 20°C, a 5mm wetsuit with hood for 15°C~20°C, and consider a drysuit below 15°C. Equipment selection should be based on actual water temperature and diving depth, with colder water demanding higher thermal protection as extended low-temperature work easily triggers muscle cramping and impaired judgment.
- Dive mask: properly sized, not pressing the face with weight belt in place, sealing completely without leakage; carry a backup mask
- Wetsuit: 3mm (above 20°C) or 5mm/drysuit (below 20°C), cuffs and ankles sealing well to prevent water circulation
- Weight system: total weight approximately 8%~10% of body weight to counteract wetsuit buoyancy and ensure underwater neutral buoyancy
- Long-blade fins: provide adequate propulsion, reducing leg fatigue; overly soft fins reduce propulsion efficiency
- 3mm neoprene gloves: thermal protection plus protection against hull sharp edges and abrasion
Surface support equipment is equally essential — a surface marker buoy (to mark the working area), a 30-meter backup safety line, and a lifebuoy for surface rescue are all mandatory checks before every operation. Surface support personnel should remain alert throughout and maintain hand signal contact with the underwater operator — this is the final safety line preventing accidents.
Diving Time Monitoring
Diving time monitoring is critical for safety during boat cleaning operations. Most small scuba tanks used for boat cleaning have an actual usable duration far shorter than the rated value — the rule of thumb is to consume no more than 50% of the tank's total air supply during a single dive, leaving the remaining 50% as an emergency reserve.
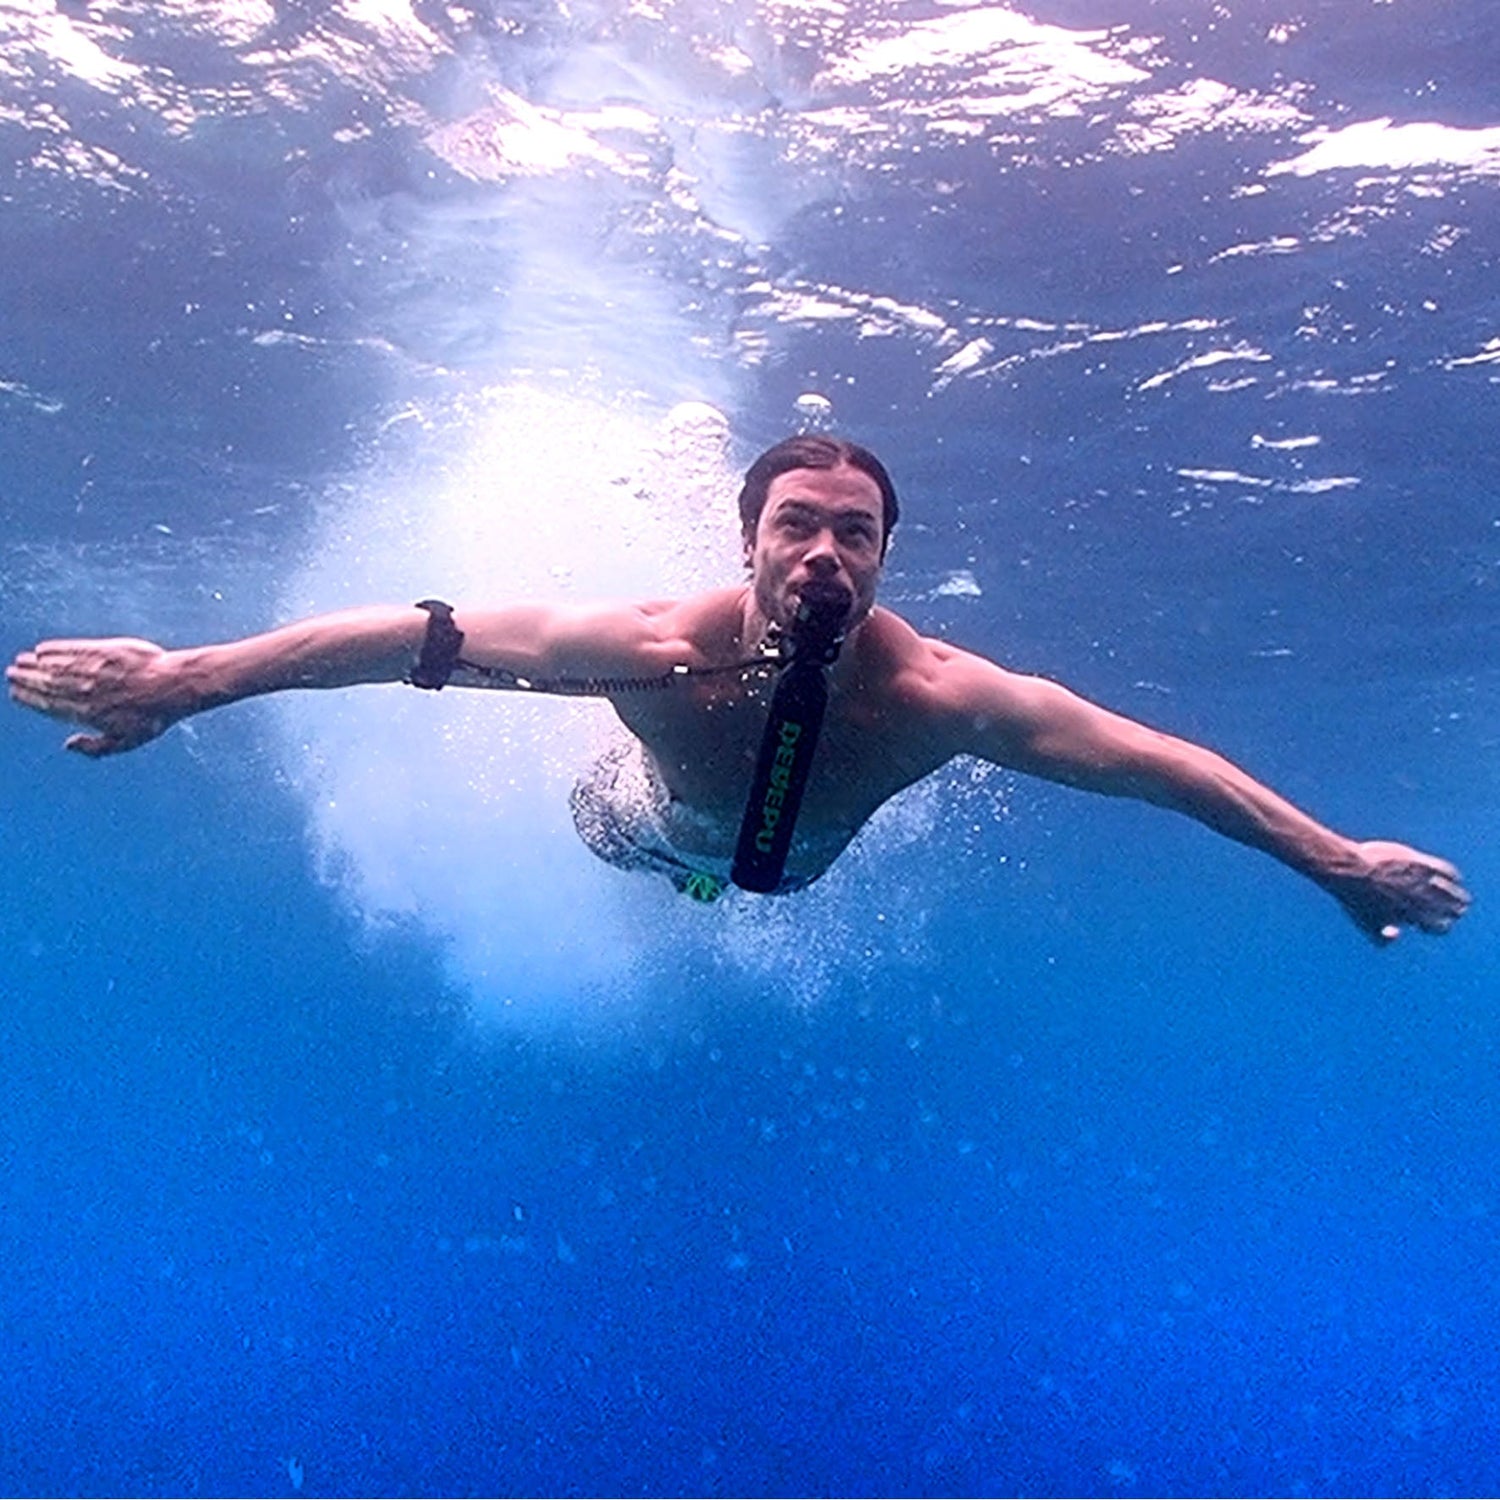
For DedepuDive's D600 (2.3L, 200 bar), the usable portion at a typical consumption rate of 15~20 L/min provides approximately 45 minutes of underwater work; the S3000 (0.5L, 180 bar) delivers about 20 minutes of quick inspection time. A diving watch or dive computer with a built-in timer is essential — set the alarm at 70% of your planned maximum dive time as an early warning, and at 50% as a mandatory turn-around signal.

During boat cleaning, the dynamic underwater environment means visibility conditions can change rapidly, so monitoring time in real time prevents both running out of air and developing cold-related muscle cramps from prolonged exposure.
Minimum air reserve rule: always surface with at least 5~10 bar above the tank's working pressure minimum. For a 200 bar tank, this means never diving below 185 bar before ascending.
- D600 (2.3L, 200 bar): 45 min underwater work time
- S3000 (0.5L, 180 bar): 20 min quick inspection time
- Air reserve requirement: always surface with ≥5~10 bar above minimum working pressure
Boat cleaning: check hull cracks and coating; inspect propeller dents and fishing lines; monitor air, gear, and time. D600 (2.3L, 200 bar): 45 min; S3000 (0.5L, 180 bar): 20 min.
Leave a comment
All comments are moderated before being published.
Este site está protegido pela Política de privacidade da hCaptcha e da hCaptcha e aplicam-se os Termos de serviço das mesmas.