
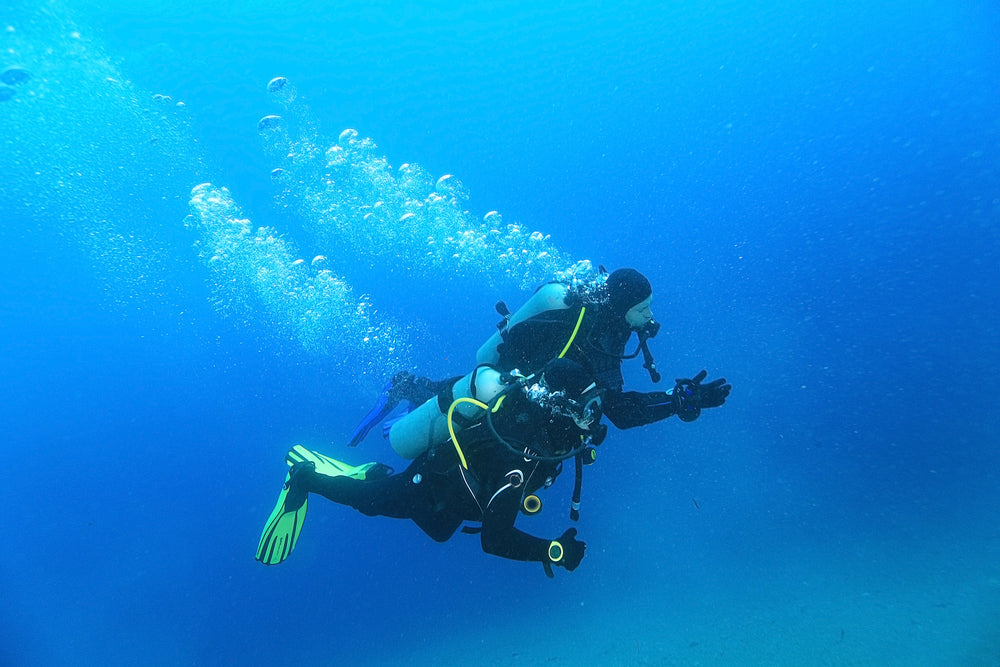
Small diving air tanks are compact high-pressure air sources designed specifically for underwater photographers. Rated at 200 bar working pressure with capacities ranging from 0.3 to 3 liters, these tanks are built for no-decompression dives to 30 meters. Weighing under 3 kg empty and totaling under 5 kg when filled, they fit into most dive backpack side pockets, dramatically lowering the barrier to entry for serious underwater imaging.
Stability
Stable Shooting
In water shallower than 30 meters, underwater photography demands far greater image stability than recreational diving. Surface swells, breathing rhythms, and mild currents all produce camera shake, and divers typically brace against reefs or sandy bottoms to stay fixed in position. A small tank's buoyancy characteristics and ballast configuration directly determine whether the diver can hover steadily near a target without drifting or sinking unexpectedly. A single-cylinder setup places the tank axis roughly perpendicular to the body's center of gravity, producing superior hover stability compared to side-mounted eccentric configurations. Dual-cylinder symmetrical mounting aligns both buoyancy centers on a horizontal plane, delivering a marked improvement in lateral stability that makes it the preferred configuration for wide-angle underwater photography.
Breathing rhythm plays an equally critical role in stability. Each inhalation of roughly 0.5 liters of air into the thoracic cavity causes the body to rise approximately 0.1–0.2 meters; exhalation reverses the process. High-frequency shallow breathing — such as the 20+ breaths per minute typical of anxiety — creates continuous vertical oscillation that keeps the lens perpetually jittering. I have observed that trained underwater photographers maintain breathing rates between 10 and 14 cycles per minute, drawing the belly inward slightly on the inhale and relaxing the abdominal wall on the exhale. This technique keeps the body stable even in lightly flowing open water, allowing the camera to capture sharp frames without post-processing stabilization corrections.
| Tank Capacity | Full Weight (approx.) | Empty Weight (approx.) | Recommended Use |
|---|---|---|---|
| 0.5 L | 1.2 kg | 0.8 kg | Snorkeling / freediving supplement |
| 1.0 L | 2.2 kg | 1.2 kg | Photography dive to 30 m |
| 2.0 L | 4.0 kg | 2.3 kg | Mid-depth training dive |
| 3.0 L | 5.8 kg | 3.2 kg | Reserve near depth limits |
Ambient current also plays a significant role in hover stability. Even a mild current of 0.2–0.5 knots — barely perceptible at the surface — exerts continuous directional force on the diver's body and equipment. The combined frontal area of a dual strobe arm assembly and a housing with external dome port creates substantial fluid resistance, and a slight body angle into the current can reduce this resistance by redistributing flow around the asymmetrical shape. Experienced underwater photographers learn to orient their bodies slightly downward into mild current, which simultaneously improves buoyancy compensation and streamlines the overall profile, reducing fin kick effort and gas consumption during extended hover sessions.
Underwater Art Society Technical Report, 2023 — divers who improve hover stability by 10% reduce post-processing time by an average of 25%.
- Select a neutral-buoyancy BCD to reduce ballast dependence
- Fine-tune buoyancy in shallow water before descending
- Match mask and fin combination to tank capacity for balanced trim
Weight Balance
- Test hover midpoints at both full and half-tank gas levels
- Dual-tank setups require left-right weight differential under 0.5 kg
- Reassess overall ballast whenever tank position changes
Achieving weight balance sounds straightforward in theory but proves genuinely difficult in practice. I have often encountered amateur divers who discover excessive lateral imbalance only after entering the water — a single 12 L tank losing gas to around half remaining shifts buoyancy by roughly 0.5 kg, and multi-tank configurations amplify this variation considerably. The reliable verification method is straightforward: use water displacement to measure your bare weight and total negative buoyancy, then calculate the exact lead mass needed. I recommend conducting this measurement in calm water with the body fully submerged and the lungs at a normal breathing volume, because lung gas volume changes directly skew the readings.
For underwater photographers, the ballast configuration must also account for gear differences. Adding a dual arm with one external strobe shifts the overall center of gravity to one side, requiring corresponding weight redistribution. Rigid arm systems versus flexible arms create asymmetric fluid resistance due to their different surface areas, which also affects directional stability during hovering. My recommendation is to perform a new buoyancy test in shallow water whenever the gear configuration changes and to log the weight adjustments for future reference.
PADI IDC Standards require that divers using small tanks for no-decompression dives test hover posture at both full and over-half-gas states, confirming that the hover midpoint stays at approximately 0.5 meters below the surface in both conditions.
A practical field method I often recommend for calibrating ballast in small tank configurations is the breath-hold check at depth. Take a full breath and observe whether the body rises or sinks, then exhale fully and repeat. The difference in vertical displacement directly indicates whether the current ballast is appropriate. If holding a full breath causes noticeable upward drift exceeding 0.3 meters, at least 0.5–1.0 kg of additional weight is needed. This method bypasses the inaccuracies of surface-weight calculations and accounts for the combined effect of exposure suit compression, BCD material volume change, and tank gas density variation at depth.
Beyond the initial calibration, seasonal temperature variations demand periodic reassessment of the ballast configuration. A wetsuit that fits snugly in summer becomesCompressed in winter water, reducing its thermal insulation volume and shifting the diver's overall buoyancy by 0.3–0.7 kg across a typical seasonal temperature range of 8–15°C. I recommend repeating the full buoyancy test at the start of each dive season and keeping a written log of the results including water temperature, suit thickness, and tank pressure — over time this log becomes an invaluable reference for achieving accurate ballast settings quickly.
| Tank State | Buoyancy Change (typical) | Compensation Method |
|---|---|---|
| Full (200 bar) | Approximately -1.0 kg (negative) | Add weight or inflate BCD |
| Half (100 bar) | Approximately -0.5 kg (slightly negative) | Normal hover posture |
| Low pressure (below 50 bar) | Approximately +0.3 kg (positive) | Deflate BCD or kick upward |
Trim Control
Trim control in the 0–30 meter range determines whether a diver can freely adjust body angle underwater. Lateral trim imbalance manifests as a persistent lean to one side, forcing the diver to continuously flutter-kick sideways to counteract the drift. For underwater photography, body tilt also misaligns the lens optical axis with the horizontal plane, producing trapezoidal distortion in captured images. Minor lens tilts can be corrected in post-processing software, but a consistently angled viewpoint is nearly impossible to fix and represents one of the most frequently observed technical errors in underwater imaging.
Trim control centers on vertically aligning the center of gravity with the tank axis. In dual-cylinder or side-mount configurations, the right-side tank typically depletes faster than the left, so initial ballast should be placed slightly left of center to account for the shift as gas is consumed.
Environmental factors beyond the diver's body also influence effective trim. Water density changes with temperature and salinity — cold saltwater provides more buoyant lift per unit volume than warm freshwater, meaning the same gear configuration may require different trim settings in different dive environments. I have found that logging trim adjustments across different dive sites and seasons, alongside water temperature and salinity readings, builds a personal reference library that makes subsequent buoyancy setup faster and more accurate.
During photography sessions requiring sustained head-down or head-up orientation — such as shooting straight up at a overhang or straight down into a coral head — the body's longitudinal trim changes significantly as equipment weight shifts relative to the tank axis. I have found that pre-setting a slight head-up trim when shooting downward and a slight head-down trim when shooting upward provides a more stable platform for camera work, compensating for the gravitational effect of the housing and lens combination.
Breathing is the most immediate trim adjustment tool available. Inhaling depresses the diaphragm and temporarily adds roughly 0.3–0.5 liters of volume to the upper torso, producing a slight upward trend; exhaling contracts the ribcage and causes the lower body to sink relatively. Experienced underwater photographers use rhythmic breathing to fine-tune body angle without changing hand or foot position, a technique that proves particularly valuable in close-up marine life photography where the most minute adjustments matter. For coral reef species requiring precise pitch angle control, kick-based adjustments tend to overshoot, whereas respiratory trim delivers smooth, continuous micro-corrections without any movement artifacts.
- Lateral trim: distribute lead weights evenly left to right
- Longitudinal trim: adjust tank vertical position to shift center of gravity
- Respiratory trim: leverage breath cycle volume changes for fine posture control
Runtime
Actual Dive Time
Standard air consumption formula: surface consumption rate (SM) multiplied by the absolute pressure ratio (depth in meters divided by 10, plus 1). At 20 meters, the effective consumption rate is approximately 3 times the surface rate.
Tank specifications — such as a 10 L steel cylinder rated at 200 bar — state total gas volume under standard atmospheric pressure, and actual available time depends on depth, breathing rate, and activity intensity. Underwater photography is a low-to-moderate intensity activity with a surface minute volume (SM) of approximately 15–20 L. At 20 meters, the effective breathing volume is roughly 45–60 L per minute. Using a 10 L tank at 200 bar as an example, the total gas volume of 2,000 L supports approximately 33–44 minutes of pure breathing at 20 meters, though ascent-related consumption must also be deducted from this figure.
Calculating actual dive time also requires accounting for non-breathing gas expenditures: equalizing mask pressure, BCD inflation and deflation, and emergency preparation actions each consume a measurable volume. These auxiliary activities typically reduce available breathing time by 10–15% compared to theoretical calculations. Additionally, the frequent camera parameter adjustments and compositional reframing involved in photography naturally elevate breathing rate, so actual consumption often runs 20–30% higher than during static hovering. I once reviewed a dive profile where a photographer spent 8 minutes adjusting a single wide-angle composition and consumed gas at nearly double the baseline rate during that interval.
For recreational underwater photographers, the effect of depth on underwater visibility is equally important. Waters shallower than 20 meters typically deliver the best natural light penetration and most accurate color reproduction; beyond 25 meters, the red spectrum begins to be absorbed by seawater, and even with external strobe lighting, the resulting images skew blue-green and require significant color correction in post-processing. Actual dive time therefore involves more than just gas consumption calculations — it requires a holistic assessment of depth-related marginal returns on image quality.
Water temperature stratification also influences diving time indirectly through the thermocline layer. In temperate regions during summer, a sharp temperature boundary often forms between 8 and 15 meters, where warmer surface water meets cooler deeper water. Fish and invertebrates frequently congregate along this boundary, making it a productive photography zone. However, staying within this narrow depth band while managing gas consumption requires disciplined time management, as the thermocline itself may occupy only 5–10 meters of the total depth range.
| Depth | Absolute Pressure | Consumption Ratio | Available Time on 10 L Tank (approx.) |
|---|---|---|---|
| 5 meters | 1.5 bar | 1.5× | 55–65 minutes |
| 10 meters | 2.0 bar | 2.0× | 40–50 minutes |
| 20 meters | 3.0 bar | 3.0× | 28–35 minutes |
| 30 meters | 4.0 bar | 4.0× | 18–25 minutes |
- Small tanks drain rapidly below 20 meters
- Photography is low-to-moderate intensity — breathing rate can be controlled
- No-decompression time window sets the maximum allowable stay
Reserve Tanks
Deploying a small 1–3 liter tank as a reserve air source follows two distinct strategic models: emergency reserve and planned reserve. The emergency reserve logic assumes a primary tank failure — such as a second-stage regulator malfunction or gas quality anomaly — and must sustain safe breathing until the diver returns to the surface. Planned reserve instead treats the small tank as a dedicated terminal air source during staged dives or deep diving profiles, where the diver switches to the reserve at a pre-determined depth or gas pressure threshold. The key distinction lies in how much gas the diver needs versus how much the small cylinder can reliably deliver under stress.
- Primary tank capacity should be at least 3× that of the reserve tank
- Reserve tank must be kept fully charged — verify pressure before every dive
- Planned dive depth must not exceed the reserve tank's theoretical endurance
IANTD Technical Diving Standards require that any dive exceeding no-decompression limits must carry an independent backup breathing gas source; a small high-pressure tank verified for pressure and capacity may serve as a technical diving reserve for experienced divers.
Choosing between an emergency reserve strategy and a planned reserve strategy depends on the specific dive environment. In high-current channels, strong-thermocline zones, or shark-feeding sites where unexpected situations could require extended bottom time, the planned reserve model with a fully charged independent cylinder provides the psychological security needed to focus on photography rather than gas management. I have found that the mental relief of knowing a reserve exists consistently lowers heart rate and breathing frequency during challenging dives, which paradoxically extends effective dive time through reduced stress-induced consumption.

When using a planned reserve configuration, the point at which to switch tanks depends on both remaining gas volume and the decompression status of the dive. A common rule of thumb reserves one-third of total gas volume for the ascent and any emergency needs, leaving two-thirds for the working portion of the dive. With dual-primary tanks, this allows switching to the reserve tank at the one-third remaining mark on the first tank — which in a typical 200-bar fill occurs at approximately 130 bar — and then monitoring both tanks throughout the remainder of the dive to ensure neither drops below the safe minimum.
For recreational photography divers, a more practical approach uses a dual primary tank configuration with the small tank as a supplementary source, maintaining continuous gas supply during tank-to-tank transitions. This arrangement becomes especially critical in strong current or low-visibility environments — if one tank fails, the other provides sufficient gas to complete a safe ascent. Dual primary tanks also allow the diver to carry two different gas mixes, such as enriched air nitrox and standard air, switching blends based on target depth to extend no-decompression limits and reduce post-dive residual nitrogen.
Depth Limits
| Depth Range | Available Time (tank ≤3 L) | Risk Level | Recommendation |
|---|---|---|---|
| 0–18 m | 30–45 minutes | Low | Usable as primary tank |
| 18–25 m | 18–28 minutes | Moderate | Use as primary with careful assessment |
| 25–30 m | 12–18 minutes | High | Reserve tank only |
| >30 m | Under 12 minutes | Extreme | Prohibited — requires standard SCUBA |
Depth limits for small diving air tanks originate primarily from the ratio between gas volume and consumption rate. Each 10-meter descent increases ambient water pressure by approximately 1 bar, directly multiplying the volume of compressed gas consumed per breath. At 30 meters, a 3-liter tank provides approximately 240 breaths at a breathing rate of 15 cycles per minute with 0.5 liters per surface breath — fewer than 16 minutes of continuous breathing. If a problem arises underwater requiring the diver to pause and manage the situation, actual available shooting time drops further.
Depth limits must also account for the physiological effects of cold on the body. In temperate or cold-water environments, water temperature drops approximately 1–2°C for every 10 meters descended, meaning 30-meter depths may reach only 12–15°C. Extended exposure at these temperatures causes body core temperature to fall, resulting in stiff hands and feet that impair camera operation and fin kick precision. Small tanks — due to their limited capacity and thus shorter dive duration — paradoxically reduce hypothermia risk compared to longer dives on larger tanks.
Another critical depth-related factor is light absorption and its effect on color rendering. Below 20 meters, available natural light drops to less than 10% of surface levels, and the color temperature shifts toward blue-green. While external strobes provide partial compensation, the effective working distance of strobes also decreases with depth due to increased particulate scattering in the water column. Underwater photographers planning dives between 20 and 30 meters should budget additional strobe power and plan longer post-processing time for color correction.
Marine life distribution patterns also shift significantly with depth, and understanding these patterns informs whether a particular dive depth actually serves the photographer's goals. Below 25 meters, large fish species become increasingly rare compared to the shallower reef zones, while certain macro invertebrates — elaborate sponges, deep-water nudibranchs, and bryozoans — reach their peak diversity. A dive plan that accounts for target subject distribution at specific depth ranges prevents spending limited gas on unproductive depth zones.
Recreational diving's maximum depth limit of 30 meters is grounded in the physiological safety threshold for nitrogen narcosis. Nitrogen's anesthetic effect under high pressure progressively impairs a diver's judgment and reaction speed, beginning to meaningfully affect safe decision-making beyond 30 meters.
- Strictly observe the 30-meter no-decompression ceiling
- Monitor real-time depth with a dive computer or depth gauge
- Never exceed 80% of the tank's theoretical endurance in a single dive
Maneuverability
Easy Turning
In water between 5 and 30 meters deep, the efficiency of underwater turning directly determines whether a diving photographer can rapidly track moving subjects. Turning is fundamentally angular momentum control — the diver coordinates fin movements with the core musculature to change horizontal orientation. Turning too fast disrupts hover stability, causing tanks and camera equipment to sway excessively; turning too slowly causes the photographer to miss the optimal shooting moment. Whether tracking a school of fish in wide-angle photography or reframing a shot in close-up work, the diver needs the ability to pivot with both speed and precision.
The role of core strength in underwater turning is frequently underestimated. A strong core enables the diver to maintain torso rigidity through the pivot motion, preventing the rotational inertia from carrying the body past the intended angle. Professional underwater photographers typically incorporate dedicated core training — such as plank holds and Russian twists — which directly improve both turning control precision and maximum turning speed. A robust core also maintains body posture against current-induced drift, reducing the number of unnecessary postural corrections that waste gas and break camera stability.
Fin selection also interacts directly with turning performance. Long blade fins generate more thrust per kick but require more leg excursion to achieve the same rotation speed, which increases the time needed to complete a tight turn. Short blade freediving fins offer quicker pivot response and are increasingly popular among underwater photographers working in tight reef spaces, though they demand stronger ankle flexibility and calf endurance to maintain over a full dive.
In moving water, turning strategy differs fundamentally from still water. First determine current direction — head into the current near a target and wait, use the flowing water to accelerate the approach when moving downstream, or cover the target's flank from downstream when the current runs with you. The simplest way to read current direction is to observe sediment movement on sandy bottoms or the drift trajectory of suspended particles.
- Fin kick pivot: use fins as a pivot point — ideal for small-range rapid turns in macro photography
- Helicopter turn: keep both fins together, rotate the upper body first then follow with the lower body — suitable for confined spaces like reef crevices
- Glide turn: use hover momentum to coast into the target angle — suited to fish and large marine animal tracking
| Turning Technique | Best Used In | Stability Impact |
|---|---|---|
| Fin kick pivot | Macro / small range | Low |
| Helicopter turn | Reef / cave | Moderate |
| Glide turn | Large-scale tracking | Low |
Slow Approach
- Smaller bubbles disturb subjects less
- Positive buoyancy posture suits bottom-dwelling subjects
- Maintain at least 30 cm distance between photographer and subject
In water shallower than 25 meters, marine organisms react to divers primarily based on approach method. Bubble size and direction represent the dominant disturbance sources — rapid large bubbles routinely startle cautious fish species and invertebrates such as nudibranchs. The core philosophy of slow approach centers on fine buoyancy control: instead of using fin kicks to adjust position, the diver exploits the tiny vertical displacements caused by breathing to nudge closer without generating any propulsion force that might alert the subject.
The buoyancy hovering technique used by experienced underwater photographers requires maintaining position near a target while slowing the breathing cycle to 6–8 breaths per minute. Each inhale produces a small upward drift, each exhale a corresponding downward drift — the cumulative effect allows precise vertical adjustments without any fin movement. Once mastered, this technique enables photographers to work within 20 centimeters of shy subjects without causing any behavioral disturbance. I have observed a macro photographer remain within 15 centimeters of a coconut octopus for an entire 12-minute dive without the animal retreating once.
Visibility conditions fundamentally alter the approach distance threshold. In crystal-clear water exceeding 30-meter visibility, a subject may spot the diver from 5–8 meters away, requiring an extremely gradual approach from the outset. In murky water with visibility below 5 meters, the subject's detection distance shrinks to under 1 meter, allowing photographers to position themselves almost instantly without elaborate stealth tactics. Reading these conditions and adapting the approach speed accordingly is what separates consistently successful underwater photographers from those who consistently flush subjects.
The behavioral state of the target organism matters enormously in determining the acceptable approach distance. A fish actively feeding is significantly less vigilant than the same species resting in a crevice, and a mating pair engaged in a spawning event may tolerate unprecedented proximity. Reading behavioral context — body posture, fin positioning, eye contact with the diver — and adjusting approach distance accordingly is what separates photographers who consistently capture natural behavior from those who only get disturbed retreat shots.
Underwater photographers' approach strategy should also account for water temperature's effect on organism behavior. In thermoclines — boundaries between water masses of different temperatures — fish tend to linger longer and display more relaxed behaviors, allowing slightly more assertive approach angles. Below the thermocline, organisms typically increase their alert distance significantly, demanding much more cautious approach protocols.
Hands-Free Operation
Underwater photography has two fundamental demands: maintaining stable hover and operating the camera and lighting system — both competing for the photographer's hands. Any hands-free solution must simultaneously address buoyancy balance, or releasing the hands will cause posture changes as the center of gravity shifts.
| Hands-Free Solution | Buoyancy Effect | Stability | Best Use Case |
|---|---|---|---|
| Legs grip tank; both hands on camera | None | High | Reef / sandy bottom |
| Floating tray supports camera | Slight positive buoyancy | Moderate | Coral reef zones |
| Extended arm plus floating arm combo | Adjustable | High | Deep water / strong current |
In water shallower than 20 meters, the most direct hands-free method is to crouch on a reef or sandy substrate, find a stable point of contact, and let the legs bear the body weight so the upper body is completely free. In coral reef diving zones, crouching above the reef with the legs providing buoyant support — without actually touching or damaging coral — frees both hands to position the camera and adjust lighting angles and exposure settings. While working on a reef, the diver should always maintain a slight positive buoyancy, so that even if the grip accidentally releases, the body drifts upward slowly rather than dropping uncontrolled.

In strong current or when the subject is suspended mid-water column with no bottom reference available, a floating camera tray offers a more flexible solution. The tray itself carries slight positive buoyancy — typically +0.3 to +0.5 kg — which counteracts the weight of the camera and light arm assembly. Both hands then handle only the fine angular adjustments rather than bearing equipment weight. In strong current, adding a sliding counterweight bar to the tray allows real-time balance adjustment based on flow velocity to maintain steady hover without fighting the current. When selecting a tray, note that a large fluid-resistance surface area generates additional rotational torque in current, which paradoxically increases control difficulty rather than solving it.
Camera tray systems also differ in their attachment mechanisms. Some use a standard ball-joint arm system compatible with common underwater photographic equipment, while others feature proprietary quick-release mounts that speed setup and breakdown but limit equipment compatibility. I recommend choosing a tray system with standardized arm connections — this allows mixing components from different manufacturers and ensures that if one part fails in the field, replacement parts are more likely to be available from fellow divers.
- Tray positive buoyancy counteracts equipment weight — this is the core principle
- Strong current: use sliding counterweights for real-time balance adjustment
- With both hands free, the diver can simultaneously navigate and operate the camera
The essential value of small diving air tanks lies in finding the optimal balance between portability and endurance for underwater photography. Choose tanks no larger than 3 liters with a rated pressure of at least 200 bar; verify ballast and trim through actual in-water testing rather than estimation; and treat depth limits as the most non-negotiable safety parameter. Whether photographing coral reef macro subjects or tracking fish schools in open water, stable hover, precise gas management, and completely freeing both hands for camera operation together form the physical foundation of outstanding underwater imagery.


Leave a comment
All comments are moderated before being published.
Situs ini dilindungi oleh hCaptcha dan berlaku Kebijakan Privasi serta Ketentuan Layanan hCaptcha.