


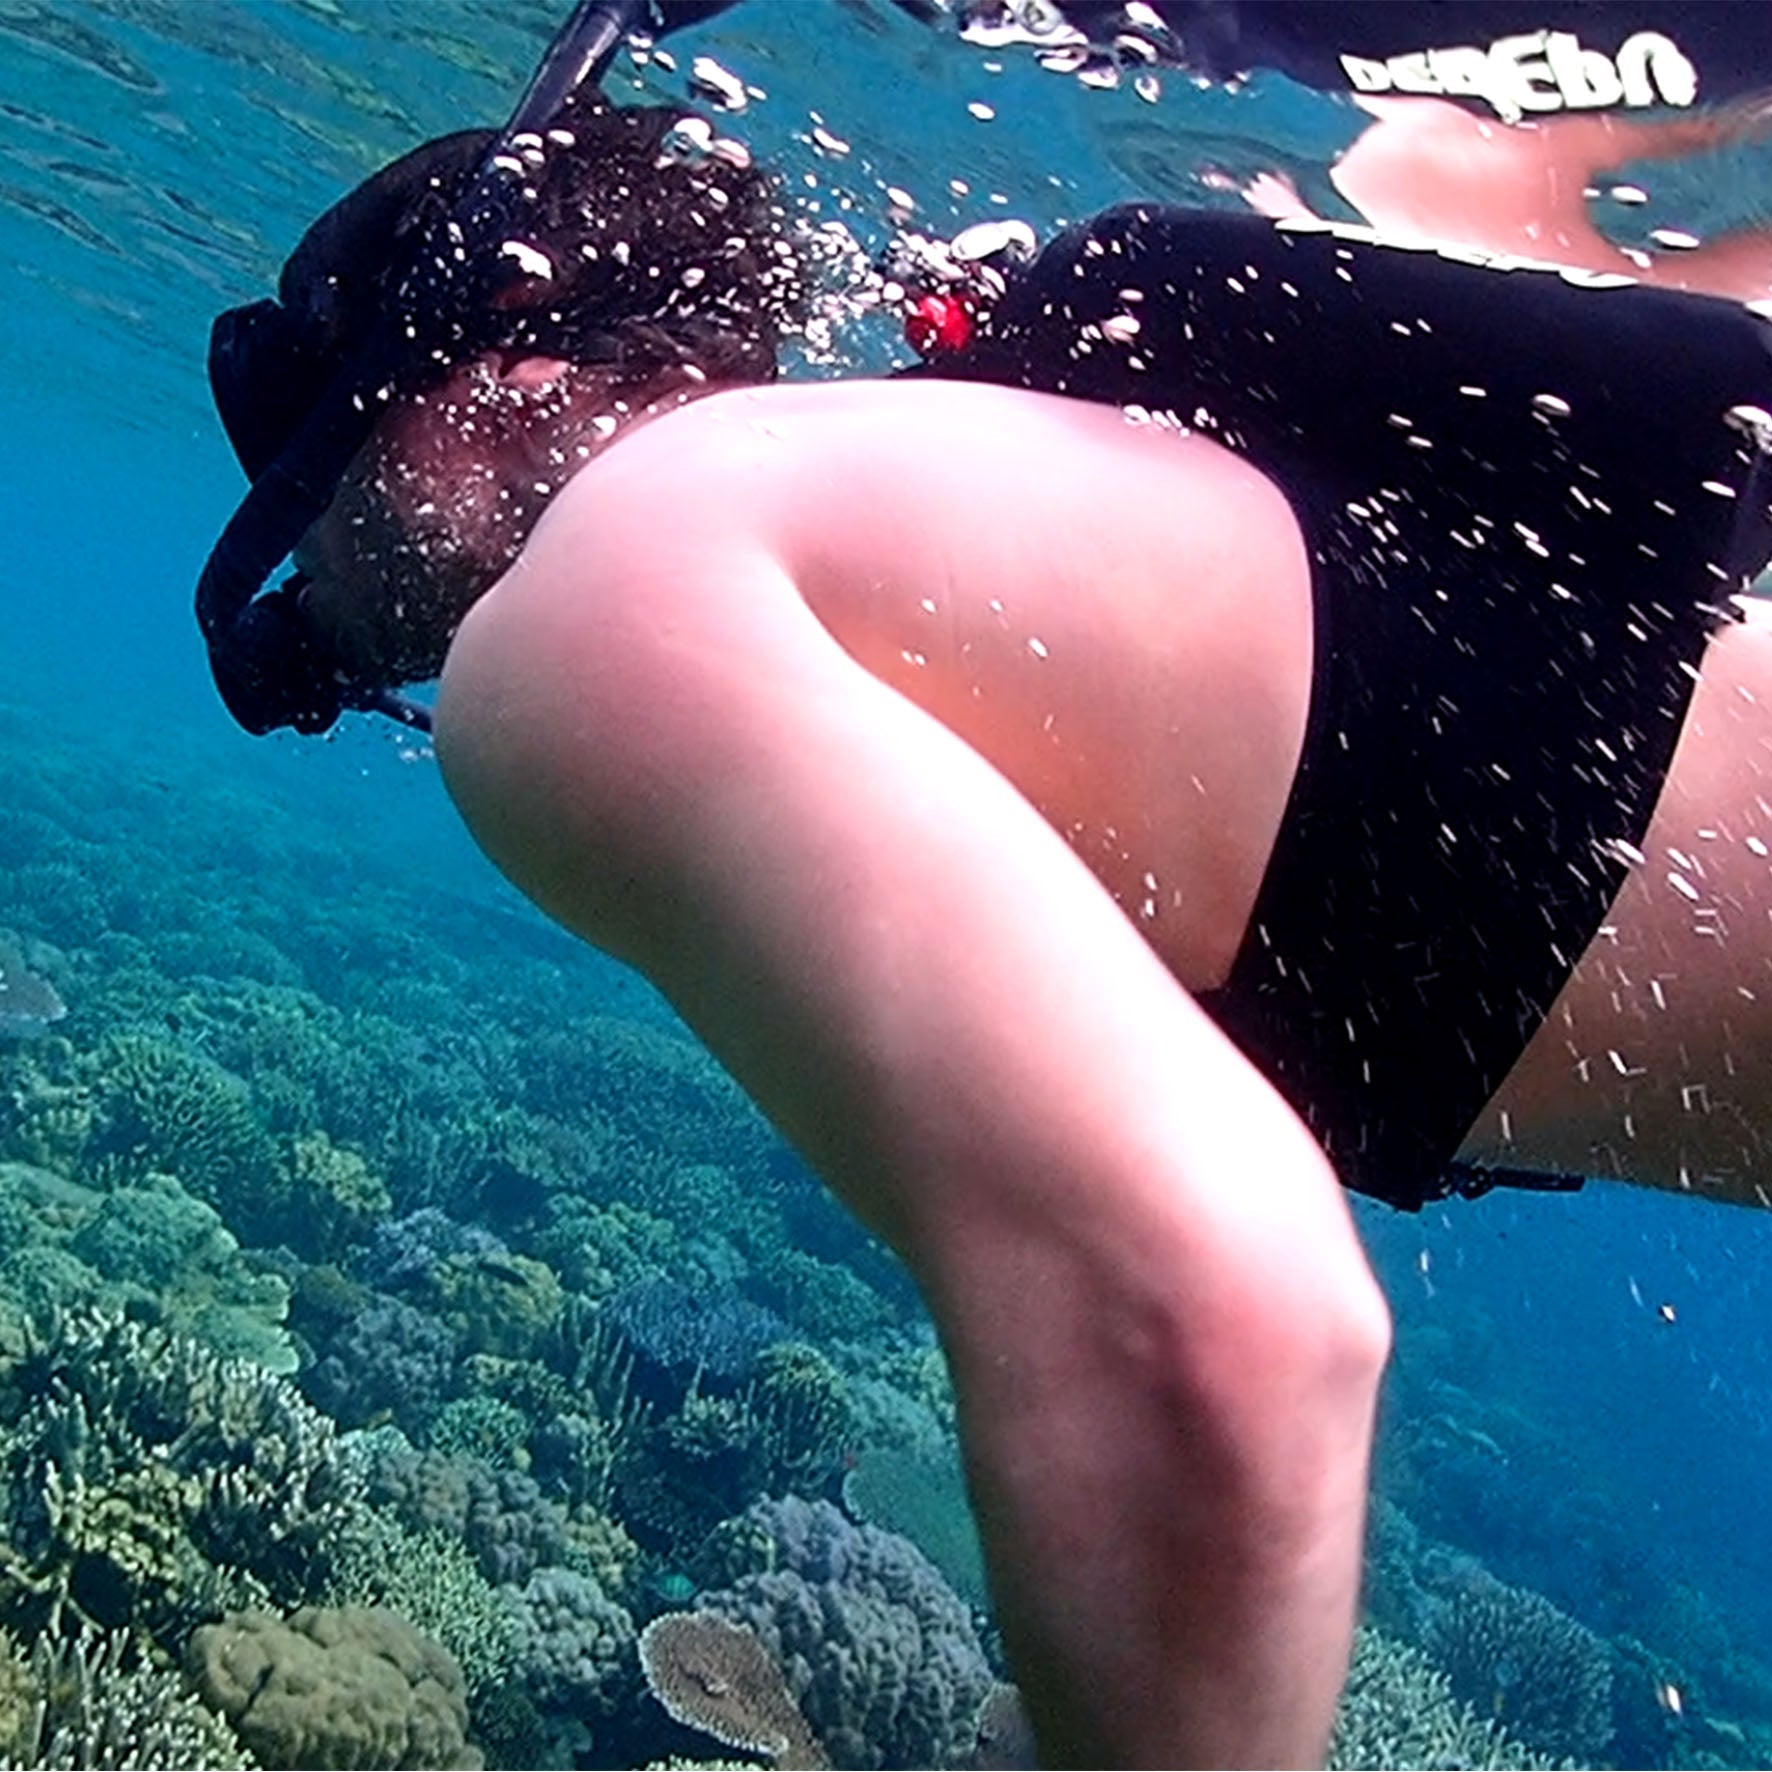
Selecting the best snorkeling gear requires focusing on three points: mask fit, snorkel drainage performance, and fin propulsion efficiency. High-quality masks should use a silicone skirt with a leakage rate below 5%; dry snorkels can reduce the risk of water entry by 90%; and a fin length of approximately 50–65cm is more labor-saving.
Beginners are advised to choose a combination of a full-dry snorkel + medium-short fins, with a price range of about 300–800 yuan, balancing safety and cost-effectiveness.

Fit and Vision
If you buy the wrong mask, the most common issue is not "blurry vision," but leaking, fogging, facial pressure, and discomfort when looking down at reefs. The inspection sequence provided by PADI is very practical: first, press the mask gently against your face for a suction test, then check if the skirt fits snugly all around, and after putting it on, turn your eyes forward, upward, downward, and to both sides to confirm the field of vision; meanwhile, prioritize basic configurations such as tempered glass, soft silicone double skirts, low profile, and adjustable headbands.
Check the Fit First
When putting on a mask, the first thing to look at is not how large the lens is, but whether the skirt can steadily press against the contact line of the face. PADI's fitting method is very clear: place the strap in front so it doesn't participate in securing the mask, let the mask rest gently against your face, and then inhale lightly through your nose; if the mask can stay in place by itself for a few seconds without continuous inhalation, the sealing foundation is appropriate. Next, check if the skirt fits uniformly along the entire edge of the face; there should be no lifting at the bridge of the nose, cheekbones, upper lip, or lower edge.
Many people pull the strap very tight as soon as they try it on, which actually reverses the problem. PADI mentions in its mask purchasing advice that over-tightening the strap can actually cause leaks. The reason isn't complicated: the silicone skirt is meant to be a continuous loop against the face; when excessive force is applied, the edges near the nose, under the eyes, and at the cheekbones will be pulled out of shape, allowing water to slowly seep through the smallest gaps. The truly correct state is: the strap is only responsible for keeping the mask in place, not for creating a seal through brute force. If there are obvious indentations on the forehead, eye sockets, or bridge of the nose after 30 minutes in the water, it usually isn't a problem with your face shape, but rather the size, skirt thickness, or strap tension was incorrect.
Materials also affect the fit. PADI lists soft silicone double skirts as a standard configuration; TUSA repeatedly highlights designs like round-edge skirt and pure silicone skirt in their Freedom One PRO, X-Plore, adult sets, and youth sets, aiming to make the contact surface more uniform and reduce hard pressure at the edges; several Cressi masks specify hypoallergenic silicone and secure seal, indicating that mainstream brands prioritize soft silicone and complete sealing.
A double skirt adheres more easily to the bridge of the nose and cheekbone transitions than a single-layer skirt, and the low-profile design brings the mask body closer to the face, requiring smaller movements when clearing water.
You can use this table for the first round of judgment:
| Fitting Position | Performance when Fitting | Common Issues when Improper |
|---|---|---|
| Upper Bridge of Nose | Snug but no pressure | Soreness upon wearing, swelling after minutes |
| Both Cheekbones | Near equal pressure | Tight on one side, loose on the other; leaking when turning head |
| Upper Lip/Nasal Area | Continuous fit after suction | Leaking starts after speaking or biting the mouthpiece |
| Lower Edge | No lifting when looking down | Edge floats open when looking at reefs or looking up for a boat |
| Strap Tension | Fixed with minor adjustment | Must be pulled very tight to stay stable |
PADI also requires that you don't just do a suction test when fitting, but also put a snorkel or second stage in your mouth and check again. The reason is practical: when the mouth is closed and the cheek muscles contract, the face shape changes slightly compared to when the mouth is empty. Some masks fit fine with an empty mouth but leak near the upper lip and nasal wings once the mouthpiece is held. This detail takes only an extra 20 seconds in the store, but it saves a lot of repeated mask removal and clearing after entering the water. The nose-pinching action should also be smooth, as both fingers must be able to steadily enter both sides of the nose pocket for pressure equalization; being too shallow, narrow, or hard will affect operation.
Face shape differences cannot be ignored. Products like TUSA's Kleio II and Ino specify they are suitable for smaller faces, while adult sets are marked Adult Medium to Large; TUSA's Mini-Kleio youth even notes 6–12 years old. These labels are not marketing jargon; they are telling you that the bridge span, skirt length, and frame height have been differentiated.
If small-faced users wear standard medium-to-large models, a common situation is that the upper bridge fits fine, but the lower edge and outer cheekbones cannot be pressed down; for people with wider faces wearing narrow versions, they will be pushed very tightly at the temples and under the eyes, becoming uncomfortable within 20 to 40 minutes.
You can go through these 6 points first:
-
It should stay in place for 3–5 seconds after a light inhale without continuous suction. This state is closer to the sealing performance when floating on the surface.
-
Don't over-adjust the strap; it's enough to keep it fixed. If it must be pulled dead tight, the size is likely wrong.
-
Try again after biting the snorkel, especially looking at the upper lip and nasal wings. PADI explicitly suggests doing this.
-
Pinching the nose with two fingers should be smooth. If not, you will be adjusting back and forth during short dives or equalizing.
-
People with beards should prioritize the upper lip contact line and trim the strip under the nose if necessary. PADI notes this improves the seal.
-
Prioritize soft silicone, double skirts, and round-edge designs; these configurations appear repeatedly on the TUSA and Cressi official pages.
Performance in the water can also help determine if the fit is appropriate. If the mask needs to be cleared every 5–10 minutes, it’s usually not because your technique is unrefined, but because a section of the contact line isn't secure; if it only leaks when looking up or down, it’s likely the curves of the lower or upper edges don't match; if one side always leaks, it's often due to uneven pressure on the left and right sides of the face.
You can also compress common problems into a list to check faster when fitting:
-
Nose bridge pressure after 1 minute: check frame height and nose bridge span.
-
Fits with empty mouth, leaks after mouthpiece: check upper lip, nasal wings, and nose pocket depth.
-
Lower edge gap when looking down: check the fit line from chin to lower edge.
-
Leaking on one side when turning head: check if strap lengths are equal and if the skirt is folded on one side.
-
New mask fogs easily: treat the inside of the lens first, then judge if it’s a fit issue; PADI recommends treating the inside of new lenses with a non-abrasive cleaning method.
When buying a mask, doing the fitting step thoroughly will make looking at vision, lenses, and appearance much easier later. PADI's process is also to look at seal and comfort first, then look around; in the official specs of TUSA and Cressi, terms like round-edge skirt, pure silicone, secure seal, and low volume appear much more frequently than color and patterns—the priority is clearly written.
Next, Field of Vision
A mask being "open" is not just about lens area. There are 4 directions you often look during snorkeling: straight ahead for fish schools, downward for reefs, sideways for companions, and upward for the boat or shoreline. PADI separates high volume and low volume in its mask purchasing guide: high volume brings a more open feel and easier access to better peripheral vision; low-volume, low-profile models are closer to the face, making water clearing more effortless.
If you spend most of your time floating flat on the surface, the openness straight ahead and to the sides will be more noticeable;
If you frequently look down at the seabed and occasionally do short duck dives, low-volume models with lenses closer to the eyes are usually more convenient.
Many people take "single lens = definitely larger field of vision" as a fixed conclusion, which is not entirely correct. TUSA Freedom HD and Freedom Elite are both single-lens, and both clearly state wide field of view in official specs; Freedom HD is also equipped with a 180° rotational buckle system, and the internal volume of Freedom Elite is marked at 220cc. However, TUSA Intega is a twin-lens model, and the official site still notes that due to its lens position and low-volume design, the field of vision is 20% wider than other TUSA masks, with an internal volume of 175cc.
Lining up the movements to try in-store is more useful than just staring at the packaging:
-
After putting it on, look straight ahead first to confirm the upper frame doesn't block your line of sight.
-
Rotate eyes downward toward your chest or fins. People with poor downward vision will frequently lift their heads to re-locate targets in the water.
-
Look left and right with your eyes, not just by turning your head; if there's significant blockage at the lens edges, you'll be slower to find companions.
-
Look up to confirm the upper edge won't cut off the boat bottom, buoy lines, or surface direction.
-
Try again holding the snorkel, as the field of vision and fit may change together with the mouth shape.
The 5 movements above align with PADI's logic and several brands' lens design descriptions.
The field of vision also has a strong relationship with the distance from the lens to the eyes. The official Cressi Focus description states it clearly: minimum eye-lens distance brings a field of vision in all directions; the same page mentions low internal volume, making water clearing easier. Cressi Calibro also mentions in official pages that the frame angle has been adjusted to keep the lens closer to the face, so even with low internal volume, the view remains very wide. It’s not just about "making the lens bigger," but about drawing the lens position near the eyes.
Lenses closer to the eye often provide a more complete picture;
Lenses farther from the eye may still be sufficient straight ahead, but the bottom and edges are more likely to be cut off by the frame.
Looking further, the field of vision is also affected by the skirt color. PADI mentions in its mask buying article that clear silicone skirts allow more light in, making many beginners feel the view is brighter and peripheral awareness is more open; dark, opaque silicone is often chosen by underwater photography users because it reduces glare. In other words, a clear skirt is more like "letting ambient brightness in," while a dark skirt is more like "blocking side light." In strong reflected sunlight at noon, a dark skirt is more stable; on cloudy days, in shallow waters, or for a first-time snorkel, a clear skirt is often more relaxing.
You can simply cross-reference skirt color with usage scenarios:
-
Beginners, shallow water, wanting a brighter view: look at clear skirts first.
-
Love taking photos, strong surface reflection, want to reduce side glare: look at black or dark skirts first.
-
If you're already prone to nervousness, a bright view is usually friendlier than a "pro-looking" dark one.
-
If you frequently wait to enter the water on a boat dive, a dark skirt makes looking at gauges and camera screens more stable.
The 4 points above can find corresponding support in PADI and Cressi product descriptions.
There is one more thing often overlooked: Vision is not just about the "lens being transparent"; whether it can steadily stay clear also counts. Cressi Calibro mentions a patented membrane design inside the nose pocket on its official page, which works to divert moisture from exhalation, reducing lens fogging; the same page mentions matte coating to reduce underwater reflections. Translated into user experience, it means when you are looking at fish, reef textures, or companion hand signals, the view won't be constantly interrupted by fog or glare.
If you break down "seeing clearly," you are actually looking at 3 layers:
-
Layer 1 is the range of view: whether front, bottom, and sides are complete enough.
-
Layer 2 is visual stability: whether vision becomes chaotic after moving, clearing water, or turning the head.
-
Layer 3 is brightness and reflection: differences brought by clear vs. dark skirts and matte treatments.
Looking at these 3 layers together is closer to daily use than just staring at "panoramic" or "ultra-wide angle." When buying, you can condense the order into 6 steps for ease and speed:
-
Put it on first, look down with eyes, confirm downward vision.
-
Look at both sides; don't judge by the front only.
-
Check if the lens is close to the face; low-volume models usually capture a more complete view.
-
Check single vs. twin lens without preconceptions.
-
Choose clear vs. dark skirt.
-
Finally, check coatings, appearance, and color combos.
Looking at PADI, TUSA, and Cressi official descriptions together, the sequence rarely bypasses the first 4 steps.
What you're really looking for is not the lens that "looks big" in an ad photo, but the one where, once on, the front, bottom, and sides are sufficient, looking down isn't awkward, and the view doesn't immediately scramble after clearing. In the water, whether you can easily find fish, reefs, companions, and the boat's direction is much more practical than whether the frame looks 5mm wider or narrower.
Choose by Person
The same mask won't simultaneously suit nearsighted users, 7-year-old children, narrow-faced adults, and medium-to-large-faced travelers. Official product pages already make this clear: TUSA has a 6–12 year old youth line, Cressi has a 7–13 year old junior line; adult sets will specifically state Adult Medium to Large, showing that sizes are not as crude as "child and adult tiers." PADI also places the mask buying sequence on fit, comfort, and vision rather than color and shell.
First, check vision status. People who normally wear glasses cannot stuff them into a mask; PADI's explanation is clear—glasses interfere with the mask fit, and if the seal isn't done well, leaking will become frequent. The other path is to use replaceable lenses or optical correction inserts. TUSA's universal correction lens kit lists sets of -2.0, -3.0, -4.0, -5.0, -6.0; Cressi's negative lenses range from -1.0 to -6.0, going up in 0.5 increments; for presbyopia or close-up reading needs, Cressi also has positive degree solutions from +1.0 to +3.0, also increasing by 0.5. The finer the degree, the smoother it is to look at gauges, fish textures, and companion hand signals underwater.
You can filter by this set first:
-
People who only wear glasses on land and don't want contacts in the water: check if lenses can be swapped first, not the frame color.
-
People with significant differences in vision between eyes: prioritize twin-lens solutions where left and right lenses can be chosen separately for better adaptation. Cressi's negative lenses are separate for left and right.
-
People who struggle to see close: check for support for +1.0 to +3.0 reading lenses; otherwise, viewing camera parameters or small gauges will be difficult.
-
People who only vacation once or twice a year: ask the dive center for lens solutions; PADI's advice is also to confirm compatibility at a dive center first.
-
For those already used to wearing contacts: PADI instructor articles mention daily disposables are easier, as losing one is easy to handle.
Next, check age and face width. A child's mask is not just a scaled-down adult version. TUSA's Mini-Kleio youth line says 6–12 years old; Cressi's Estrella Tx Mask Junior says 7–13 years old; there are models specifically for younger age groups, like the Cressi Moon Mask for 5–10 years old. Behind the age numbers, changes include not just frame dimensions, but also nose bridge position, forehead contact area, and pressure points on the skirt edge. When children wear adult masks, common issues aren't "a bit big," but the lower edge floating up when looking down, or the nose pocket being too deep, making pinching difficult.
If you have a narrow or small face, adults shouldn't force a standard large size. TUSA's Kleio II is clearly stated as being for smaller, more narrow faces, suitable for small-faced women and youth; Ino also specifies it's better for smaller faces. Conversely, adult sets like TUSA's Liberator and Powerview note Adult Medium to Large faces, showing that manufacturers branch out by face type. If you ignore this when buying and rely on pulling the strap tight at the sea, your face will be pressured, and the skirt will deform more easily.
When buying for children, teens, or small-faced users, follow this order:
-
Age ranges like 5–10 years old, 6–12 years old, and 7–13 years old must match first; don't mix up youth and junior labels.
-
The nose pocket must leave space for two-finger operation; if a child is uncomfortable with ear pressure, awkward pinching leads to constant mask removal. PADI also includes operational familiarity in its mask selection.
-
Small-faced adults should look at low-volume, small-profile models first. Kleio II and Ino both list low volume in product descriptions.
-
For a teen's first snorkel, prioritize tempered glass and pure silicone skirts. TUSA youth lines specify ClearVu tempered glass and Pure Silicone Skirts.
-
After putting it on, eyes should ideally fall in the center of the lens area. Cressi's Piumetta Kid describes this in detail, emphasizing eyes are perfectly centered within the glass display.
Beyond that, categorize by usage scenario. Travelers and frequent divers have different mask needs. Low-volume models like Cressi's F1 and Focus include "lens closer to eyes, wider vision, lighter weight, faster adjustment" in their specs; TUSA's Intega notes a 20% wider field of vision than its other masks, and the Freedom HD has a 180° rotational buckle system to accommodate more face shapes.
This group is better for adults buying for themselves:
| Your Situation | Look at First | Look at Later |
|---|---|---|
| Medium to Large Face | Does it state Adult Medium to Large, strap adjustment range | Frame color |
| Small/Narrow Face | Does it specify smaller faces, low volume | Lens coating |
| Travel/Storage | Low profile, lightweight, quick-adjust buckles | Complex accessories |
| Reading difficulties underwater | Lens degree range, separate left/right availability | Outer styling |
Judgments in this table can all find corresponding content in brand descriptions.
The Snorkel
A snorkel is not an accessory that "just needs to inhale." According to the upper limit of EN 1972, the length of an adult split-type snorkel should not exceed 380 mm, and internal volume should not exceed 230 ml; for children, these are 350 mm and 150 ml respectively. In studies, a traditional J-tube with an inner diameter of 20.5 mm increases total breathing resistance by about 6.5%; the sensation is often overestimated by users, so when buying, one should look at tube dimensions, valve structure, and mouthpiece comfort more than "number of features."
Tube Dimensions
When buying a snorkel, don't focus on drainage valves and appearance first; look at length, internal volume, and inner diameter. EN 1972 classifies adult split snorkels into larger lung capacity levels, with a total internal volume upper limit of 230 ml and a length upper limit of 380 mm; smaller lung capacity levels, mostly for children, have a total internal volume upper limit of 150 ml and a length upper limit of 350 mm. The standard also specifies that length L isn't just measuring the whole tube, but the linear distance from the center of the mouthpiece opening to the lowest point of the air intake.
Length first affects the height of the tube exposed when looking up, and then the air exchange path. PADI's equipment descriptions state clearly that the tube should have an appropriate diameter, length, and shape, and bends should be smooth to reduce breathing resistance. As length increases, the margin of the tube above the head might increase slightly, but the path air travels with each breath also lengthens; DAN also reminds that the inner diameter and length of the snorkel affect functional dead space, where the gas has a higher CO2 ratio; if the exchange volume is insufficient, one will feel more like accelerating their breathing.
Looking at data in a table makes it easier to judge the differences between adult models, child models, and common research samples. The first two columns in the table below are from EN 1972, and the research column is from experimental data published in PubMed-indexed journals in 2021.
| Item | Adult Split-type | Children Split-type | Common Adult Sample in Research |
|---|---|---|---|
| Total Internal Volume Limit | 230 ml | 150 ml | — |
| Length L Limit | 380 mm | 350 mm | — |
| Inner Diameter | No single fixed value given | No single fixed value given | 20.5 mm |
| Resist. Change | Affected by size and shape | Affected by size and shape | Total resistance increase 6.5% ± 3.2% |
| Ventilation Change | — | — | MVV12 decreased by 6.0% ± 3.7% |
Looking closer at the research, it's nearer to the buyer's sensation. That experiment recruited 19 volunteers using a classic J-snorkel for comparison; when using a 20.5 mm inner diameter sample, the 12-second maximum voluntary ventilation was 152 ± 38 L/min, 6.0% ± 3.7% lower than without a snorkel; total breathing resistance was 457 ± 83 Pa·s·L⁻¹, 6.5% ± 3.2% higher than without. The same research mentioned that for classic J-snorkels with an inner diameter reaching over 19.5 mm, extra resistance mostly falls between 3% and 16%. In buyer language, adult casual snorkeling is not suitable for blindly pursuing ultra-thin diameters; too thin feels stuffy, while too thick brings the tube volume up with it.
Beyond length, include "total internal volume" in the same shopping list. EN 1972 notes under the table that total inner volume represents the dead space volume in respiratory exchange. DAN explains that dead space doesn't mean you can't breathe, but rather a portion of the air you just exhaled stays in the upper airway and snorkel; if the next tidal volume isn't large enough, the proportion of fresh air decreases. Therefore, buying a "robust-looking" snorkel isn't necessarily more comfortable than a model with more reasonably kept dimensions.
Many people also overlook bend angles. PADI uses the description smooth, rounded bends, meaning transitions should be smooth without making the airflow turn sharp corners. If you pick up a model with many tube creases, a very thick top cover, and a long corrugated hose at the bottom, it looks "more accessorized"; after putting it in your mouth and gently turning your head 30 to 45 degrees, some will immediately feel the mouthpiece angle is off, pulling the corners of the mouth or the mask strap.
The following set of checks is more useful than memorizing model numbers. Once you have a new snorkel and are wearing your mask, perform a static test for 1 to 2 minutes, then perform 3 to 5 head movements (tilting up, down, and turning side to side). This will usually filter out half of the unsuitable models:
-
When the mouthpiece is inserted, does the tube opening naturally rest near the midline of your mouth? PADI suggests that the mouthpiece should be neither too large nor too small.
-
Does the top of the snorkel clear the top of your head sufficiently, yet not so long that it wobbles noticeably when you look up? The upper limit for adult detachable models is 380 mm.
-
Is the corrugated lower hose too long? A long flexible section increases the swing range, making it easier to pull on the mouthpiece when turning your head. PADI lists the "flexible corrugated bottom portion" as an optional feature, not a requirement.
-
Does the curve of the snorkel body run close to the side of your head, or is it too far away? If it is too far, surface drag and the sensation of wobbling will be more pronounced. PADI notes that the attachment system should allow for adjustments to ensure comfort.
When buying for children, you cannot afford to be lazy with sizing. EN 1972 has already categorized small lung capacity classes separately; 150 ml/350 mm is not as simple as shortening an adult model, but rather keeping both dead space and length within a much smaller range. Using an adult snorkel for a teenager or someone with a smaller mouth leads to two problems: first, the length and internal volume are too large; second, the mouthpiece size is often too big. This is why PADI places "comfortable mouthpiece, not too small or big" at the forefront of its equipment pages.
Take another look at the testing conditions in the standards to better understand why manufacturers shouldn't just claim "smooth breathing." The EN 1972 airflow resistance test connects the mouthpiece to a breathing simulator using a sinusoidal breathing pattern of 25 cycles/minute at 2.5 L/cycle. It requires that both inhalation and exhalation peak breathing pressures fall within the range of ±10 mbar. When you see these numbers, understand them this way: the body size, curvature, valve structure, and connection points must all serve the single goal of whether the user can breathe smoothly in real-world surface conditions.
Choosing the Structure
The structure of a snorkel is more than just a matter of "whether there is a valve." EN 1972 defines a detachable snorkel as consisting of a flexible or rigid tube plus a mouthpiece, with optional parts including valves and splash guards. The standard also specifies that it applies to independent snorkels and not to integrated full-face masks where the snorkel opening is inside the mask. Buyers should clarify this range first to avoid comparing traditional, semi-dry, and dry snorkels as the same category of product.
PADI explains common structures clearly: a standard configuration typically includes a properly sized tube, an adjustable attachment, and a comfortable mouthpiece. Optional structures include purge valves, corrugated hoses or swivel joints, top splash guards, submerged closing devices, folding structures, and quick-release buckles. In other words, most price differences on the market often come from the combination of these additional structures rather than the ability to "breathe" itself.
Viewing the 3 most common types in a single table makes it easier to decide which one to buy.
| Type | Top Structure | Bottom Structure | Suitable Scenarios | Things to Note |
|---|---|---|---|---|
| Traditional J-Tube | No closure, simplest opening | May lack purge valve | Calm water, users who can clear water | Water entry depends on sea state and head angle |
| Semi-Dry | Splash guard, angled top, deflector | Commonly has purge valve | Light waves, boat diving, leisure snorkeling | Not completely waterproof |
| Dry | Top float valve | Commonly has purge valve | Beginners, choppy water, frequent looking down | More complex structure, more maintenance points |
In this table, "top splash guard" and "top closure" do not mean the same thing. PADI refers to the former as water-exclusion devices, such as slits, vents, covers, and angles, used to reduce water splashing into the top during surface chop. The latter is referred to as water-blocking devices, which close the tube opening upon submersion. Standards have even stricter requirements for closure valves: they should only close when submerged, and upon surfacing, they should open easily on the first exhalation. If you buy a dry snorkel that requires two or three hard blows to restore airflow after surfacing, the design is not user-friendly.
Next, look at the lower end. PADI describes the purge valve as a "self-draining purge valve," usually located below the mouthpiece, designed to help drain water from the tube. Corrugated hoses or swivel joints allow the mouthpiece to swing aside when switching to a second-stage regulator. PADI's 2020 equipment articles provide specific examples: some models use dual purge valves, others add a splash guard at the top, and some feature an externally corrugated but internally smooth bottom section to allow water to drain faster.
The more structures there are, the more you must check connections and durability. EN 1972 requires a tensile test of 30 ± 2 N maintained for 10 seconds on joints; they should not detach. The requirement for the attachment is not just that it "holds," but that the snorkel can be moved away from the mouth and replaced without moving the mask, and it should be adjustable. When testing in a store, wear the mask as well, turn your head left and right 3 to 5 times, and simulate looking up for a boat and down for fish. If the clip is too loose, it will slide down within minutes; if too tight, adjustments in the field will be slow.
The following comparison is suitable for the first round of screening when purchasing:
-
If the sea is mostly calm and you are mainly floating in shallow water for 20 to 40 minutes, a traditional or semi-dry model is usually sufficient. PADI lists top splash guards as "reducing water entry," not "completely sealing."
-
If you get nervous easily or are often hit by spray, a dry snorkel is more convenient, provided the valve restores airflow on the first exhalation.
-
If a single snorkel has a top closure valve, a bottom purge valve, a long corrugated hose, and a large splash guard, the number of parts increases significantly, as will the cleaning and inspection steps. This judgment is based on PADI's list of optional structures and the valve/joint requirements in the standards.
-
Folding models are better for storing in BCD or wetsuit pockets; PADI includes these in optional structures, and technical divers often use them as backups.
DAN's advice on structure is more focused on practical use. It notes that a snorkel allows one to swim face-down on the surface without frequently lifting the head and saves tank gas while on the surface; however, the same article points out that snorkels increase underwater drag, can pull on the mask, and pose a risk of entanglement with hair or seaweed. Understanding this structurally is simple: top-heavy components, flared splash guards, and excessively long side-mount structures might not stop you from diving, but they will likely make the "drag" more noticeable.
Complex structure does not equal easier water time.
For many leisure snorkelers, 1 less redundant part, 1 less wobble point, and 1 less clearing action is often more useful than one more marketing term. This judgment is an extension based on PADI's structural classifications, EN 1972's valve and joint requirements, and DAN's warnings about drag and pull.
The testing methods in the standards can be used as a yardstick. EN 1972 requires breathing resistance tests to be connected to a simulator using a sinusoidal pattern of 25 cycles/minute at 2.5 L/cycle, with peak pressures within ±10 mbar. Practical tests also require experienced users to complete at least 2 dives to a depth of at least 1 m, recording comfort, joint security, mouthpiece/attachment adjustment, breathing ease, and valve opening on the first exhalation.
End with a shorter checklist to go through when buying to speed things up:
-
Check the top: Is it a splash guard or a closure valve? They have different functions. PADI divides them into water-exclusion and water-blocking types.
-
Check the bottom: Is there a purge valve? Does the valve hit your chin? PADI describes the purge valve as being located below the mouthpiece.
-
Check the connection: Can the attachment be adjusted? Can you move and reset the snorkel without moving the mask? The standards have explicit requirements for this.
-
Check the joints: Don't just bend them; perform head movements. The standards give joints a strength test of 30 N for 10 seconds.
-
Check storage: Does it need to fold or have a quick-release? PADI lists folding/collapsing snorkels and quick-connect attachments as optional structures.
Service Life
Many people test a snorkel only to see if they can "grip it," ignoring how the mouth and jaw will feel after 20, 30, or 45 minutes. PADI's fitting method is specific: place the snorkel on the left side of your ear, check if the mouthpiece can be held while the jaw is relaxed, then see if the lips seal effortlessly, whether there are hard edges against the gums, and if the mouthpiece is centered. EN 1972 also requires that parts contacting oral mucosa be smoothed, materials not be known irritants, and the tube ends not protrude into the mouth.
Mouth feel is not just about comfort; it affects how long you can stay on the surface. DAN data mentions that temporomandibular joint (TMJ) discomfort is reported by about 15% to 20% of snorkelers and scuba divers, with common triggers including ill-fitting mouthpieces, jaw protrusion, biting too hard, or pre-existing grinding/dental issues. Beginners are more likely to bite down hard, leading to aching in front of the ears, temples, and masseter muscles over time.
Before buying, perform a static check for 1 to 2 minutes based on the following items before deciding to order:
-
Once held, can your upper and lower lips close naturally without constant pursing?
-
Is the jaw relaxed? Do you feel like your teeth are constantly clenched?
-
Does the edge of the mouthpiece rub against your gums or the inside of your mouth? Even 1 noticeable hard point is usually amplified once in the water.
-
Is the mouthpiece centered when placed in the mouth? If it slants left or right, your jaw will exert uneven force after floating for 15 minutes.
-
Once attached to the mask strap, does the tube pull the mask edge outward when you turn your head? PADI specifically recommends wearing the mask together when checking angles.
Next, look at the connection position and weight distribution. Standards require the attachment device to allow users to move the snorkel away from the mouth and back without moving the mask. Connecting parts must also pass a tensile test of 30 N for 10 seconds without detaching. In the store, put on the mask and simulate looking at fish, looking up for a boat, and turning to talk to a buddy, doing each 3 to 5 times. If the clip is too tight, it's slow to adjust; if too loose, it may slide down when moving your head in water.
Many ask if a softer mouthpiece is better. In practice, too hard rubs the mouth, while too soft may lack support, causing one to subconsciously bite harder. Standards don't provide "hardness values"—a parameter easy for consumers to see—but they do make "retention in the mouth" and "smooth oral contact surfaces" explicit requirements. In buyer's terms: you shouldn't need to practice your bite for a snorkel; your mouth and jaw shouldn't be constantly working to hold it.
The following sensations usually indicate a snorkel is not suitable for continuous use:
-
Less than 10 minutes into the water, your jaw or the area in front of your ears starts to ache.
-
When re-inserting after clearing, you always feel the mouthpiece pushing forward.
-
If you say a word and bite back, you have to search for the position again.
-
Upon surfacing, as soon as you relax your mouth, it leaks air because your lips can't wrap around it.
-
After a snorkeling session, tooth marks are deep and don't fade after 30 minutes.
If you already have TMJ discomfort, grind your teeth, wear a mouthguard, or are undergoing orthodontic treatment, DAN suggests prioritizing a more suitable mouthpiece, and considering a customized one if necessary, rather than trying to adapt by "biting harder."
The impact of maintenance on mouth feel usually doesn't show until the second or third trip. PADI recommends rinsing with fresh water after each use, storing in a cool, dry place away from direct sunlight, and not keeping it next to neoprene gear to prevent staining the silicone. DAN also reminds that gear needs regular inspection for wear; maintenance cycles vary by equipment, but daily cleaning and storage cannot be skipped.
Don't just rinse the exterior. Areas where debris accumulates are typically in 4 places: inside the mouthpiece, the edges of the purge valve, the folds of the corrugated hose, and where the clip contacts the tube. Salt crystals, sunscreen, sand, and lipstick residue will make the surface rough, the mouthpiece less comfortable, and the purge valve slower to rebound. Rinsing with running fresh water for 30 to 60 seconds upon returning to your room, then lightly shaking it to clear water from the valve and folds, is more effective than just soaking it in a basin.
You can divide maintenance into three levels, which aren't complicated to do:
-
After each use: Rinse with fresh water, especially the mouthpiece and valve; hang to air dry in a ventilated area.
-
Before each outing: Squeeze the mouthpiece to check for hardening, cracks, or whitening; pull the clip to ensure it won't slide on its own. DAN advises regular wear checks.
-
After each trip cycle: Check if the purge valve is deformed, if there are fine cracks in the hose folds, and if the storage case has a musty smell or salt stains.
-
Long-term storage: Keep in a cool, dry place away from direct sun and heavy gear. PADI also mentions keeping it away from neoprene to reduce silicone staining.
Service life doesn't have a "fixed number of months" universal to all brands. Standards define safety requirements and test methods; PADI and DAN focus on cleaning, inspection, and storage, rather than a uniform date such as "must replace after 12 months." A more practical approach is to look at frequency of use and signs of aging: using it 1 or 2 times a year for a tropical holiday results in a different wear rate than weekly use, long-term sun exposure, or frequent packing in suitcases.
Which changes indicate it's time to switch from "keep using" to "prepare to replace":
-
Cracks appear on the mouthpiece edge; even just 2 to 3 mm will become more noticeable when biting in water.
-
The silicone begins to harden, rebounds slowly when pressed, or turns white.
-
The purge valve doesn't close securely, with a backflow sensation even after a light blow.
-
The connection clip can no longer be adjusted tightly and slides down after minutes of swimming.
-
Creases appear at the tube bends, and it remains deformed when laid flat.
-
Persistent odors after cleaning and drying indicate residues have entered the crevices.
Note one more point: biting the mouthpiece for 5 seconds at a counter won't reveal much. Standard performance tests require the user to perform at least 2 dives to at least 1 meter, recording comfort, connection security, mouthpiece adjustment, breathing ease, and valve function. While buyers can't replicate full testing in a store, they can extend the experience: wear the mask and hold it for 2 to 3 minutes, walk around, turn, look up and down before deciding to buy.
Power and Portability
Common travel-sized short fins are about 16.5–21.4 inches long, and folding snorkels can fit into a 7 × 4 × 2.5 inch space; longer freediving fins are commonly 31–38 inches, providing more displacement per kick but proving more troublesome for luggage space, airport carrying, and shore walking. For most holiday snorkelers, propulsion efficiency, foot feel, and volume should be considered together, rather than just "longer" or "lighter."
Fins
Among snorkeling gear, fins usually create the first noticeable difference in experience. they govern propulsion, steering, shore donning/doffing, luggage space, and calf exertion. Public data shows freediving long fins are commonly 31–38 inches (79–97 cm), while travel-style open-heel fins can be 18.31 inches and 2.54 lb. Mid-length full-foot models often have blades around 35.5 cm. While both "can swim," the leg feel will be very different after 30 minutes vs. 60 minutes; similarly, 16.5 inches and 31 inches occupy very different luggage space.
The table below compares common types, clarifying size, weight, and usage environments:
| Form | Public Spec Example | Common Environment | Travel Experience |
|---|---|---|---|
| Short Blade Open-Heel | Cressi Palau SAF: Short blade, covers EU 35/38–44/47; retail page has 16.5 inch version info | Hotel beach, floating platforms, short swims, family sharing | Fits easily into small suitcases, quick on/off |
| Full-Foot Mid-Blade | Mares Avanti Superchannel FF: Blade 35.5 cm, size 42/43 approx. 0.7 kg | Warm water, shore snorkeling, personal use | Saves more space than long fins, more consistent foot feel |
| Travel Open-Heel | Scubapro GO Sport: Length 18.31 in, weight 2.54 lb, labeled to fit IATA carry-on | Air travel, boat dive sites, need more secure wrap | Better balance between storage and performance |
| Open-Heel Channel Blade | Mares Avanti Superchannel OH: Thrust area 730 cm², single fin approx. 0.9 kg | Slight current, desire for more distinct propulsion | Better thrust, more noticeable luggage space and weight |
Length first determines the propulsion style. PADI makes it clear that long fins convert each kick into more forward displacement because of the larger surface area pushing more water; however, it also warns that stiffer fins are only easier to utilize when leg strength and technique are mature. For leisure snorkeling, many do not need 79–97 cm freediving blades; the 35–37 cm range already covers scenarios like shore watching, reef edge cruising, and boat entries.
Material also changes the foot feel. PADI divides common materials into plastic, fiberglass, and carbon fiber: plastic is more durable and lower priced, but with average rebound and shape retention; fiberglass is in the middle; carbon fiber is lighter, more elastic, and more expensive. Leisure snorkeling buyers mostly don't need carbon fiber because a typical session is only 30–60 minutes in shallow, warm water, where impact resistance, price, and packing size are more practical than extreme rebound.
Screen by scenario first to save unnecessary comparison:
-
Island holiday, hotel beach, 30–45 minutes daily swim: Prioritize short blades or mid-length full-foot models for easier ankle movement.
-
Frequent boat entries or rocky shores/pier steps: Open-heel models are more convenient, and strap operation is faster.
-
Family sharing, rentals, or multiple people swapping: Foot pockets like the Palau cover 3–4 adjacent sizes, with public sizing up to EU 32–47.
-
Tight luggage allowance, trying to fit the set into a 20–22 inch carry-on: Look at short blades and travel models, not freediving long fins first.
Translating public parameters into purchasing language makes judgment easier:
-
Want a lighter footprint in the case: Look at the 16.5–18.3 inch range.
-
Want moderate propulsion that's easy on the legs: Look for mid-length blades and soft to medium stiffness. The Mares FF public page lists medium.
-
Want easier walking on shore and switching on the boat: Look for open-heel models and bungee straps.
-
Want shared use: Check if the foot pocket covers 3–4 adjacent sizes and if the range goes up to EU 47.
Many treat "longer" and "stiffer" as better, but fins aren't compared that way. PADI's freediving fin notes are blunt: stiff fins are more powerful but require leg strength and technique; in leisure snorkeling, swimming speed isn't always the first priority. Cruising coral zones, making small turns near rocks, looking up for buddies, and repeatedly entering via boat ladders—fin length, weight, pocket structure, and blade rebound together determine if the fins are handy. In public product pages, 0.7 kg, 0.9 kg, and 2.54 lb don't look like huge differences, but you feel it when carrying them to the entry point.
Looking at travel specifically: Scubapro explicitly labels the GO Sport as fitting IATA carry-on, and Cressi calls the Palau SAF "short and easy to pack." For tourists taking short-haul flights, swapping islands, or changing boats, whether fins fit into a bag with a mask, snorkel, and rash guard is a more frequent concern than paper thrust. If you go out to sea 2–4 times a year, you'll likely use travel models more; if you swim 3 or more times a week in open water, look at longer, larger-surface models.
Powered Gear
With powered gear in a snorkeling list, the first things to look at aren't the shape or the speed buzzwords in the ad, but battery Wh, machine weight, run time, and airline approval. The FAA has drawn clear lines for passenger lithium batteries: under 100Wh is generally for personal use; 101–160Wh requires airline approval, with a max of 2 spares per person; over 160Wh cannot be carried by regular passengers. Spare batteries must be in carry-on luggage, with terminals protected against short circuits.
Buyers often see "30-minute endurance," "60-minute endurance," or "Airline Approved." Read the specs together. In Sublue's official public page, Swii lists 98Wh, ~30 min battery, 3.8kg weight, 3.6km/h max; Mix lists 100N thrust, 30 min, 3.5kg, 5.4km/h; Navbow+ reaches 140N, 60 min, 4.5kg, 7.2km/h; Tini gives 98Wh for ~45 min, 158Wh for ~55 min, and ~2 hours for a full charge.
The following items are more useful when compared on the purchase page than just staring at "speed":
-
The 98Wh tier is better for flight scenarios, typically avoiding the extra approval process for 101–160Wh; standard batteries for Swii and Tini fall into this tier.
-
158Wh has crossed into the FAA's 101–160Wh range; flying with it depends on more than the device page—it requires carrier approval, and spare quantities are limited.
-
The weight difference between 3.5kg and 4.5kg is felt when carrying it to the pier, walking from the beach to the water, or finding a place for it on a boat. Mix is approx. 3.5kg, Swii approx. 3.8kg, and Navbow+ approx. 4.5kg.
-
When a page says "30 minutes," it's usually nominal endurance under average conditions. Official notes state that actual time is affected by speed, water temp, and body weight. Surface currents, frequent acceleration, or multiple people sharing will drop the remaining power faster.
Seeing public specs in a table makes it easier to judge which tier you need:
| Device Example | Battery/Endurance | Weight/Speed | Suitable Travel |
|---|---|---|---|
| Swii | 98Wh / ~30 min | 3.8kg / 3.6km/h | Flight + Leisure beach snorkeling |
| Mix | ~30 min | 3.5kg / 5.4km/h / 100N | Want faster thrust while keeping weight low |
| Tini | 98Wh ~45 min; 158Wh ~55 min | Dual-boost up to 2m/s (4.5mph) | Near-shore fun, balance of endurance/speed |
| Navbow+ | ~60 min | 4.5kg / 7.2km/h / 140N | Longer duration/distance, tighter luggage space |
After looking at the table and returning to the usage scenarios, many decisions become clear. For family holidays, hotel beaches, and short boat swims, most don't need the 140N or 7km/h+ paper specs; instead, a 3.5–4kg body, 98Wh battery, and a 2–4 hour recharge are closer to actual travel needs. Tini official states the 98Wh version is approx. 45 min, the 158Wh version is approx. 55 min, and it supports approx. 2-hour fast charging; Tini spare battery page recommends charging at 20°C ± 5°C.
Safety and maintenance can't be missed. Sublue product pages mention BMS battery management, overload protection, power display, and quick-swap batteries multiple times. The Mix page notes a 10-second quick-swap battery; Swii notes automatic shutdown due to overload protection if the propeller is entangled; Navbow+ has OLED display for power, runtime, depth, temp, and compass. If a buyer can't see remaining power before diving, or if the swap takes too many steps, the second round of use often becomes messy.
Check these items one by one on the purchase page:
-
Does the page list the Wh value, not just "mAh"? Flight rules are based on Wh, not on "the power looks big." The FAA also provides Wh conversion guidelines.
-
Is the spare battery detachable? FAA/TSA rules require spare lithium batteries to be carry-on only, not in checked bags.
-
Do terminals have protective caps, separate battery bags, or original boxes? The FAA explicitly requires short-circuit protection—using original packaging, taping over terminals, or using individual protection bags.
-
Does the page list charging temperature and duration? Tini's battery page gives approx. 3.5 hours and 20°C ± 5°C, showing the manufacturer has clear ranges for charging conditions.
-
Is the buoyancy state mentioned? Navbow+ is listed as slightly positive; Mix notes an optional buoyancy module. Whether the gear floats or sinks after release affects hand-swapping and photography.
Before departure, also check the airline's own page. The FAA/TSA provides the general US framework, but carriers write their own execution details. United's public page allows up to 2 batteries under 160Wh; EVA's dangerous goods page allows up to 2 spare lithium batteries (100–160Wh) with airline approval. Checking the carrier's page when using a 158Wh battery is much easier than handling it at the counter.

Dejar un comentario
Todos los comentarios se revisan antes de su publicación.
Este sitio está protegido por hCaptcha y se aplican la Política de privacidad de hCaptcha y los Términos del servicio.