

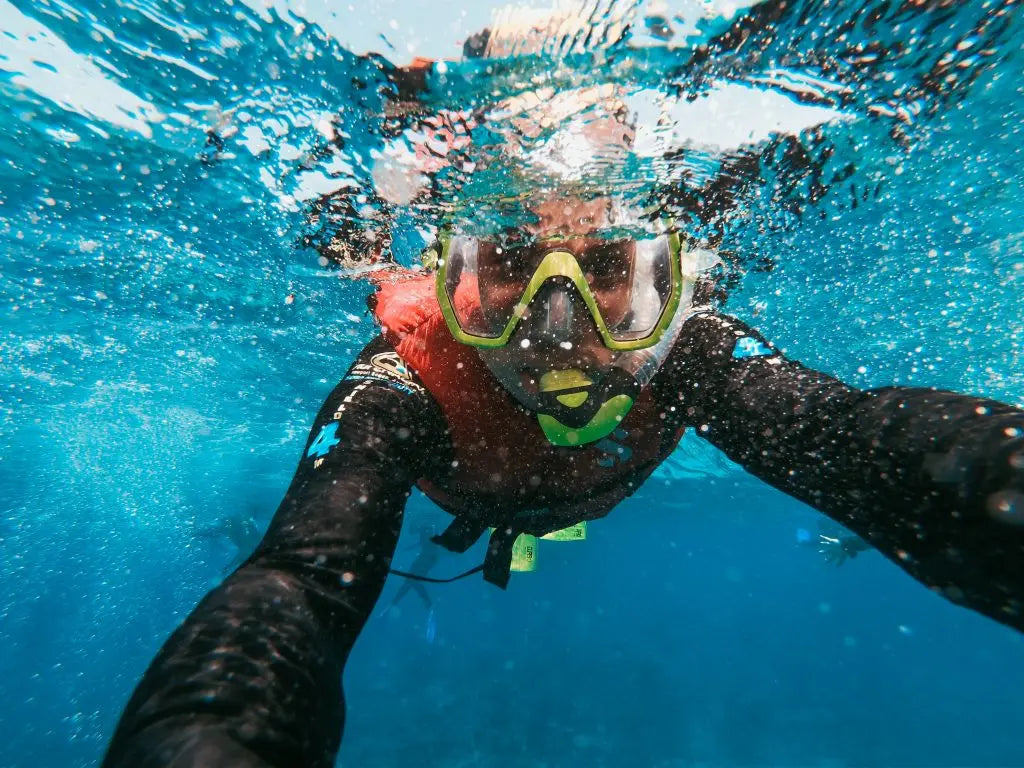
A common 12-liter capacity, 200-bar pressure aluminum mini tank only supports about 15-20 minutes of underwater breathing (at a depth of 5 meters). If descending to 10 meters, gas consumption doubles due to increased pressure, so it is recommended that a single dive does not exceed 12 minutes. Apply soapy water to the connection points and observe for air bubbles (a leak rate > 0.1 bar/minute requires repair). When observing the tank pressure gauge, the initial reading should stabilize at ≥180 bar (reserving 20 bar residual pressure to prevent air backflow). Maintain a distance of ≤2 meters from your buddy throughout the dive. If the air supply becomes abnormal, immediately share the backup second stage regulator and ascend. After use, if the residual pressure in the tank is <50 bar, it should be refilled promptly to avoid internal corrosion caused by residual moist air, extending its service life.
Tank Condition and Connections
Before diving with a mini tank, inspect the appearance: no dents with a diameter >2 mm, no flaky corrosion, or scratches deeper than 0.5 mm.
Apply diluted soapy water to the valve connection and let it sit for 30 seconds: no continuous bubbles (a leak rate >0.5 L/min requires immediate discontinuation of use). After inflation, check the pressure gauge: a 3-liter tank is nominally 200 bar, but the actual pressure should be between 190 and 210 bar (error <5%). Screw the mouthpiece and second stage regulator tightly: hand-tighten until it cannot be turned, then use a tool to add a half turn (≈2 N·m of torque) to prevent detachment and water inhalation.
Appearance Check
You might think a mini tank looks sturdy and nothing will happen after a couple of uses, it must withstand high pressure (every 10 meters underwater adds 1 bar; 30 meters = 4 bar), and external "minor injuries" can become major problems.
Spending 3 minutes checking the tank's "skin" before diving can prevent risks like air supply interruption or tank rupture.
The shell of a mini tank is mostly aluminum alloy or steel. Aluminum tanks are lighter (a 3-liter tank ≈1.2 kg) but softer. Steel tanks are more impact-resistant (same capacity ≈1.8 kg) but prone to rust. Regardless of material, external damage affects safety.
The standard is: dents with a diameter >2 mm must be a cause for alarm.
In a 200-bar tank, stress at the dent is 30% higher than in normal areas; repeated pressurization could turn a 2-mm small pit into a crack.
If the powder is flaking (area >coin size), it indicates internal corrosion may have started, reducing strength by 15%-20%.
Steel tanks are more problematic, prone to reddish-brown rust. Flaky rust (not just speckles) or rust powder that can be scraped off suggests corrosion has penetrated the metal; continued use risks explosion.
If a scratch is deep enough to catch a fingernail (depth >0.5 mm), attention is required.
The coating is the first barrier against corrosion. Where it’s broken, water and salt seep in, slowly eroding the metal.
The test method is simple: use a bank card (thickness ≈0.76 mm). If it inserts easily into the scratch, the depth is excessive; replace the tank.
Valve Connections
A leak here during a dive could cause sudden air loss 10 meters underwater, leading to panic and water inhalation.
How to Prepare Soapy Water
Soapy water for leak testing must have the right consistency: 500 mL clean water + 1 drop of neutral dish soap (do not use laundry detergent; it creates too much foam, obscuring small bubbles).
Four Locations
The valve connection isn’t just a "nut"; details matter:
-
First Stage Regulator Threads: Metal threads where the tank and valve connect. If not sealed with PTFE tape or improperly tightened, high-pressure gas can escape through gaps.
-
Valve Switch Base: Rotating switch area. Long-term use wears the sealing gasket, a common leak zone.
-
Second Stage Regulator Connection: Connection between the valve’s output and the second stage regulator (breathing regulator above the mouthpiece). Aged O-rings here leak during supply.
-
Pressure Gauge Connection: Some tanks have a pressure gauge; its connection to the valve can also seep air.
How to Interpret Bubbles
-
No Bubbles: Best case; good seal. You can dive.
-
Occasional Small Bubbles (diameter <1 mm, ≤3 bubbles in 30 seconds): May be slight moisture or residual air. Wipe dry and respray; if they disappear, it’s normal.
-
Continuous Small Bubbles (1-2 per second, diameter >1 mm): Leak rate ≈0.5-1 L/min. Don’t underestimate this. A 3-liter tank at 10 meters (2 bar) consumes 15 L/min. Leaking 1 L wastes 6% of reserve time, forcing an early ascent.
-
Strings of Large Bubbles (>3 per second, diameter >2 mm): Leak rate >2 L/min. Discontinue immediately.
Pressure Verification
Underwater, every 1 meter adds 0.1 bar. Inaccurate pressure readings could cause sudden air depletion at 15 meters or misjudge remaining time, causing panic.
Checking the Pressure Gauge
The tank’s pressure gauge is usually on the body or valve, marked in "bar" (1 bar ≈14.5 psi). A common 3-liter aluminum tank has a nominal Working Pressure (WP) of 200 bar (2900 psi), the max safe pressure marked by the manufacturer. After inflation, the gauge must read 190-210 bar (error <5%).
If inflated to 180 bar (10% below nominal), a 3-liter tank holds only 540 L (3 L × 180 bar). At 10 meters (2 bar) with 15 L/min consumption, usable time = 540 L ÷ (15 L/min × 2 bar) = 18 minutes—6 minutes less than at 200 bar (24 minutes).
If inflated to 220 bar (>10%), though more gas, long-term over-pressurization accelerates metal fatigue in aluminum tanks. Tests show aluminum tanks cycled 500 times at 210 bar have 3% more wall thinning than at 200 bar; beyond 220 bar, risk increases significantly.
Operational Detail: Let the tank sit 5 minutes post-filling to equalize temperature with ambient air before rechecking pressure.
Temperature and Pressure
-
Gauge readings aren’t fixed. A 10°C change can cause ±10 bar pressure fluctuation.
-
Summer diving: A tank left in 30°C sun for 1 hour may rise from 200 bar to 210 bar. Winter: Moving from 10°C indoors to 0°C water may drop to 180 bar.
Note: If temperature stabilizes (e.g., 30 mins underwater, tank and water temp equal) and pressure still deviates from 190-210 bar, be vigilant. E.g., winter water at 10°C with a 170 bar reading means insufficient gas; plan earlier return.
Practical Tip: Remember the temperature compensation formula—10°C change ≈10 bar pressure change. E.g., filled at 25°C (200 bar), water at 15°C (10°C drop): 190 bar is normal; no extra air needed.
Problems with Low or High Pressure
Pressure Too Low (<180 bar):
-
Possible causes: Tank aging (aluminum >15 yrs, steel >20 yrs) reducing effective volume via internal corrosion; or underfilling (e.g., pump failure mid-fill).
-
Risk: A 3-liter tank at 180 bar holds 540 L. At 20 meters (3 bar) with 20 L/min consumption, usable time = 540 L ÷ (20 L/min × 3 bar) = 9 minutes half the planned 15 minutes. Increases risk of rapid ascent and decompression sickness.
Pressure Too High (>220 bar):
-
Possible causes: Uncalibrated filling equipment or poor tank valve sealing (repeated high-pressure leaks).
-
Risk: For aluminum tanks, long-term over-pressurization causes micro-cracks in stress areas (e.g., bottom welds). Lab data: 100 cycles at 220 bar expands a 0.1 mm crack to 0.5 mm; >0.8 mm risks explosion.
Countermeasures: Steel tanks tested every 5 yrs; aluminum every 3 yrs. Test pressure = 1.5× nominal (200 bar tank tested at 300 bar).

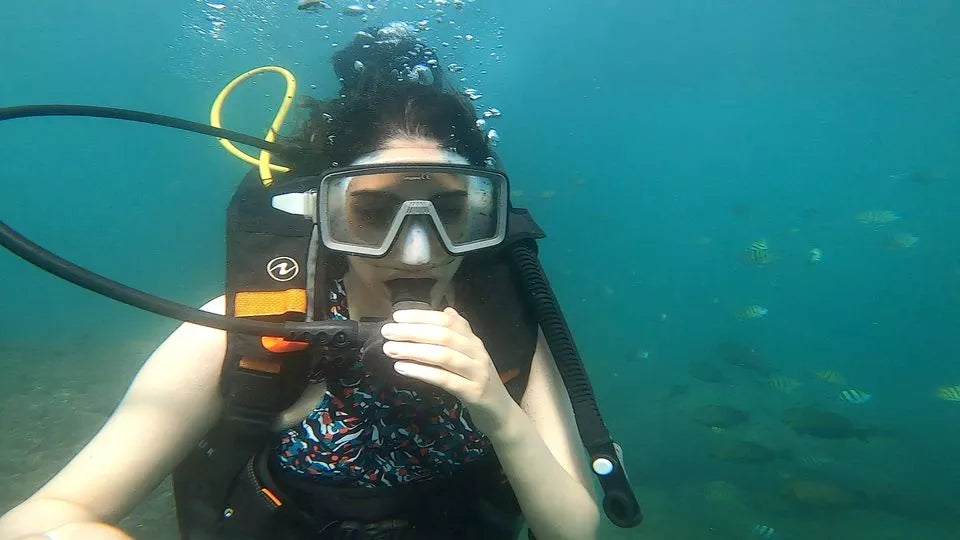
Connecting the Regulator and Test Breathing
When connecting the regulator, gently place the second stage mouthpiece in your mouth and screw the first stage clockwise onto the tank valve (3-4 turns of the handwheel; over-tightening damages seals).
Afterward, stand in 1-2 meters of shallow water, take a deep breath.
Simultaneously check the pressure gauge; initial reading ≥180 bar (reserve 20 bar to prevent backflow).
Regulator Connection
Data shows ~30% of mini tank diving air supply anomalies stem from improper regulator connection: gas leaks wasting air or seal failure causing sudden cutoff.
Identifying the Regulator
The regulator has two main parts: the first stage (large metal connector to the tank valve) and second stage (small mouthpiece component connecting the breathing hose and mask). The first stage outputs high-pressure air; the second reduces pressure to breathable levels. Before connecting, check first stage and tank valve threads.
Hand-Tightening to the "Stop"
-
Grip Posture: Left hand steadies the tank valve; right hand pinches the first stage casing (not the hose). Align threads and rotate clockwise.
-
Hand-Tightening Force: Use fingertips until the first stage won’t rotate (≈3-4 turns, matching thread depth).
-
Wrench Reinforcement: If loose after hand-tightening (shakes gently), use a special regulator wrench on the first stage groove for an extra 1/4 turn (≈90°). Total rotation ≤5 turns (≈180°).
Every 0.1 mm gap between the first stage and valve increases leak rate by 15%. Under-tightening leaves the seal uncompressed; over-tightening crushes or tears the gasket, causing leaks.
Three-Step Check
Don’t rush to dive; perform these checks in 30 seconds:
-
Soapy Water Leak Test: Dip a cotton swab in soapy water and apply to the first stage-tank valve seam. Let sit 10 sec; no continuous bubbles (single bubbles may be residual water; continuous bubbling means leak rate >0.2 bar/min—adjust).
-
Pull Test: Gently pull the first stage and tank valve. They shouldn’t move. If they do, it’s not tight enough.
-
Second Stage Bite Test: Place the second stage in your mouth and bite the silicone pad (not too hard). Inhalation should feel distinct; no mask leaks on exhalation (look at the surface.
Improper Operation
-
Too Loose: A novice descended after only 2 hand turns. The first stage leaked at 2 meters; the regulator washed off, nearly causing aspiration.
-
Too Tight: Another diver used an adjustable wrench for 2 full turns, deforming the first stage threads. Subsequent connections leaked, requiring repair/replacement.
Data Reference: Following this procedure controls regulator connection leak rate to <0.05 bar/min (safety threshold: 0.1 bar/min), improving supply stability by 70%. Spending 1 extra minute on checks prevents 80% of underwater air emergencies.
Best for Novices
90% of novice diving issues (mask leaks, regulator sticking) occur within 3 meters of descent; 1-2 meter shallow water exposes these early, avoiding deep-water pressure tension. This depth isn’t arbitrary—1 meter water pressure ≈0.1 bar (holding a 5-lb watermelon); 2 meters ≈0.2 bar (adding a 3-lb bag).
1-2 Meter Water Depth Pressure
Water pressure increases with depth (+1 bar/10 meters). At 1-2 meters, pressure is only 0.1-0.2 bar. Here:
-
Even minor regulator blockages clear easily with breath.
-
If the mask isn’t tight, escaping bubbles gather in front of your eyes for easy adjustment (deep water bubbles rise fast and are hard to spot).
-
If air cuts out, stand up quickly (1 meter: bend over; 2 meters: one step), avoiding panic from being "pinned underwater."
A coach noted: 60% of novices diving straight to 5 meters panic from mask leaks/regulator issues. Those testing at 1-2 meters see this drop to 15%.
What to Test in Shallow Water
1. Stationary Breathing: Confirm Stable Supply
Stand chest-deep (≈1.5 meters) with the tank on your back. Inhale deeply, ~80% as smooth as on land." If "hard to inhale" (high resistance):
-
First stage not fully open (check if the tank valve handwheel is fully turned).
-
Debris inside (factory dust, last-use sand residue).
Exhale slowly; listen for "hissing" near the mouth.
2. Lift Mask: Check for Leaks
-
Slightly lift the mask top, exhale through your nose, and hold for 3 seconds. No continuous bubbles around the nose/cheeks (single bubbles = hair; ignore).
-
Look down; no bubble strings around the mask in 30 seconds (if present, head strap is loose; tighten it toward the back of your head).
3. Bite Second Stage & Swim: Simulate Breathing
Take a deep breath, bite the second stage, and push off the pool bottom to swim 1-2 meters. Check:
-
Breath smoothness: Airflow shouldn’t weaken/strengthen (weakening = partially closed valve; strengthening = failed pressure reduction).
-
Mask fit: Water pressure deforms it slightly; no water at chin/forehead (if yes, wrong size; resize or adjust strap).
Encountered Problems
| Problem Symptom | Possible Cause | Solution |
|---|---|---|
| Gurgling when inhaling | Water in second stage | Remove second stage, shake forcefully 2-3 times downward, re-bite |
| Mask constantly fogging | Insufficient nose exhalation | Exhale gently through nose to circulate air; or pre-apply anti-fog |
| Tank drops 5 bar in 5 mins | Minor first stage leak | Check first stage connection, re-soap test, and tighten |
Data Reminder: Allocate ≥5 minutes for shallow testing (don’t rush down). This reveals 80% of initial issues. Post-test, slow descent to 3-5 meters cuts risk by >half.
Handling Abnormal Situations
Data shows ~45% of novice incidents stem from panicked mishandling: struggling when air cuts out, rushing to remove straps when masks flood.
Air Supply Cutoff
Sudden air loss (inability to inhale) is most dangerous. 90% caused by loose first stage or internal blockage. Then:
-
Step 1: Stabilize: Stop moving; grip your sides (or a fixed object). Avoid kicking up sediment that clouds vision.
-
Step 2: Check Source: Check the gauge—if zero, tank’s empty; if >50 bar, first stage is loose or regulator blocked.
-
Step 3: Ascend Slowly: Regardless, ascend slowly (speed ≤9 m/min; faster increases decompression risk).
A diver ascending rapidly at 5 meters due to panic suffered severe ear pain (early decompression sickness).
Mask Flooding
Most common novice issue; 70% from loose straps or wrong size. Handle by:
-
Don’t Rush to Remove Straps: Wastes time; may let water into nasal passages.
-
Adjust Strap Position: If frequent flooding, pinch strap sides and push toward the crown (not tight enough to hurt).
-
Test Seal: Look up; no continuous bubbles in 30 seconds means adjustment worked.
90% fixed in 5 seconds; if not, the mask may be aged (hardened silicone); replace it.
Blocked Second Stage
Labored inhalation (resistance >30% higher than normal) often stems from sand, condensation, or silicone debris. Steps:
-
Shake-Out: Remove second stage, grip the mouthpiece base, and shake forcefully 2-3 times downward (centrifugal force dislodges debris).
-
Light Tapping: If shaking fails, gently tap the casing (not hard) to dislodge particles from the pressure reduction channel.
-
Bite Test: Re-bite; if resistance drops, it worked. If not, internal failure.
Why: The second stage’s reduction channel is only 2-3 mm wide; one grain of sand blocks it. Shaking/tapping resolves 95% of minor clogs.
Other Minor Issues
Two more high-frequency problems:
-
Mouthpiece Rubbing Lips: Wrong size (choose soft silicone) or biting too hard (relax lips; gently clamp with teeth).
-
Exhalation Fogging: Exhale gently through your nose (not mouth) or pre-apply anti-fog (lasts 30 mins).

Capacity and Material
Common 3-6 liter aluminum tanks, inflated to 200 bar, store ≈600-1200 L of air—enough for 20-40 minutes in 5-10 meter shallow water. Aluminum is light (≈1.5 kg) but scratches easily; steel (≈2 kg for same capacity) resists corrosion better for frequent use. Check the tank body for the test date (mandatory every 5 yrs) and prioritize EN 12245-certified products; avoid unmarked old tanks.
Capacity and Dive Duration
Novices often face "planned 20 mins, ran out at 10" or "worried about air running out." Capacity dictates duration and depth.
Marked capacity (e.g., 3L, 6L) is "tank volume"; usable air depends on inflation pressure (bar).
A 3L aluminum tank at 200 bar holds 600 L (surface-equivalent volume). At the surface, breathing 30 L/min supports 20 mins (600 ÷ 30 = 20). At 10 meters (2 bar), consumption doubles to 60 L/min; 600 L lasts 10 mins (600 ÷ 60 = 10). A 6L tank at 200 bar holds 1200 L—40 mins surface, 20 mins at 10 meters, ≈13 mins at 15 meters (3 bar).
| Tank Capacity (Liters) | Inflation Pressure (Bar) | Total Air Storage (Liters) | Surface Time (Mins, 30 L/min) | 10m Depth Time (Mins, 60 L/min) | 15m Depth Time (Mins, 90 L/min) |
|---|---|---|---|---|---|
| 3 | 200 | 600 | 20 | 10 | 6.7 |
| 6 | 200 | 1200 | 40 | 20 | 13.3 |
Air Consumption
Every 10 meters deeper adds 1 bar; each breath consumes air equivalent to surface volume. E.g., at 5 meters (1.5 bar), breathing 30 L/min actually consumes 30 ÷ 1.5 = 20 L of "tank air." At 20 meters (3 bar), 30 L/min surface-equivalent requires 30 ÷ 3 = 10 L/min from the tank. A 6L tank at 200 bar (1200 L total) lasts 1200 ÷ 10 = 120 mins? No—previous calculations need adjustment.
For novices, remember: "Usable time halves every 10 meters deeper." E.g., a 3L tank lasts 10 mins at 5 meters, but only 2-3 mins at 15 meters.

Breathing Habits
Some breathe calmly (20 L/min); others nervously (35 L/min). A high-breather (35 L/min) with a 3L tank at 10 meters (60 L/min consumption) gets 10 mins (600 ÷ 60 = 10). A low-breather (20 L/min) at 10 meters consumes 40 L/min (20 × 2); 600 ÷ 40 = 15 mins.
Novices should choose a 6L tank—40 mins surface, 20 mins at 10 meters. For surface snorkeling (≤5 meters), a 3L tank suffices with practiced controlled breathing.
Tank capacity is marked on the body. When filling, check the gauge; don’t overfill (aluminum max ≈232 bar; steel higher).
Reserve 50 bar (150 L for 3L; 300 L for 6L). This is safe and prevents rapid ascent due to low air.
Safety and Durability
The American Diving Equipment Association reports 30% of mini tank leaks stem from material aging.
Lightweight Aluminum Tanks
Most common mini tanks are aluminum alloy. A 3L aluminum tank ≈1.5 kg—0.5-1 kg lighter than steel. A 3L aluminum tank used twice weekly in saltwater may see wall thickness reduce 0.1 mm after 3 yrs (original ≈3 mm). Don’t underestimate this—0.1 mm matters.
Durability and Maintenance
Stainless steel (steel) 3L tanks ≈2 kgt. UK lab tests: steel tanks used twice weekly in saltwater lost only 0.03 mm wall thickness after 5 yrs—1/3 of aluminum’s loss.
Cylinder Markings
Both materials require permanent body markings for reliability:
-
Manufacturer name (e.g., "Luxfer," "Catalina");
-
Test date (format "MM/YYYY," e.g., "06/2025" = next test by June 2025);
-
Certifications (e.g., EN 12245, US DOT-3AL).
EN 12245 requires hydrostatic testing every 5 yrs—tank pressurized to 1.5× rating (200 bar tank = 300 bar) to check deformation/leaks. Failed tanks are scrapped. When buying used, check the last test date; avoid tanks untested >5 yrs.
Valve and Accessories
25% of mini tank issues stem from valve leaks or mismatched parts.
Valve Types
-
Mini tank valves: K-valve (traditional threaded, potential slight high-pressure leaks >200 bar) and DIN-valve (quick-release with O-ring/metal cone seal; 70% lower leak rate, better for high-pressure filling).
-
Choose based on filling needs: High-pressure (>200 bar) = DIN-valve; low-pressure = K-valve (but stripped K-valves leak 50% more even if tight).
O-ring Check
O-rings are the seal core. Apply soapy water to O-rings/connectors; bubbling = leak.
O-rings (nitrile rubber) last ≈6 months. Water/salt exposure hardens/cracks them. A 1-yr-old O-ring leaks 40% more than new.
Maintenance: Don’t pry O-rings out by hand; use a tool. Check for cracks/deformation. Replace with original size (common: 11 mm or 13 mm).
Interface Matching
-
Tank valve and regulator must match. Third-party adapters have 3× higher leak rates than OEM parts.
-
Prioritize same-brand tank/regulator or confirm standards (e.g., both EN 250-certified).
Regular Maintenance
If unused >3 months, purge with dry nitrogen quarterly—lab tests show this cuts internal valve rust risk by 80%.
Small Accessories
Cheap hoses (recycled rubber) burst under pressure; unbranded gauges have large errors (showing 180 bar when actual is 150 bar), causing misjudgment. Check certifications: Hose = EN 1800; gauge = EN 250. Certified accessories reduce failure rates 65% vs. unbranded parts.
Leave a comment
All comments are moderated before being published.
This site is protected by hCaptcha and the hCaptcha Privacy Policy and Terms of Service apply.