

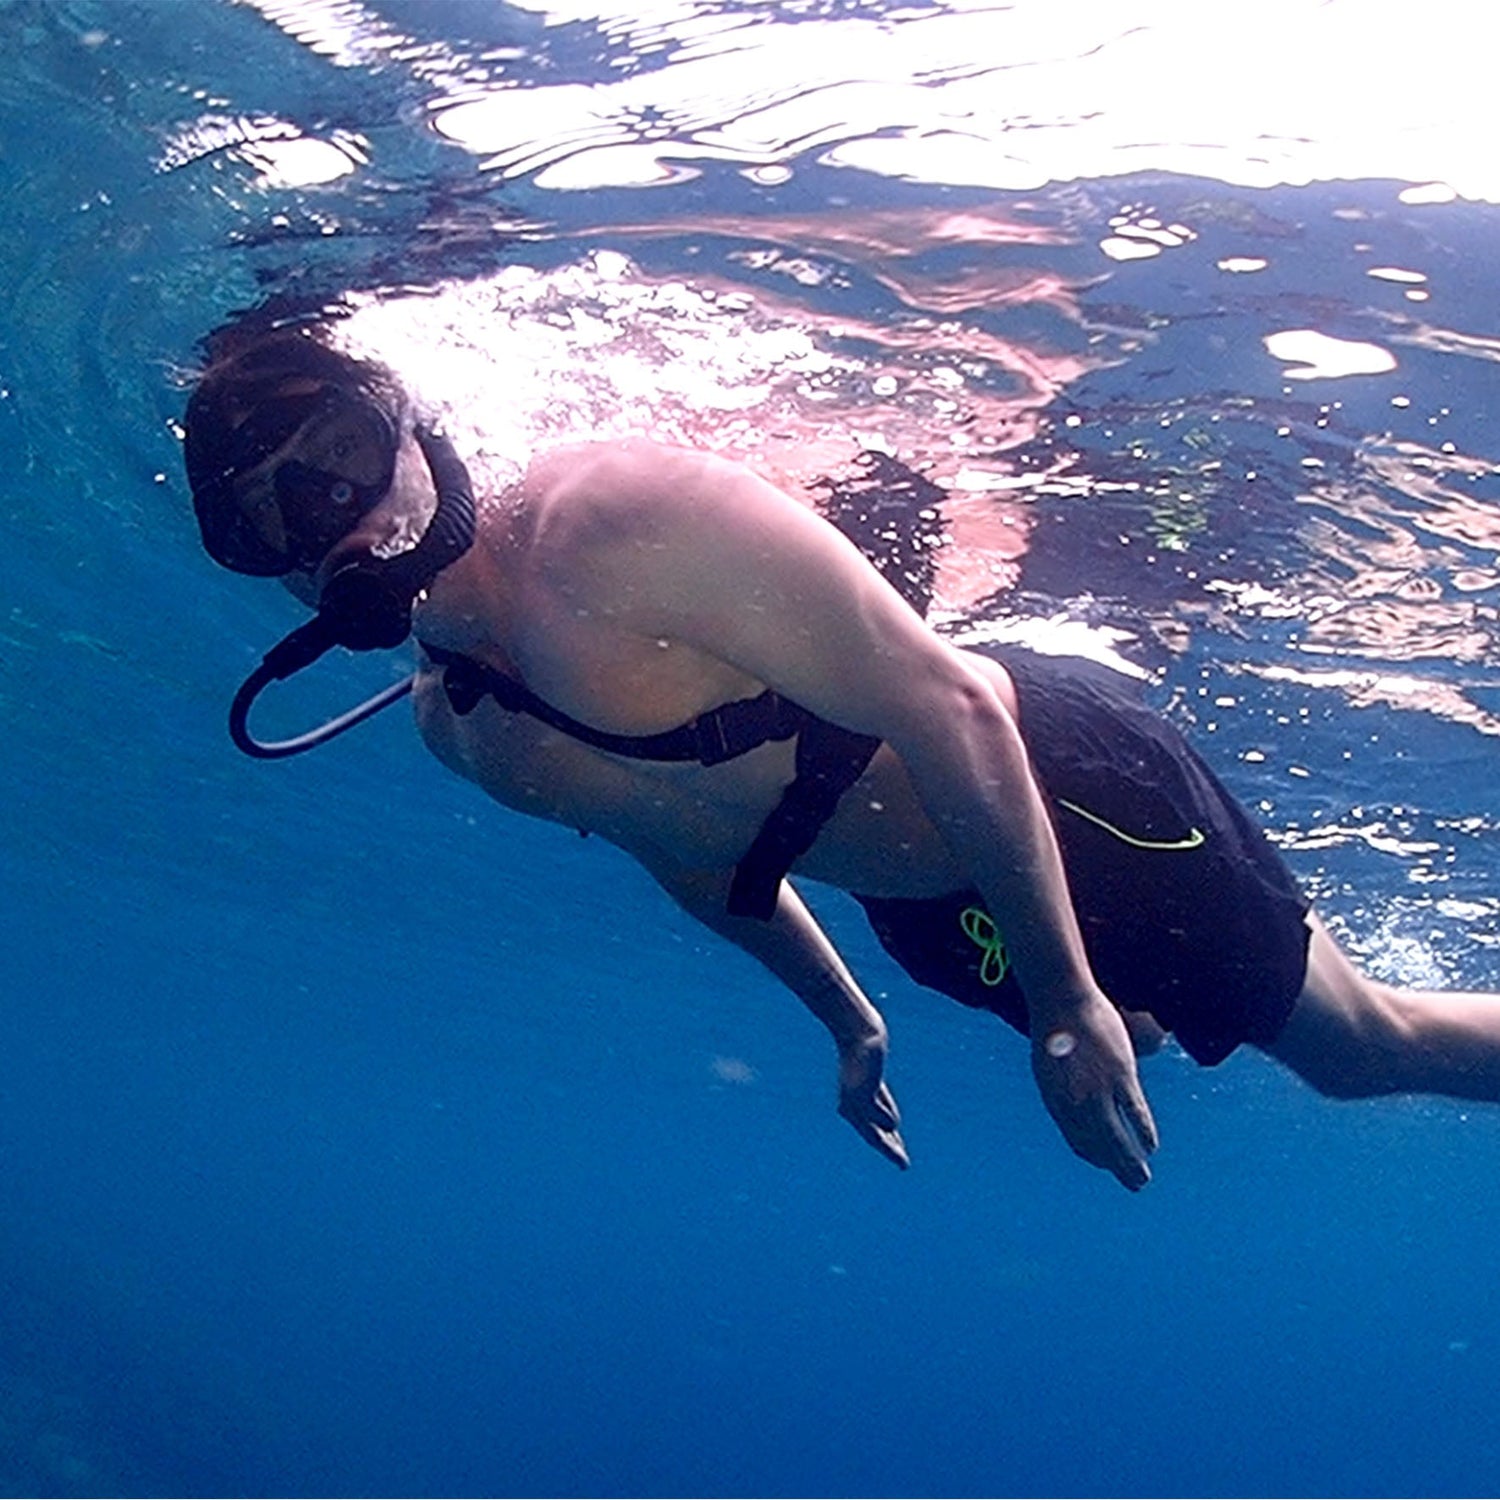
Handheld scuba tanks are designed more for portability and short durations, typically featuring a water capacity of approximately 0.5L and an air capacity of 3 cu ft/85L, providing about 57 breaths at the surface—ideal for shallow water experiences or emergencies.
Mini scuba tanks usually cover a wider range, typically 1.7–6 cu ft. A 6 cu ft tank holds about 170L, offering 114 breaths or approximately 6–10 minutes at the surface, though at 30.5m, the duration may drop to only about 1/4. Choose handheld for portability; choose mini for a higher safety margin.

Capacity and Dive Time
When looking at Handheld Scuba Tanks and Mini Scuba Tanks, don't first look at the "10 minutes" or "20 minutes" of dive time written by merchants. Instead, look at how much breathable air the cylinder actually contains at its rated pressure. Common handheld small cylinders come in two sizes: 48 L and 85 L, while a 1.0 L / 200 bar mini tank holds approximately 200 L. For every 10.06 meters of water depth, the ambient pressure increases by 1 ATA; for the same person, a light-to-moderate activity level requiring 20 L/min at the surface will turn into approximately 40 L/min at 30 ft / 9 m.
Usable Air Volume
Many people see 1.0 L and read it as "can only breathe 1 liter of air." In diving cylinders, the liters written on the page often first indicate the internal volume of the cylinder, not the total volume of air you can breathe at the surface. DAN's conversion method is very practical: for metric cylinders, for every 1 bar of pressure drop, the surface-equivalent gas released is approximately equal to the cylinder's nominal liter rating; therefore, a 1.0 L / 200 bar cylinder has a nominal surface-equivalent air volume of approximately 200 L.
Reading it another way makes the numbers on the page much clearer. Common small Spare Air cylinders are listed as 1.7 cu ft / 48 L and 3 cu ft / 85 L, where 48 L and 85 L are already the air volume specifications. The SMACO S400 is listed as 1.0 L / 200 bar, which is closer to the "cylinder volume + working pressure" notation; when reading this, you should first mentally convert it to a surface-equivalent air volume of approximately 200 L before considering how long it will last.
Putting different page notations into the same perspective prevents confusion over the differences:
| Common Page Notation | Pressure Given on Page | Convert to Surface-Pressure Usable Air Volume First | Rough Estimate Based on Surface Light/Moderate Activity (20 L/min) |
|---|---|---|---|
| 1.7 cu ft / 48 L | 207 bar | 48 L | Approx. 2.4 minutes |
| 3 cu ft / 85 L | 207 bar | 85 L | Approx. 4.25 minutes |
| 1.0 L / 200 bar | 200 bar | Approx. 200 L | Approx. 10 minutes |
The 20 L/min in the table above comes from the DAN reference value for light-to-moderate surface activity; 48 L and 85 L come from official Spare Air specifications, and 1.0 L / 200 bar comes from official SMACO specifications. 200 L is the nominal surface-equivalent air volume obtained using the DAN metric conversion method.
When you see "1.0 L," don't rush to compare it side-by-side with "48 L" or "85 L." The former likely hasn't been converted yet, while the latter are usually already in the breathable air volume format.
This difference affects the judgment of duration. Suppose two small cylinders are roughly the same length; if one page says 85 L and the other says 1.0 L / 200 bar, many people might mistakenly think the "1.0 L" is smaller. After converting to the same format, you'll find the latter nominally has about 200 L, which is nearly 2.35 times the 85 L of the former. If estimated at 20 L/min for light-to-moderate surface activity according to DAN, the paper duration would also stretch from 4.25 minutes to around 10 minutes.
Taking it a step further, you must separate "full pressure" from "planned usable amount." For example, a 1.0 L / 200 bar cylinder has a nominal surface-equivalent air volume of approx. 200 L; if you don't use the pressure down to 0 bar but leave 20 bar untouched, the volume available for planning is approx. 180 L using the same conversion. This same logic applies to large cylinders: DAN suggests subtracting the reserve amount before calculating duration in gas planning.
When reading a product page, you can cross-reference these items:
- If the page says 48 L, 85 L, or 170 L, it is likely already the surface-pressure air volume format; do not multiply it by 200 bar or 207 bar again.
- If the page says 0.5 L, 1.0 L, or 2.0 L paired with 200 bar or 3000 psi, you usually need to convert it to surface-equivalent air volume first.
- If the page also lists breaths, check the test conditions. Spare Air's 57 surface breaths and SMACO's 75 breaths (5 m test) use different formats.
Another common misconception is mixing "cylinder volume" with "usage scenarios." According to DAN data, light-to-moderate activity at the surface is about 20 L/min, which becomes about 40 L/min at 30 ft; NOAA also clearly states that for every 33 ft / 10.06 m of descent in seawater, ambient pressure increases by 1 ATA. Therefore, 1.0 L / 200 bar ≈ 200 L is only the first step in understanding the page; once you reach 10 m or 20 m, you must factor in the depth, and the number of minutes will continue to shrink.
The standard way to convert page data into comparable numbers isn't complicated:
- First, see if it is written as cu ft / L or cylinder L + bar.
- Then, convert all products to the same format, such as 48 L, 85 L, or 200 L.
- Next, compare this against your own breathing rate. In DAN's reference values, surface resting is 8 L/min, light-to-moderate activity is 20 L/min, and heavy exertion is 70 L/min.
Once you understand this layer, look back at Handheld Scuba Tanks and Mini Scuba Tanks; the "size" on the page will no longer mislead your judgment. The 48 L tier is closer to a short-term air supplement; 85 L starts to provide a bit of a margin; only the 200 L converted from 1.0 L / 200 bar looks more like the duration you would expect for short-term shallow water use. The names are similar and the dimensions on the page might be similar, but once converted to usable air volume, the difference is often 2 to 4 times.
Depth & Minutes
Many product pages list time as "up to 10 min" or "up to 20 min," but underwater minutes are not a fixed value. NOAA data is clear: for every 33 ft / 10.06 m of descent, ambient pressure increases by 1 ATA. If a person takes 1 breath at the surface, taking that same 1 breath at 30 ft means the mass of gas inhaled becomes approximately 2 times as much; at 100 ft, it becomes approximately 4 times. A cylinder contains a finite volume of compressed air; the greater the depth, the faster that same tank of air is consumed.
DAN's reference values are suitable for calculating minutes. Surface resting is approx. 8 L/min, light-to-moderate activity is approx. 20 L/min, and heavy exertion is approx. 70 L/min; at 30 ft, these three tiers become 16 / 40 / 140 L/min; at 100 ft, they become 32 / 80 / 280 L/min. For the same person and the same cylinder, as depth increases, the minutes will shorten according to pressure and will not remain constant based on the shallow-water specifications of the product page.
Look at a set of large cylinder data first, then scale it down to small cylinders. DAN uses a common Aluminum 80 as an example, with a capacity of approx. 2,265 L. Under light-to-moderate activity, it lasts about 70 minutes at the surface, 35 minutes at 30 ft, and 17 minutes at 100 ft. The duration doesn't just decrease slightly; it follows a progression of 1x, 1/2, and 1/4. This rule applies even more noticeably to handheld and mini scuba tanks because their inherent capacity is small.
Putting common small cylinders into the same perspective makes them easier to understand. The Spare Air 170 is 48 L, the Spare Air 300 is 85 L, and the SMACO S400 is 1.0 L / 200 bar, which converts to approx. 200 L. If all three are estimated at 20 L/min at the surface, the paper minutes are approx. 2.4, 4.25, and 10 minutes respectively; once at 10 m, with air consumption calculated at 40 L/min, the minutes become 1.2, 2.13, and 5 minutes.
The table below places the same tank of air at several common depths. For consistency, calculations follow DAN's "light-to-moderate activity" format, meaning 20 L/min at the surface, approx. 40 L/min near 10 m, and approx. 80 L/min near 30 m. The 5-meter tier is estimated at approx. 1.5 ATA, with air consumption around 30 L/min.
| Usable Air Volume | Surface 1 ATA / 20 L/min | 5 m / 1.5 ATA / 30 L/min | 10 m / 2 ATA / 40 L/min | 20 m / 3 ATA / 60 L/min | 30 m / 4 ATA / 80 L/min |
|---|---|---|---|---|---|
| 48 L | 2.4 minutes | 1.6 minutes | 1.2 minutes | 0.8 minutes | 0.6 minutes |
| 85 L | 4.25 minutes | 2.83 minutes | 2.13 minutes | 1.42 minutes | 1.06 minutes |
| 200 L | 10 minutes | 6.67 minutes | 5 minutes | 3.33 minutes | 2.5 minutes |
This set of numbers in the table is best used to correct product page expectations. Someone seeing 200 L might think "10 minutes is a lot," but that is only true near the surface or in very shallow areas. At 20 m, this same tank of air lasts only 3.33 minutes under light-to-moderate activity; at 30 m, it's approx. 2.5 minutes. For every 10m of depth, the number of minutes doesn't just decrease linearly; it shrinks further with ambient pressure.
The effect is even more pronounced for smaller cylinders. The 48 L tier provides 2.4 minutes at the surface based on 20 L/min, but only 1.2 minutes at 10 m, and only 0.8 minutes at 20 m. If you need to turn around, kick, hold a rope, or clear your mask in the water, your actual breathing often won't stay at the lower limit of light-to-moderate activity. DAN also mentions that a diver's measured RMV can range from 6 L/min to over 35 L/min, showing significant individual variation.
The same changes are visible in the "breath count" format. The Spare Air 2019 spec sheet states the 48 L model offers approx. 32 surface breaths and the 85 L model offers approx. 57 surface breaths, calculated at 1.5 L/breath; the SMACO S400 lists approx. 75 breaths, but the test condition is 200 bar at a depth of 5 m, along with a note that breath count is affected by depth and a warning not to exceed 5 m / 16 ft. One is measured at the surface, the other at 5 meters; they both look like "dozens of breaths" on the page, but when recalculated for the same depth, the results will not be the same.
To turn page data into a usable judgment, these items are usually enough:
- Whether it says surface breaths or breaths at a certain depth. Spare Air marks surface, while SMACO marks 5 m.
- Whether the starting pressure is full pressure. Common notations are 200 bar or 207 bar / 3000 psi; if not full, minutes decrease proportionally.
- The depth at which you plan to use it: 5 m, 10 m, or 20 m. For the same tank of air, 10 m roughly equals surface consumption ×2, and 30 m roughly equals ×4.
- Whether the page gives a "resting test" or something closer to real activity. DAN's light-to-moderate activity set is 20 / 40 / 80 L/min, while the heavy exertion set is 70 / 140 / 280 L/min.
If you factor in heavy exertion, the paper time becomes even shorter. Based on the DAN 70 L/min surface rate, a 200 L small cylinder lasts about 2.86 minutes at the surface; at 10 m, consumption reaches approx. 140 L/min, leaving only 1.43 minutes; at 30 m, if calculated at 280 L/min, only 0.71 minutes remain. This isn't an extreme scenario; cold water, mild current, buoyancy instability, nervousness, or increased movement before ascent can all pull breathing above 20 L/min.
Therefore, when looking at the "dive time" for handheld and mini scuba tanks, don't just compare the 48 L, 85 L, and 200 L written on the cylinder with the 10 min, 20 min, or 75 breaths on the page. Once depth is factored in, the minutes often drop from 10 minutes to 5 minutes, 3 minutes, or even around 1 minute.
Test Conditions
When a product page says "up to 20 min," make sure to read the other lines on the same page. The SMACO S400 lists 1.0 L, 200 bar, and approx. 75 breaths, with a test depth of 5 m, and warns that breath count is affected by depth and should not exceed 5 m / 16 ft. The Spare Air Model 300 lists 85 L and 57 surface breaths, calculated at 1.5 L/breath. One is measured at 5 meters and the other at the surface; comparing their minutes side-by-side makes it easy to overestimate the actual duration.
Note down these data points from the product page first before considering "how long it will last":
- Whether the test depth is surface, 5 m, or another depth.
- Whether the fill pressure is 200 bar or 207 bar / 3000 psi.
- Whether it lists breaths or minutes, and if the single breath volume is specified. Spare Air uses a format of 1.5 L/breath.
- Whether the page mentions backup use or redundant back-up. DAN reminds us that backup air sources should not be counted toward usable air in a normal dive plan.
As depth changes, minutes shrink. NOAA's conversion is fixed: for every 33 ft / 10.06 m of descent, ambient pressure increases by 1 ATA. DAN's reference consumption rates are approx. 8 L/min for surface resting and approx. 20 L/min for surface light-to-moderate activity; at 30 ft, these become approx. 16 L/min and 40 L/min respectively. The duration you see for the same small cylinder at 5, 10, and 20 meters will not be the same.
DAN's method for calculating usable dive duration is also clear: first subtract the reserve air from the starting pressure, then divide by the air consumption rate at that depth. For dives requiring a return to a fixed ascent point, DAN suggests managing air based on one-third for the way out, one-third for the return, and one-third in reserve. Applying this to small cylinders, the "total air volume" on paper first decreases by one-third.
The table below takes common small cylinders, subtracts "one-third in reserve," and then estimates duration based on light-to-moderate activity at 5 m and 10 m. 48 L uses the Spare Air 1.7 cu ft spec, 85 L uses the Spare Air Model 300, and 200 L uses the conversion for a 1.0 L / 200 bar mini tank.
| Specification Format | Total Air Volume | Planned Air After One-Third Reserve | 5 m (approx. 1.5 ATA), 30 L/min | 10 m (approx. 2 ATA), 40 L/min |
|---|---|---|---|---|
| 48 L | 48 L | 32 L | Approx. 1.1 minutes | Approx. 0.8 minutes |
| 85 L | 85 L | 56.7 L | Approx. 1.9 minutes | Approx. 1.4 minutes |
| 200 L | 200 L | 133.3 L | Approx. 4.4 minutes | Approx. 3.3 minutes |
The numbers in the table look short, not because of the cylinder, but because the format has changed: this is not "total duration," but "planned duration after subtracting reserve volume." Manufacturer pages typically give total capacity, surface breath counts, or minutes for a specific shallow water test scenario, and won't subtract the reserve air for you.
Differences become clearer when you factor in safety stops. PADI's recreational diving practice is an ascent rate no faster than 18 m / 60 ft per minute, with at least a 3-minute safety stop at 5 m / 15 ft. Converted using DAN's surface consumption reference, if you are near resting during the safety stop, 3 minutes uses about 36 L; if you are in light-to-moderate activity, 3 minutes uses about 90 L. This doesn't even count the 1–2 minutes during the ascent itself.
Applying the three capacity tiers shows practical differences. The 48 L tier can still cover a short portion of a safety stop at 5 meters if breathing is near resting; if you enter light-to-moderate activity, it isn't even enough for 3 minutes. The 85 L tier leaves a small margin under steady, shallow, low-movement conditions; if breathing quickens, little usable space remains after the stop. The 200 L tier provides more of a buffer, provided you include the ascent, safety stop, and the journey back to the exit point in your calculations.
Some pages use "number of breaths" instead of "minutes." The 57 surface breaths of the Spare Air Model 300, according to official specs, are calculated at 1.5 L/breath; converted to surface atmospheric air, this is approximately 85.5 L. This number is very close to its marked 85 L. The problem is that people do not consistently breathe at 1.5 L/breath, especially in cold water, moving water, when buoyancy is not stabilized, or when the heart rate is high. When converted to actual air consumption at depth, the minute count will continue to decrease.
When looking at testing conditions, you must also factor in the environment and the diver's state. DAN makes it very clear: strong currents, poor buoyancy control, frequent depth changes, and anxiety all accelerate air consumption; specifically, working hard at depth can increase air consumption to as much as 20x the normal rate. The results for the same cylinder will not be close when compared between a poolside, calm sea, shore entry surf zone, or a reef with light currents.
The following items are often skipped on small cylinder pages, but it is best to include them in your own calculations:
-
How far you need to travel from the descent point back to the ascent point. DAN’s "rule of thirds" was originally written as "one-third out, one-third back, and one-third in reserve."
-
Whether you will be waiting for a buddy in the water or staying along a line for more than 3 minutes. PADI specifies "at least 3 minutes."
-
Whether the starting air volume is at full pressure. DAN reminds divers not to enter the water with an incompletely filled cylinder.
-
Whether you will use the spare cylinder as your primary air supply. DAN explicitly states that redundant cylinders are for emergency situations and should not be factored into a normal dive plan.
-
How often you check the pressure gauge. DAN suggests checking the gauge every 1–2 minutes during the early stages of a deep dive, and more frequently as the air volume gets lower.
If you want to turn the numbers on a product page into numbers you can actually use, try recording once in this order: starting pressure, ending pressure, maximum depth, minutes spent at the bottom, whether there was current, whether a safety stop was performed, and how many minutes the stop lasted. With just two or three records, you will find that your air consumption rate at 5 m and 10 m differs significantly and will not match the uniform specs on the manufacturer's page.
For Handheld Scuba Tanks and Mini Scuba Tanks, when you see "20 min," "75 breaths," or "57 surface breaths," it is best to ask: At what depth, at how many bar, and under what breathing state was this number measured? Does it deduct reserve air volume, and does it include the ascent and safety stop?
Portability and Travel
If your itinerary involves flying, transferring between boats, changing hotels, and walking to the shore, handheld models are usually more convenient. In manufacturer specifications, 0.5L products are commonly 33–36.3 cm long, 6–6.4 cm in diameter, and 1–1.1 kg; 1L products are commonly 34–36 cm long, 8.2–8.9 cm in diameter, and 1.5–2.33 kg. The increase in length is not much, but the diameter and weight rise more rapidly; based on a circular cross-section estimate, an 8.9 cm cylinder takes up approximately 2.2x the area in a suitcase compared to a 6 cm cylinder.
Packing & Carrying
To break down whether it is "travel-ready," don't rush to look at underwater usable time; first, look at the cylinder dimensions and the feel of carrying it. In public specs, 0.5L handheld models are commonly 33–36.3 cm long, 6–6.4 cm in diameter, and 1–1.1 kg; 0.7L models are commonly 37.8 cm long, 7 cm in diameter, and 1.55 kg; 1L mini scuba tanks are commonly 36 cm long, 8.2–8.9 cm in diameter, and 1.5–2.33 kg. The length difference is sometimes only 2–5 cm, but the changes in diameter and weight are more pronounced.
It is easier to understand these numbers when placed within common carry-on suitcase dimensions. Delta and United both list a common carry-on limit of 56 × 35 × 23 cm. Using these external dimensions for a rough comparison, a 33–36.3 cm cylinder already accounts for about 59%–65% of the suitcase's long side; a 6 cm diameter cylinder is roughly 26% of the suitcase's depth, while 8.9 cm is closer to 39%.
First, consider how it "eats space" in a suitcase. A cylinder is not a flat board; what affects storage most is not the length, but the cross-section and the surrounding gaps. Based on a circular cross-section, a 6 cm diameter takes up about 28.3 cm², 7 cm about 38.5 cm², and 8.9 cm about 62.2 cm²; in other words, the horizontal space occupied by an 8.9 cm spec is roughly 2.2x that of a 6 cm spec.
-
When a 0.5L model is placed in a 20–22 inch carry-on, it can usually be lined up with a mask box, a thin wetsuit, and chargers; once you reach the 1L class, the cylinder diameter approaches 8.9 cm, which more easily creates a whole strip of "uneven" space in the suitcase.
-
The 0.7L model is in the middle; its 37.8 cm × 7 cm volume is a step up from the 0.5L, but it hasn't reached the point where, like the 1L, it obviously displaces other gear once inserted.
-
Some 1L models are not much longer than 0.5L models—36 cm vs 36.3 cm is a tiny difference; what really makes the "suitcase feel suddenly tight" is often the diameter change from 6 cm to 8.9 cm.
-
If two people travel together, each with a 1L bottle, the horizontal space taken up by the cylinders alone is much larger than two 0.5L bottles; there will be fewer flexible corners left in the suitcase.
Once packed, the next step is carrying it. The 0.5L class is commonly 1–1.1 kg, and the 1L class is commonly 2.14–2.33 kg, a weight difference of nearly 2x. An extra 1 kg on paper looks ordinary, but during travel, this 1 kg doesn't exist in isolation; it stacks with masks, fin straps, towels, dry bags, phone cases, and keys. Walking 200–500 meters to a shore entry, or from a parking spot to the pier, this difference is quickly amplified by your arms and shoulder straps.
Breaking "carrying" into finer movements makes the difference even clearer.
-
From the hotel to the car, a 1 kg 0.5L model feels more like bringing an extra thermos or a camera accessory; a 2.33 kg 1L model feels more like lugging a separate piece of equipment.
-
When boarding a boat from a pier, you usually have more than one item in hand. As the cylinder increases from 6–6.4 cm to 8.2–8.9 cm, the one-handed grip is thicker, and the feel will change with wet hands.
-
When placed in a backpack side pocket, the 6 cm class hugs the side more easily; the 8.9 cm class is more likely to bulge the bag, and the side-to-side swing while walking is more noticeable.
-
When going up boat ladders, crossing rocks, or walking on wooden boardwalks, thicker equipment is more likely to bump into cameras, mask boxes, or life vest straps. It's not length at play here, but diameter.
-
For recreational users with average height and reach, while a 36 cm 1L model isn't long, the weight of over 2 kg becomes more apparent after 10–15 minutes of carrying.
Consider another often-overlooked factor: the volume of the "unusable space" surrounding the cylinder. Based on a cylindrical shape, a 36.3 × 6 cm 0.5L has an external volume of about 1026 cm³, a 37.8 × 7 cm 0.7L is about 1455 cm³, and a 36 × 8.9 cm 1L is about 2240 cm³. From 0.5L to 1L, the external volume has doubled to over 2x.
Therefore, users often encounter the following practical situations when packing.
-
If the suitcase already contains fins, a mask, and a thin wetsuit, adding an 8.9 cm diameter cylinder usually requires giving up an entire column of space; a 6 cm diameter is easier to tuck into the sides.
-
If you also need to bring a camera housing, power banks, and chargers, the 0.5L class coexists more easily with these small items; the 1L class often crowds out the "small items area."
-
The 0.7L class is suitable for those who want a bit more air than 0.5L but don't want to jump straight to over 2 kg; its 1.55 kg / 7 cm is still relatively manageable for packing and carrying.
-
On family trips, the more small items and the thicker the cylinders, the longer the packing time; not because it won't fit, but because you have to keep changing the orientation.
-
People on a two-day, one-night weekend trip with only a carry-on usually find the 33–36.3 cm, approx 1 kg specs more acceptable; those staying at a fixed hotel with larger suitcases are more likely to bring the 1L class.
Many people first look at "1L has twice the air volume of 0.5L" when buying, but on the day of departure, what happens first is often not the underwater time difference, but how much space it takes in the bag, how heavy it is to lift, and how convenient it is to carry from the parking spot to the shore. A length difference of 33–36 cm is usually acceptable, but the thickness difference between 6 cm and 8.9 cm is more likely to be felt first during travel.
Flight and Transit
When it comes to flying, the criteria are different from packing. The FAA clearly categorizes scuba tanks under "compressed air cylinders": once the internal pressure reaches 200 kPa (29 psig / 43.8 psia, at 20°C), they are viewed under hazardous materials rules; when empty or below 200 kPa, they are not treated under hazmat restrictions, but airlines and airport security may still require the valve to be completely open for inspection.
At this stage, many people mistake "empty bottle" for "clearance through security," which is not the case. TSA public guidance states that security personnel will not remove seals or regulator valves for passengers; if the cylinder is still sealed—meaning the regulator valve is still attached to the cylinder—and it is not for personal medical oxygen use, the cylinder will not be allowed through.
Before departing, here are the items most likely to cause issues:
-
Lowering the pressure to "about empty" is not enough; the FAA threshold is 200 kPa. Crossing that line triggers hazmat logic; even if below it, it still must pass security inspection.
-
TSA won't remove valves for you, so don't treat "handling it at the security checkpoint" as a backup plan.
-
Some airlines say "empty bottle is fine," some say "valve wide open," and others are even more specific, such as requiring the regulator valve to be in the open position.
-
As long as there are 2 or more carriers in an itinerary, you cannot only look at the first company's rules; subsequent carriers may have stricter wording. This judgment can be seen from the differences in various official pages.
-
Being required to open your bag for a secondary inspection during transit is often not due to size, but because the cylinder status isn't clear at a glance. Both FAA and TSA text revolves around "inspection."
Looking at airline-level wording, the differences are larger than many think. Lufthansa’s page lists diving/snorkeling equipment separately, stating checked baggage: yes, carry-on baggage: no, with a rule that compressed air cylinders must be empty and the valve must be open. Qantas' explanation is also straightforward: compressed air or gas cylinders will only be accepted if empty and the regulator tap is open.
Royal Brunei's page is even more detailed, stating that diving equipment and knives must be in checked baggage, and compressed air cylinders are only accepted when empty and the valve is completely open. Air Canada writes "Scuba tanks can be accepted as checked baggage provided that you can show that the cylinder is empty."
These differences translate into several practical matters for a user's itinerary:
-
When on a non-stop flight, preparing according to the carrier's page usually saves the most time.
-
Connecting or codeshare itineraries are more likely to encounter situations where the first leg accepts the item but the second requires re-inspection, because the phrasing from Lufthansa, Qantas, Royal Brunei, and Air Canada is inconsistent. This is a travel judgment based on official page differences.
-
Regarding carry-on baggage, don't guess based on the "bottle being very small." Lufthansa already lists scuba cylinders as carry-on no, and Royal Brunei also classifies the entire set of diving gear as checked baggage.
-
Explaining the use at the counter often doesn't help much; airlines look at the packaging state and the rules on the page, not how you describe it as a "mini tank or handheld tank." FAA pages also don't categorize rules from small to large volumes.
-
Having the valve open and making the status clear at a glance is more useful than bringing a bunch of verbal explanations. This judgment comes from FAA inspection requirements and TSA’s "no valve removal" rule.
Passing security and boarding doesn't mean your destination will necessarily fill your cylinder. DAN states that once a scuba cylinder enters its usage phase, it usually requires an annual visual inspection and a hydrostatic test every five years; filling stations and manufacturers may require these inspection records and may refuse to fill if they are overdue. DAN also mentions that cylinders of certain materials have additional re-inspection requirements. For travelers, this creates a common situation: the bottle can get on the plane, but that doesn't guarantee you can successfully fill it locally upon arrival.
This adds several preparations for "bringing your own bottle across borders," beyond just emptying the air:
-
Check the inspection markings on the shoulder or body of the bottle to confirm the last hydrostatic test has not exceeded 5 years.
-
Don't ignore visual inspection stickers or records; DAN specifies an annual visual inspection.
-
If the itinerary includes 2 or more transfers, opening and reading every carrier's page is safer than just asking a customer service rep once; different companies have different wording for valve positions and check-in requirements.
-
For those planning to fill at a shop, ask the destination dive shop before departing if they accept external small cylinders and if they check VIP / hydro status. DAN explicitly states "filling stations may require recertification before filling."
-
If traveling for only 2–4 days with few dives, renting standard cylinders locally is sometimes simpler than bringing a small bottle across borders; this judgment can also be seen in DAN's travel and maintenance advice, as cylinders themselves require independent maintenance and inspection.
So for the flight and transit phase, what really needs to be handled first is not "handheld vs mini tank—which is smaller," but the empty bottle state, valve state, check-in rules, connecting carrier differences, and whether you can refill upon arrival.
Refilling Methods
There are 3 common refilling methods for handheld scuba bottles and mini scuba tanks: decanting from a standard scuba cylinder, connecting to a high-pressure breathing air compressor, or using a high-pressure hand pump. Taking a 200 bar / 3000 psi small cylinder as an example, a portable compressor takes about 15 minutes to fill a 0.5L bottle, while a hand pump usually takes 20–30 minutes; connecting to a large cylinder is faster, but if the donor bottle itself is below 3000 psi, the small bottle can often only be filled to near the equilibrium pressure, not necessarily to full pressure.
Refilling Methods
When buying a handheld scuba bottle or mini scuba tank, don't rush to look at "how many minutes it lasts." Materials from both Spare Air and SMACO clearly outline the refilling routes, with 4 common paths: decanting from a standard scuba tank, filling at a local dive shop, using a portable high-pressure compressor, or using a high-pressure hand pump. Their difference is not in the name, but in whether you usually need to bring an adapter, find a shop, plug in, or use your own physical strength.
Putting these 4 methods into a single table will make it much faster to understand. The pressure, power supply, and time data in the table are sourced from the Spare Air manual, SMACO FAQ, and hand pump product pages.
| Refill Path | What you need to prepare | Common Pressure/Conditions | Typical Scenario |
|---|---|---|---|
| Trans-fill from standard scuba tank | Large tank + dedicated refill adapter | Best if the donor tank starts at 3000 psi; common target for small tanks is also 3000 psi / 200 bar | On a boat, at a dive site, or when a friend already has a large tank |
| Refill at local dive shop | Small tank + corresponding adapter + inform shop of working pressure | Shops usually follow breathing air systems, filling to approx. 3000 psi | Low-frequency use, don't want to buy a compressor |
| Use portable high-pressure compressor | Machine + filters + power source | 110–240V outlet or 12V car power; machine can reach 310 bar / 4500 psi | Road trips, docks, boat side, or near residence |
| Use high-pressure hand pump | Hand pump + quick connector + filter assembly | Hand pump can reach 3000 psi; ordinary bike pump only reaches 15–20 bar | Backup, emergency, 0.5L/0.7L small tanks |
Let's look at the first option. If you regularly have a standard scuba cylinder like an 80 cu ft / 3000 psi nearby, trans-filling is usually the easiest. The Spare Air manual specifies in detail: the donor tank should have 3000 psi when starting the transfer, the valve should be opened slowly, the filling process takes about 45–60 seconds, and if the donor tank pressure is insufficient, the small tank will not reach the recommended full value.
Next is the second option. Many people don't dive frequently throughout the year, so filling at a dive shop is more convenient. The Spare Air website states that Spare Air can be refilled to 3000 psi at a local dive shop using an air compressor refill adapter; the SMACO FAQ also notes that most dive shops can fill them, but you must inform the shop of the small tank's working pressure in advance and confirm the cylinder's inspection status. You don't have to manage the compressor or filters yourself, but you must bring the correct adapter.
Moving on, the third path is the portable high-pressure compressor. It's better suited for those who "don't want to look for a shop every time." The SMACO FAQ provides a complete set of figures: the HEAP 1 can connect to 110–240V outlets as well as a 12V car battery; maximum pressure is 310 bar / 4500 psi; filling a 0.5L to 200 bar / 3000 psi takes about 15 minutes, 1L takes about 30 minutes, and 2L takes about 50–60 minutes, potentially requiring 1–2 cooling pauses. After the machine runs for 20–30 minutes, it is recommended to cool down for about 10 minutes.
If you usually refill during road trips, at the stern of a boat, in seaside parking areas, or in an Airbnb yard, a portable compressor is much more convenient than a hand pump. SMACO also mentions the machine runs at about 70 dB, close to a household vacuum cleaner; Spare Air’s Nomad III page states the machine weighs less than 20 pounds, comes with a travel bag, and can refill small tanks at home or on a boat.
The last option is the high-pressure hand pump. It turns refilling from "finding power" into "finding strength." The SMACO hand pump product page describes it as a 4-stage hand pump, claiming 25% less effort than a 3-stage pump, reaching 3000 psi, using an 8mm quick connector, and including an oil/water separator and double filtration; however, the page realistically states it is not recommended for refilling dive cylinders larger than 1L. The SMACO FAQ adds that it's best to cool for 3 minutes between pumping cycles.
Comparing a hand pump to a regular air pump makes the difference even more intuitive. The SMACO FAQ explicitly says a regular bike pump can only reach 15–20 bar, while the common target for a mini scuba tank refill is 200 bar; this isn't just a small gap, it's a difference of about 10x. Therefore, the idea of "buying a regular high-pressure pump to get by for a while" simply doesn't work for these products. You either trans-fill with a scuba tank, use a breathing-air compressor, or use a dedicated hand pump.
You can choose based on your typical travel style without overthinking it:
-
If you are always near a professional dive shop or club with 3000 psi large tanks available: look at a refill adapter first.
-
If you dive 2–4 times a month, mostly driving to the beach or lake: look at a 12V + 110–240V portable compressor first.
-
If you only use it a few times a year and the bottle is mostly 0.5L / 0.7L: a hand pump is acceptable; it will be much slower for 1L and above.
-
If you don't want to manage compressor cooling, filters, and electrical connections: going to a local dive shop will be easier.
Understanding the relationship between accessories will make reading product pages much easier:
-
For scuba tank trans-filling, a dedicated adapter is essential; without it, you can't refill even if the donor tank is right there.
-
For the dive shop, they will likely need to see your adapter and the small tank's rated pressure. The SMACO FAQ also reminds you to confirm the inspected status first.
-
For a portable compressor, besides the machine itself, you need to look at filters, power source, and cooling rhythm. HEAP 1 comes with an oil-water filter and 2 filter elements.
-
For a hand pump, look at the quick connector, separator, cooling intervals, and whether you can continuously pump to 200 bar.
What truly stalls many people isn't "which bottle to buy," but "how will I actually refill it after I buy it." The Spare Air website lists all 4 paths, and the SMACO FAQ uses almost the same classification. Put yourself in a daily scenario: are you refilling at home, by the car, at a shop, or trans-filling from a large tank on a boat; do you refill 1 time a month, 4 times, or just a few times a year.
Refilling Time
Breaking down "filling a tank" makes it easier to understand. The working pressure of a common small tank is 200 bar / 3000 psi. Based on free air volume estimates, 0.5L is approx. 100L, 1L is approx. 200L, and 2L is approx. 400L. As the capacity doubles, the volume of air entering the tank also doubles, so the refilling time will differ significantly; switching from 0.5L to 1L is usually a noticeable jump in daily experience.
The following set of numbers separates the three common refill paths. The times in the table are from manufacturer manuals or FAQs and are suitable for estimating daily usage rhythms.
| Method | Common Reference Value | What to watch for when reading the table |
|---|---|---|
| Fill station / High-pressure breathing air compressor | Takes 45–60 seconds to fill a small tank to approx. 3200 psi, which cools to approx. 3000 psi | This is the fill rhythm for the small tank itself, not the total time for a portable compressor to ramp up pressure from zero to full |
| Portable compressor refill 0.5L | Approx. 15 minutes to 200 bar / 3000 psi | When machine temperature is high, stop for heat dissipation |
| Portable compressor refill 1L | Approx. 30 minutes | Double the air volume compared to 0.5L |
| Portable compressor refill 2L | Approx. 50–60 minutes | Usually requires 1–2 cooling pauses |
| Hand pump refill 0.5L | Approx. 20–30 minutes; another FAQ suggests approx. 15 minutes | Time varies due to residual pressure, pump speed, and number of breaks |
| Large tank trans-fill | Commonly approaches equilibrium within a few minutes | Final gauge pressure is heavily influenced by donor tank starting pressure |
Many people are misled by gauge pressure. Spare Air states clearly: when connecting to a fill station, fill to 3200 psi first; it will return to approx. 3000 psi after cooling. The flow should be controlled at about 45–60 seconds; filling too fast causes heat, which leads to the "just filled, then dropped slightly after a while" situation. Luxfer provides more general values: a scuba cylinder fill rate should be 300–600 psig/min; 1000 psig/min and above is considered a fast fill. A drop in gauge pressure isn't necessarily a leak; often it's just the gas and cylinder cooling down.
Putting the large tank transfer path into a practical scenario makes the difference clearer:
-
Manuals require the donor tank to have 3000 psi when starting the transfer for the small tank to reach the recommended full value.
-
The valve isn't twisted to the bottom all at once, but opened "very slowly" until you can hear airflow.
-
Wait at least 2 minutes until the airflow sound mostly stops, then open the valve completely.
-
If the donor tank only has approx. 2500 psi left, the small tank will usually only approach that equilibrium pressure and won't stabilize at 3000 psi; this is determined by pressure equalization. This judgment aligns with Spare Air's requirement for the donor tank to start at 3000 psi.
-
Therefore, large tank trans-filling is more like "topping off" or "quickly recovering a portion," rather than filling a near-empty small tank to full pressure every time.
Looking at the portable compressor again, the timetable is easier to understand. The common reference values given by the SMACO FAQ are: 0.5L approx. 15 mins, 1L approx. 30 mins, 2L approx. 50–60 mins. The same page notes that after running for 20–30 minutes, cool down for about 10 minutes, or stop if it feels hot to the touch. This rhythm has little impact on 0.5L, but by 2L, cooling pauses will take up significant time. With 12V power at the car, dock, or stern, this path is much easier than a hand pump; without power, it is not an option.
Many buyers feel the gap between a compressor and a hand pump isn't huge for 0.5L, but that feeling changes with 1L. The reason is simple: the target is still 200 bar, but the air volume goes from 100L to 200L—the total amount the machine must compress doubles. If there's a 10 minute cooling break in between, the total wait becomes more noticeable. The free air volume for 2L reaches 400L, which is why manufacturers include 50–60 minutes and 1–2 pauses in the FAQ.
Hand pumps seem to save on equipment, but the physical effort is most easily underestimated. The SMACO high-pressure hand pump page mentions a 4-stage structure, target pressure of 3000 psi / 200 bar, an 8mm quick-connect, and an oil-water separator. The same brand's FAQ mentions filling a 0.5L to 200 bar takes approx. 15 minutes; the product page suggests 20–30 minutes. The two sets of numbers aren't contradictory, as starting residual pressure, pump speed, number of pauses, and ambient temperature all stretch the total duration. For a first-time hand pump user, the truly difficult part isn't the first half, but the second. As the tank pressure moves from 150 bar toward 200 bar, the resistance of each downstroke becomes heavier and the rhythm slows down.
Placing the hand pump in daily use makes the choice easier:
-
0.5L low-frequency use is acceptable with a hand pump; even at 20–30 minutes, it's doable.
-
For 1L and above, if you refill frequently, the time and effort will be magnified because the target air volume has reached 200L or even 400L.
-
For the same 0.5L, if there's residual pressure in the small tank, the hand pump time will be shorter; if it's near empty, the time will be closer to the high value on the page. This explains the discrepancy between 15 minutes and 20–30 minutes.
-
Hand pump refilling depends more on your rhythm; fast pumping or fewer stops will raise the tank and pump temperature. Wait for it to cool down before checking the gauge for a value closer to reality. Spare Air's explanation of heat from fast charging and pressure drop after cooling applies to readings here as well.
Another common situation: as soon as the gauge hits the green zone, people think it's "full." The Spare Air manual defines full pressure specifically: a gauge reading of approx. 3000 psi after cooling. This means that reading 3100–3200 psi in the first few minutes after stopping the machine, pump, or disconnecting the adapter doesn't mean it will stay there. If the fill exceeds the 3200 psi upper limit mentioned in the manual, the safety burst disc risks blowing; the replacement part spec is 3300 psi.
Remembering this final set of numbers will make reading parameters much faster:
-
When you see 45–60 seconds, think of the fill station rhythm for the small tank body.
-
When you see 15 / 30 / 50–60 minutes, think of the common time for a portable compressor to fill 0.5L / 1L / 2L.
-
When you see 20–30 minutes, think of the common range for a hand pump to fill 0.5L; not all capacities follow this.
-
When you see 3200 psi → 3000 psi, think of cooling drop after a hot fill.
-
When you see 300–600 psig/min, think of a more stable fill rate; 1000 psig/min and above is too fast.
Looking at it in this order ensures that refill time, full pressure, and physical exertion don't get mixed up: what you see is not just a "full" number, but the result of capacity, temperature rise, refill path, residual pressure, and cooling pauses combined.
Air Quality
When refilling, look at the gauge pressure, but also look at the composition of the air being sucked in. NOAA lists several baselines for breathing air: Oxygen content 20–22%, Carbon Dioxide no higher than 1000 ppm, Carbon Monoxide no higher than 10 ppm, condensed hydrocarbons no higher than 25 ppm, oil mist and particulates no higher than 5 mg/m³, and no abnormal odors. In cold environments, also check the dew point, which should be no higher than -50°F, or at least 10°F lower than the lowest ambient temperature.
Many buyers use "can it reach 200 bar / 3000 psi" as the only checklist item. Sufficient pressure does not equal qualified air. NOAA also notes that if the remote air source isn't a system you control, you should verify if it meets breathing air standards; if CGA Grade E cannot be confirmed, you must continue verifying the source. For handheld dive bottles and mini scuba tanks, this step cannot be skipped because you are breathing all the air in the tank, not just the first few breaths.
When checking parameters, focus on these items first:
-
Oxygen in the 20–22% range indicates it's ordinary breathing air, not a random mixed gas.
-
The Carbon Monoxide limit is 10 ppm, much stricter than many think; CO has no obvious odor, so relying on smell is useless.
-
The Carbon Dioxide limit is 1000 ppm; higher is not "more normal." If it's high before being compressed, it won't get better inside the tank.
-
The limit for oil mist and particulates is 5 mg/m³; for mixed gas systems with higher oxygen exposure, NOAA's requirement tightens to 0.1 mg/m³.
-
For refilling in cold waters or low-temperature shores, the dew point requirement of -50°F is to reduce icing and equipment failure, not just for show in the manual.
In air quality, water vapor is often more easily ignored than odor. The UK HSE has publicly warned that if water gets into cylinders holding compressed air or nitrox, internal corrosion can occur over 100 times faster than normal; if fresh water enters, more than 2 mm of wall thickness can be lost within 6 months, and over 5 mm under saltwater conditions. Scuba cylinder wall thickness is typically only 2–5 mm. In other words, water entry isn't something to "wait until the next annual inspection," because the scale of loss already spans the entire wall thickness range.
Luxfer’s cylinder inspection guide is also firm: if water, oil, debris, odors, or other contaminants are found inside, the cylinder cannot return to service with the contaminants; it must be cleaned and re-inspected first. It also reminds that if there is water in a bottle placed horizontally, line corrosion is more likely to develop along the waterline; improper contact between aluminum cylinders and brass valves or stainless steel fittings can also lead to galvanic corrosion.
When looking at the actual refilling process, these steps are more practical:
-
Don't leave empty bottles with the valves open for long periods; outside moisture will enter the bottle.
-
Before connecting the fill hose, briefly open the cylinder valve and supply valve to blow away moisture from the valve orifice and lines.
-
Don't empty the bottle completely underwater; the HSE explicitly says this makes it easy for water to backflow into it.
-
For small tanks that have already been emptied underwater, do not use a main tank for pressure equalization transfer; the HSE warns that moisture could reverse into the "filling tank" during equalization.
-
Just checking the cylinder inspection date isn't enough. The HSE also notes that even if still within the 2.5 year inspection cycle, once water has entered, the safety status cannot be assumed to be "qualified and in-date."
Looking at the compressor side, BAUER documentation clarifies the source: purification systems are responsible for blocking water and oil; for fuel-powered compressors, catalyst filters must be used to handle the CO rise from accidental exhaust inhalation. It also mentions that online monitoring systems can continuously measure CO, CO₂, O₂, with some models also measuring absolute humidity and total oil, triggering an alarm and shutdown if limits are exceeded to prevent unqualified air from entering the tank.
This explains a common misconception: a portable compressor stating "4500 psi" or "300 bar" only represents its compression capability, not that the breathing air is qualified. Whether it can be used to refill dive cylinders depends on whether there is a breathing air purification chain, filter life management, and gas testing. BAUER public data gives a specific example: the life of a certain purification filter under rated conditions is about 44 hours, and another is 37 hours. If not changed when time is up, the subsequent air cannot be viewed as being in the same state.
When checking equipment and records, focus on the following:
-
How far the compressor intake is from car exhaust, boat engine exhaust, or generator exhaust; CO often comes in through the intake.
-
Whether there are replacement records for filters, and whether accumulated hours are 10 hours, 20 hours, or approaching 37–44 hours. Values vary by system, but "continuing to use when near end-of-life" is common.
-
Whether gas testing has been done. BAUER PureAir documentation mentions certified sites are reviewed at least every 12 months, with Gold level sites continuously monitored during operation.
-
If the air comes from your own compressor, the HSE FAQ suggests breathing air quality be tested by a qualified person at least every 3 months; if predictable contamination exists, the frequency should be increased.
-
When you see the term "oil-water separator," don't assume everything is done. It can only handle part of the issues in the chain; CO, CO₂, intake position, filter life, and testing records must still be checked individually.
If you are refilling a handheld bottle or mini scuba tank yourself, the on-site judgment can be simple: first confirm the air source is labeled as breathing air standard, then check the date of the most recent air test, then check filter hours, and finally check if the bottle has any history of water entry. If any of these are unclear, it's better to stay at 0 psi than to compress a bottle of air from a vague source to 200 bar before diving.
اترك تعليقًا
تخضع جميع التعليقات للإشراف قبل نشرها.
This site is protected by hCaptcha and the hCaptcha Privacy Policy and Terms of Service apply.